- Home
- Free Quilt Block Patterns
- Fancy Foot Quilt Block
Fancy Foot Quilt Block: Your New Sole-mate in Quilting
Sew much fun, you'll be head over heels! 💞🙃
This post contains affiliate links, for which I receive compensation.
Step right up and get ready to experience a quilting-feet of wonder with the Fancy Foot quilt block.
This beginner-friendly tutorial is fully illustrated, simple to understand and includes cutting instructions in four sizes. Paper piecing patterns, a fabric planning page, and a cutting chart are available to download, too, to help you get off on the right foot.
Don't get cold feet as you try out this intriguing design. Toe-tally nail it with each stitch and fall in love with its unique charm.
Once the stitching's done, admire your finished block—a sweet feet-ure toe be proud of, for sure! ;)
🧭 Ready to dip your toes into the Fancy Foot quilt block? 🔍
We've got you covered from heel to toe! Use these handy links to waltz through our tutorial with ease.
- No time to quilt? Pin this for later.
It's time to cut up and sew!
General Instructions
Several abbreviations are used on this page. They are:
- SA - seam allowance
- RST - right sides together
- HST - half square triangles
- HRT - half rectangle triangles
1/4" SA are used through this tutorial.
Pressing instructions are highlighted in yellow throughout this tutorial to make them easy to spot.
As with all paper piecing, the seams within a unit are always pressed toward the last patch added.
Download and print the paper piecing pattern
You'll need the most current version of Adobe installed on your computer to download the pattern.
On the Adobe Print Menu page, under 'Page Size and Handling' set 'Custom Scale' to 100% before printing for accurate results. Click here to see what it looks like on the Print Menu page.
Choose your finished block size from the chart below and print the corresponding number of pages for a total of 4 units.
Print the Patterns for | |
|---|---|
| Finished Block Size | # of copies to print |
| 4" | 1 |
| 6" | 1 |
| 8" | 2 |
| 12" | 4 |
After printing, use the 1" square graphic on the printed page(s) to double check that your patterns printed at the correct size.

Not sure which paper to use?
Take a look at my review of several of the most popular brands available to us quilters on the market.
You want a super-easy paper to tear away—less stress on the stitches.
The newest quilt fabrics to tickle your fancy...
Click the images below to see the full collection. We share any commercial and/or free patterns that showcase them, too. (For inspiration, of course!)
✂️ Cutting patches for a Fancy Foot block
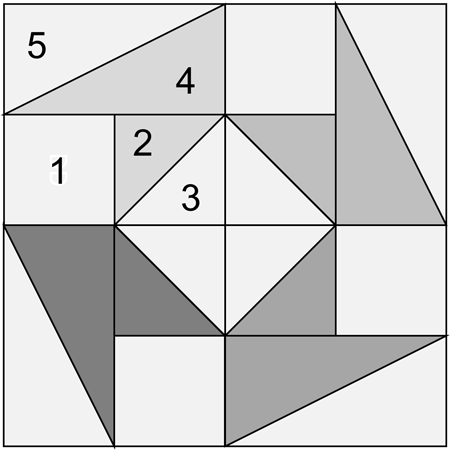
Sample Block Size: 8" finished / 8½" unfinished
Grid: 4x4
Design Type: 4-patch | Pinwheel
Please label your patches. We use their numbers throughout this tutorial.
The fabrics in the sample are all from Alison Glass' collection called 'Sun Print Luminance'. Her lines never disappoint and are always such bright and happy colors.
 | Cutting Chart for a~ Paper PLUS Traditional Piecing ~ | ||||||
|---|---|---|---|---|---|---|---|
| Patch | Fabric | Qty | Finished Block Size | Sub Cut | |||
| 4'' | 6 '' | 8'' | 12" | ||||
| 1 | Background | 4 | 1¾'' x 1¾'' | 2¼'' x 2¼'' | 2¾'' x 2¾'' | 3¾" x 3¾" | --- |
| 2 | A, B, C, D | 1 ea | 2¼'' x 2¼'' | 2¾'' x 2¾'' | 3¼'' x 3¼'' | 4¼" x 4¼" | yes |
| 3 | Background | 2 | 2¼'' x 2¼'' | 2¾'' x 2¾'' | 3¼'' x 3¼'' | 4¼" x 4¼" | yes |
| 4 | A, B, C, D | 1 ea | 3'' x 2¾'' | 4'' x 3¼'' | 5'' x 3¾'' | 7'' x 4¾" | yes |
| 5 | Background | 2 | 3'' x 2¾'' | 4'' x 3¼'' | 5'' x 3¾'' | 7'' x 4¾" | yes |
| Unfinished Block Size | 4½'' | 6½'' | 8½'' | 12½" | --- | ||
| Grid Size | 1'' | 1½'' | 2'' | 3" | --- | ||
Subcutting #4 and #5 patches for HRT units and #2s for the HST
Layer all the #4 and #5 rectangles WRONG SIDE UP on your cutting mat—I prefer to cut 4 at a time—shorter sides at the top and bottom.
With a pencil, make a mark 5/8" in from the top right and 5/8" from the bottom left sides.
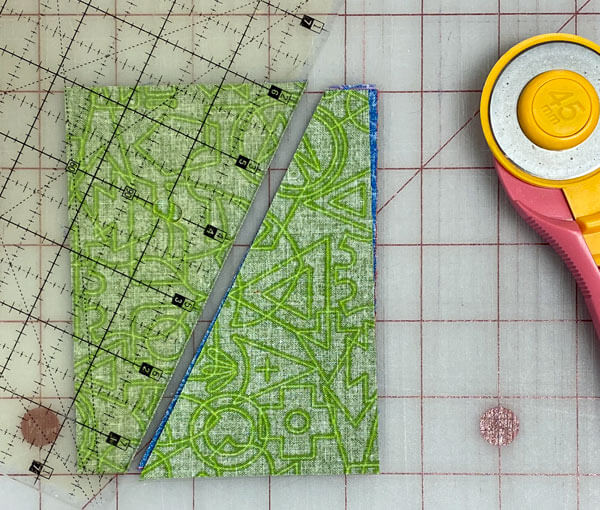 All the #4s stacked right side facing down
Align your ruler with the top and bottom short edges of the pile of upside-down rectangles at the pencil marks. Cut in half.
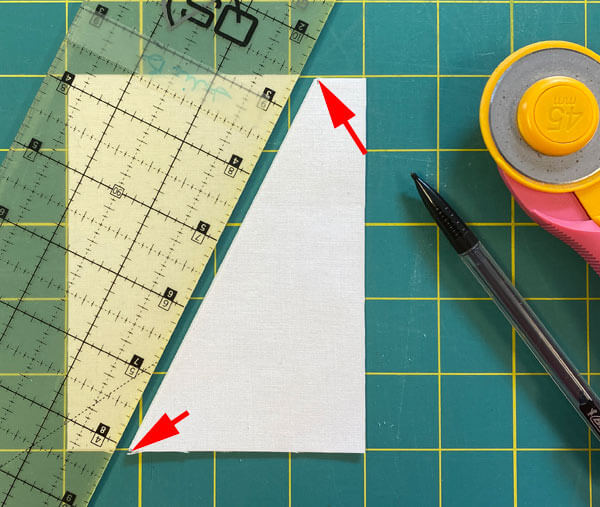 All the #5s, right side facing down
Cut each #2 patch in half diagonally to form two right triangles.
You'll have some leftover patches. They look like this.
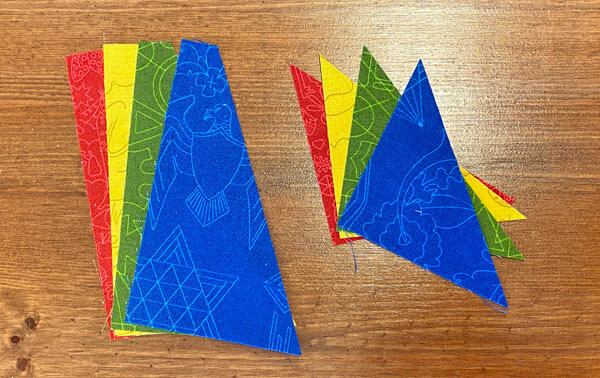 Leftover #4s and #2s
🪡 Assemble the units for a Fancy Foot block
Fancy Foot Unit
Make 4 - One 'foot' of each color
 Fancy Foot unit
Use a dot of Elmer's Washable Glue Stick to hold the #1 patch in place on the unprinted side of the pattern.
Use the dashed placement lines for quick and accurate positioning. #1 should stick out past the outside edges of the unit by roughly 1/4".
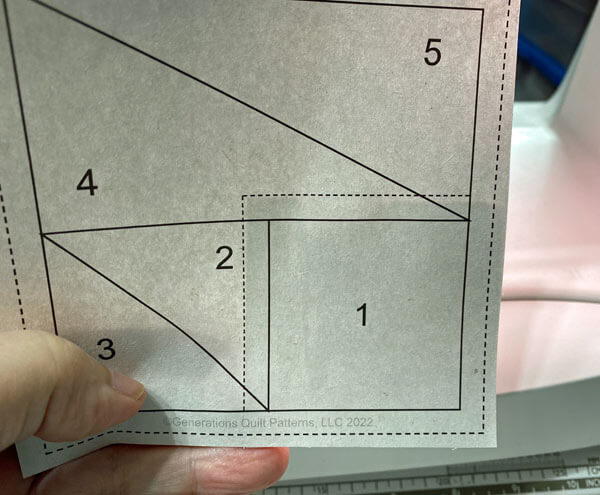
With RST, layer the long bias edge of #2 with the side #1. Keep the long straight edges even on the left side to avoid having to trim the seam allowances.
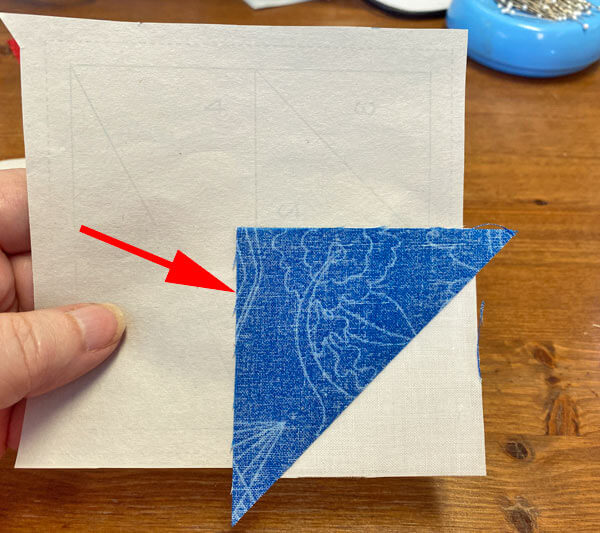 Keep the edges of your patches even on the side with the red arrow. This will save you a trimming step later on. :)
Sew on the solid line between #1 and #2 starting from outside the dashed line around the block and ending a stitch or two past the dashed placement guide.
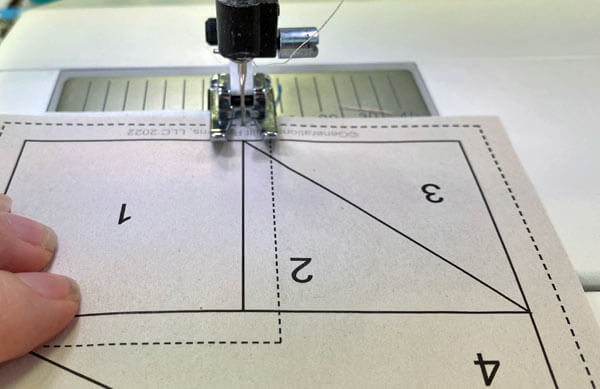
Press.
To create the perfect seam allowance, at your cutting mat, fold the paper pattern back on itself on the solid line between #2 and #3.
Lay the 1/4" line of your ruler on the fold and trim away the excess.
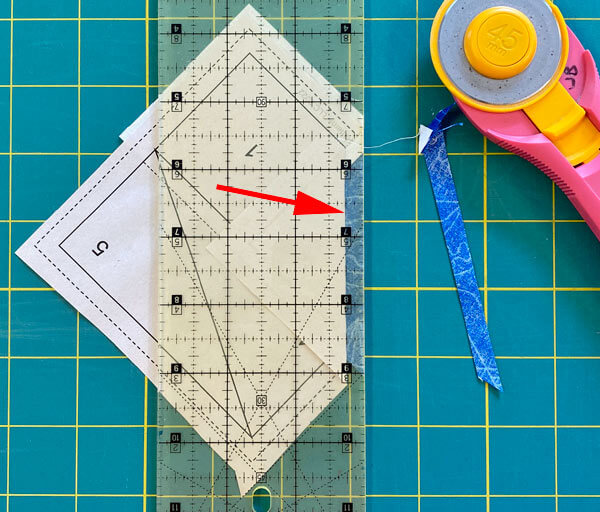
With RST, match the long bias edge of #3 with #2.
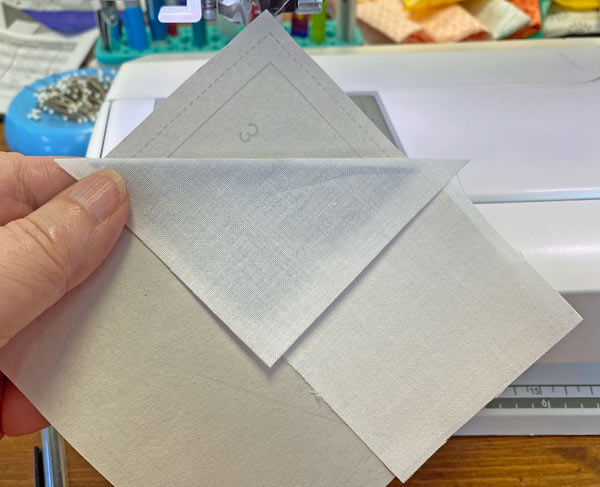 To prevent the darker fabric from shadowing through the lighter #3, I've nudged #3 a thread or two past the edge of the darker #2. You can just make it out in this photo.
Sew on the line between #2 and #3 just as before beginning and ending a good 1/4" past the solid line.
Press.
If you did a good job keeping the edges of the #1 and #2 patches even, you'll have the perfect placement line for #4.
If they're wonky and not straight, then trim the seam allowance here just like we did between #2 and #3. This time you'll fold the pattern back on itself along the line between #1/#2/#3 and #4.
You'll have to pull the pattern away from the stitches to be able to fold it. Occasionally, it rips a bit. That's normal. If the tear is really bad (and you accidentally mangle the pattern) use a piece of Magic Tape® to repair the printed side.
Next, with RST, match the long straight non-bias edge of a #4 with the edge of #1/#2/#3.
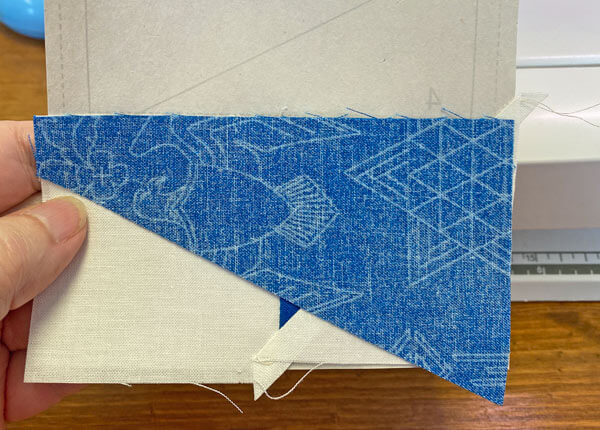
Sew the seam beginning and ending outside the dashes that surround the unit.
Press.
Finally, match the long bias edges of #4 and #5.
If your background fabric is much lighter than your A, B, C, or D fabrics, nudge the #4 a couple of threads past the edge of #4.
This prevents the darker fabric from shadowing through the lighter one.
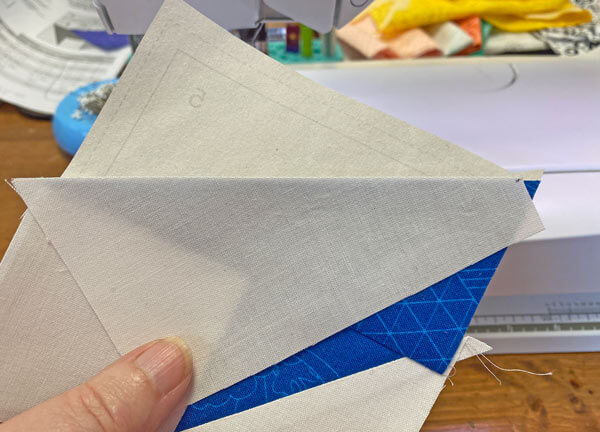
Sew this seam like the last one.
Press.
The paper piecing is complete. From this point forward, return your stitch length to the one you regularly use for piecing and install your favorite 1/4" presser foot.
All that's left is to trim these units to the perfect size.
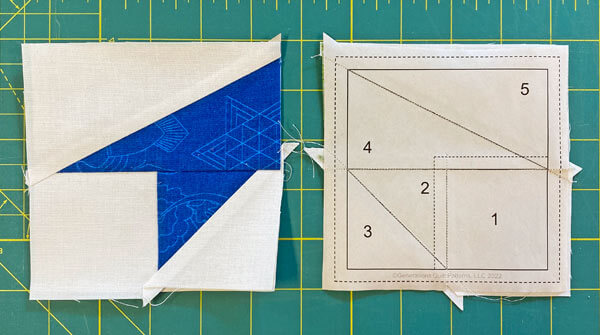 A finished Fancy Foot unit from the front (left) and back (right)
At your cutting mat, printed side up, line up the 1/4" line of your ruler with one side of the solid square.
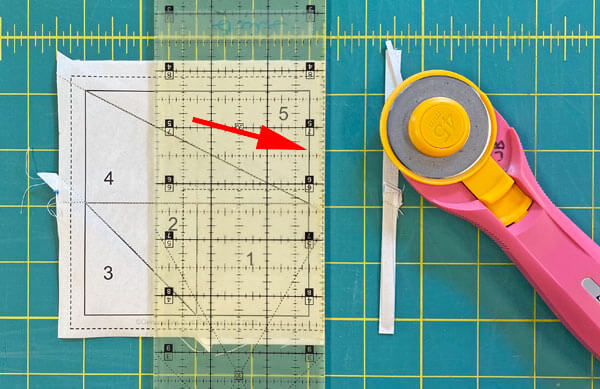
Repeat for all sides of all four units.
We've cut all the patches so that the straight of grain is on the outside edges so that we can remove all the paper from the units now.

Give your units a final pressing. Take a look at my favorite (super simple) technique for getting amazingly flat blocks and units.
🧩 Assemble the Fancy Foot quilt block
Arrange your trimmed and nicely pressed patches with the #5 backgrounds are in the four corners. The #1 HSTs are in the center.
It seems like such a simple step.
But if you've ever grabbed a pair of units, sewn them together chop-chop and then opened them only to find you've stitched them upside down, this few seconds of planning is well worth the time.
Ripping out stitches sucks.
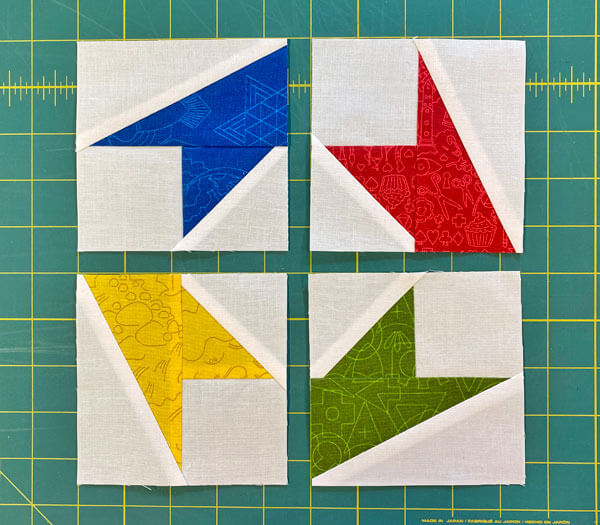
After stitching the pairs in each row together, press the seams open to distribute the bulk.
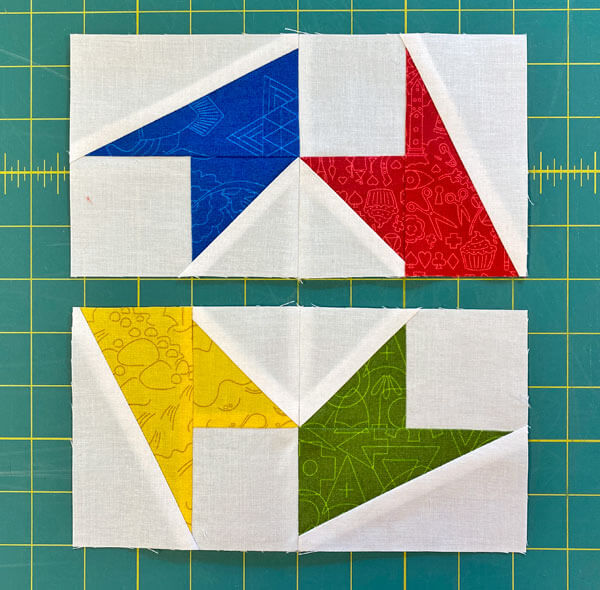
The seams at the points and corners of the block are designed to nest. (I had to redo the numbering on the paper piecing pattern after making the first sample). It helps to pin all the places you want to match.
The IBC Super Fine pins are my favorite for this job.
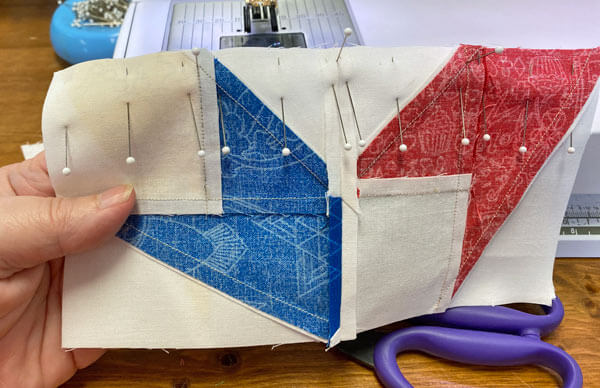
Press this last seam open, too.
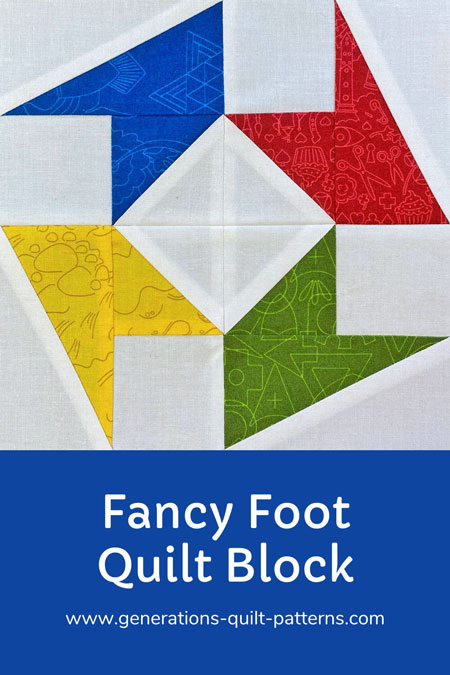
Our cute little Fancy Foot quilt block is complete. It's such a happy little thing, isn't it!

Our Fancy Foot from the backside.
See how pressing open the four seams that join the blocks reduces the bulk? It'll be much easier to quilt—fewer lumps to stitch over.
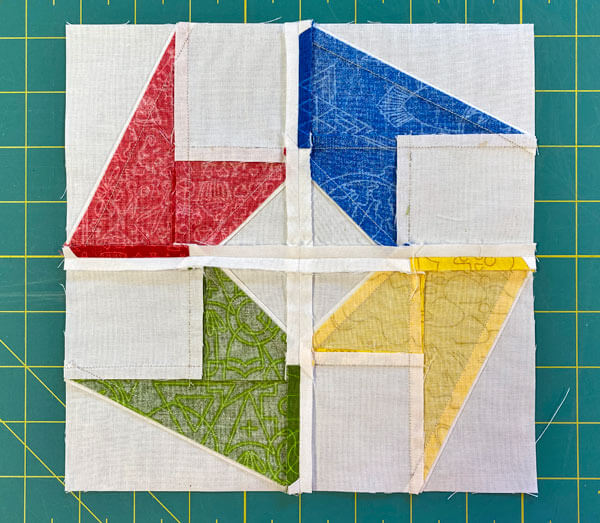
Did you notice where the edges of the lighter #3s and #5s were nudged past the edges of the darker #2s and #4s.
It's such a small and simple thing to do, but can save a lot of heartache from fabrics shadowing unexpectedly through your quilt top.
📌Toe-tally awesome tutorial alert! 🦶
Pin now, quilt later. Your future self will thank you! 🦶🙏
For even MORE blocks to make... 🧩🎨

...visit our Free Quilt Block Pattern Library, with over 230+ blocks to choose from in multiple sizes.
Free downloads are included in all sizes for any blocks require paper piecing patterns or templates.
- Home
- Free Quilt Block Patterns
- Fancy Foot Quilt Block
