- Home
- Free Quilt Block Patterns
- Eight Pointed Star Quilt Block
🧵
Stitch Your Way to Stardom: Eight Pointed Star Quilt Block Tutorial
Turning squares and triangles into starry wonders
This post contains affiliate links, for which I receive compensation.
🌟 Twinkle, twinkle, little star… wait, is that a Peaky and a Spike I see?
Welcome to our Eight Pointed Star quilt block tutorial, where we're jazzing up the classic Triangle in a Square! 🎭
Did you know this dynamic little unit got its quirky name from the late, great Doreen Speckmann? With a wink and a stitch, she turned geometry into fun! 😄
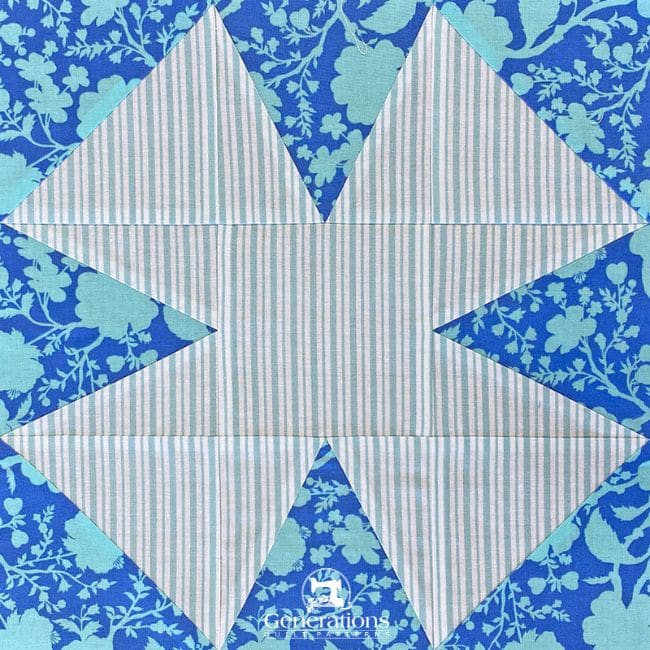
We've got all the cosmic ingredients you need, including some stripe-taming tips that'll make your directional prints behave.✨
🧭Quick Navigation🔍
🔭 Scope out the quilting constellations! These starry links will guide you to each part of this tutorial:
Cut. Sew. Press. Transform cloth into cosmic creativity!
📋
General Instructions
Several abbreviations are used on this page. They are:
- SA - seam allowance
- RST - right sides together
- HST - Half Square Triangle
- TiaS - Triangle in a Square
A 1/4" SA is used in this tutorial.
Highlighted in yellow, pressing instructions are easy to spot.
To press, first press the patches in the closed position as they came off your sewing machine. This sets the seam, melding the fibers of the threads into the fibers of the fabric.
Then press the SA to the dark unless otherwise noted.
Download and print the paper piecing pattern
To download the pattern, use the most current version of Adobe.
For accurate results, on Adobe's Print Menu page, under 'Page Size and Handling' set 'Custom Scale' to 100%. Then print.
Click here to see what it looks like on the Print Menu page.
Find your finished block size from the chart below. For each block you want to make, print the corresponding number of copies for a total of:
- Four TiaS
- Template to go with your Finished Block Size
Print the Triangle in a Square Units | |||
|---|---|---|---|
| Finished Block Size | # of copies to print | Link to PDF Download | Template |
| 1½" | 1 | 1½" | Print 1 |
| 2" | 2 | 2" | |
| 3" | 2 | 3" | |
| 4" | 2 | 4" | |
| 6" | 1 | 6" | Print 1 |
After printing, use the 1" square graphic on the printed page(s) to double check that your patterns printed at the correct size.
Then cut out the required number of patterns from your copies. A rough cut is good enough—an 1/8"-1/4"-ish away from the outside dashed square.

Not sure which paper to use?
Take a look at my review of several of the most popular brands available to us quilters on the market.
You want a super-easy paper to tear away—less stress on the stitches.
The newest quilt fabrics to tickle your fancy...
Click the images below to see the full collection. We share any commercial and/or free patterns that showcase them, too. (For inspiration, of course!)
✂️ Cutting patches for an Eight Pointed Star block
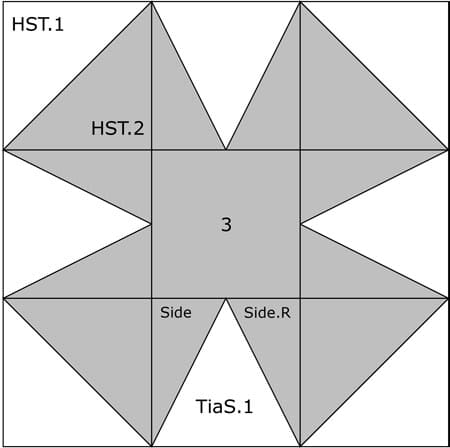 Eight Pointed Star quilt block design
Sample Block Size: 12" finished / 12½" unfinished
Grid: 6x6
Attribution: Maggie Malone #260
Design Type: Star | Equal 9 Patch | Paper piecing
I've chosen to reverse the lights and darks in my sample—remember that the value suggestions for quilt blocks are merely guidelines and not carved in stone. YOU are the boss when it comes to your quilts. To make it easier to swap lights and darks, I refer to the fabric choices as 'A' and 'B'.
A stripe is used in the sample block, so you'll see how to adapt a direction print to the block is you want the print's design to flow in the same direction.
Please label all your patches. We refer to these numbers throughout the tutorial. Keeping them organized helps you stay on track.
 | Cutting Chart for an~ Paper & Traditional Piecing ~ | |||||||
|---|---|---|---|---|---|---|---|---|
| Patch | Fabric | Qty | Finished Block Size | Sub Cut | ||||
| 4½'' | 6'' | 9'' | 12'' | 18'' | ||||
| TiaS.1 | A | 4 | 2½'' x 2¼'' | 3'' x 2¾'' | 4'' x 3¾'' | 5'' x 4¾'' | 7'' x 6¾'' | yes |
| Side, Side.R | B | 4 | 2⅝'' x 2¾'' | 2⅞'' x 3¼'' | 3⅜'' x 4¼'' | 3⅞'' x 5¼'' | 4⅞'' x 7¼'' | yes |
| HST.1 | A | 2 | 2¾'' x 2¾'' | 3¼'' x 3¼'' | 4¼'' x 4¼'' | 5¼'' x 5¼'' | 7¼'' x 7¼'' | --- |
| HST.2 | B | 2 | 2¾'' x 2¾'' | 3¼'' x 3¼'' | 4¼'' x 4¼'' | 5¼'' x 5¼'' | 7¼'' x 7¼'' | --- |
| 3 | B | 1 | 2'' x 2'' | 2½'' x 2½'' | 3½'' x 3½'' | 4½'' x 4½'' | 6½'' x 6½'' | --- |
| Unfinished Block Size | 5'' | 6½'' | 9½'' | 12½'' | 18½'' | na | ||
| Grid Size | 3/4'' | 1'' | 1½'' | 2'' | 3'' | na | ||
Subcutting
Cut out the paper template for your block's size on the lines.
Lay out the TiaS.1 rectangles on your cutting mat, the longest edges across the top and bottom. The template just fits. Use a rotary cutter and ruler to cut away the excess fabric.
NOTE: If you are using a directional print for the TiaS.1, cut two rectangles with the print running left to right and two running top to bottom.
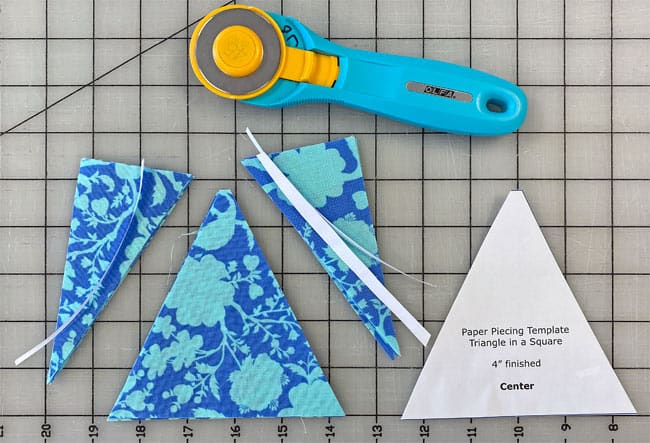
Helpful Tip
If you find the fabric slipping while cutting with the template, use a bit of Magic Tape® at the top and bottom to hold the template in position, then cut. Remove any tape bits from your cutting mat.
For the Side triangles, when we're using a directional print, if you want the stripes to run in one direction across the block, Cut one pair of Side/Side.R rectangles with the stripe running left to right and one pair running top to bottom.
⚠️ Layer these pairs right sides together to create the mirror image patches we need.
On both, make a mark 5/8" in from the top left and 5/8" in from the bottom right.
Line up your ruler with these marks and cut each pair in half.
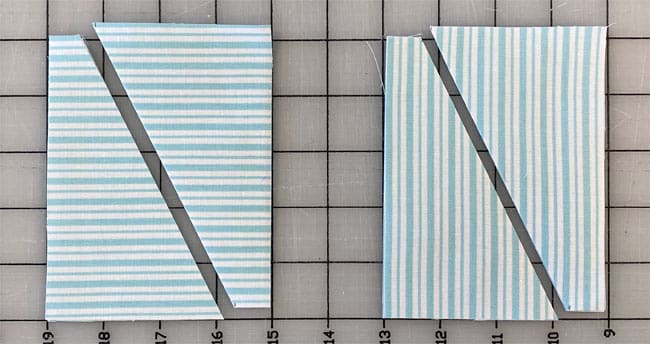
The subcutting's finished. On to the fun part!
🧵Stitch the units for our Eight Pointed Star
We'll get the paper piecing out of the way first. That way we're not switching our machine settings back and forth.
TiaS
Make 4
📢 Since first stitching this patchwork design, I updated the paper piecing pattern, adding 'Finished/Unfinished' sizes in the seam allowance and changing the name of the 'Center' to TiaS.1. Other than that, the pattern is the same.
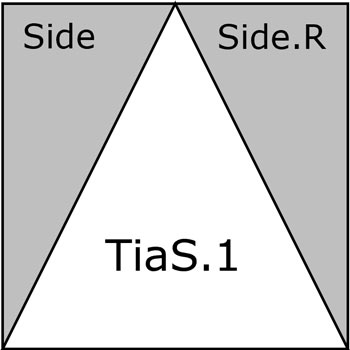
Using a dot of Elmer's Washable Glue Stick, position the TiaS.1, wrong side to the unprinted side of the pattern between the dashed guidelines.
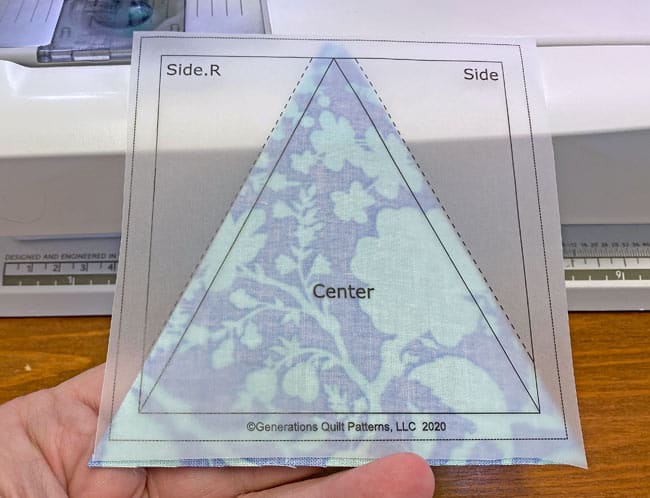 Your pattern has 'TiaS.1' instead of 'Center' for the big triangle.
We need to make a few adjustments to our sewing machine settings to paper piece.
- Reduce your stitch length to 16–20 stitches per inch (1.3-1.6 mm). This perforates the paper and stabilizes the seam when you remove the pattern. [Learn more about stitch length here.]
- Reduce your machine's speed or just plain slow down. Sew only as fast as you can AND stay on the solid stitching line.
- Install an open toe appliqué foot (sometimes called an 'embroidery' or 'satin stitch' foot) if you have one (it makes it easier to see where you're stitching).
- Use a larger needle (90/14) IF you have problems removing the pattern. Personally, I use an 80/12 Microtex Sharp for paper piecing without any issues.
With RST, position the long bias edge of the Side to one side of TiaS.1—the wide edge of the Side to the pointed end of the TiaS.
When you're using a directional print, take a second to flip open the Side patch to make sure the print is running in the direction you intend it to.
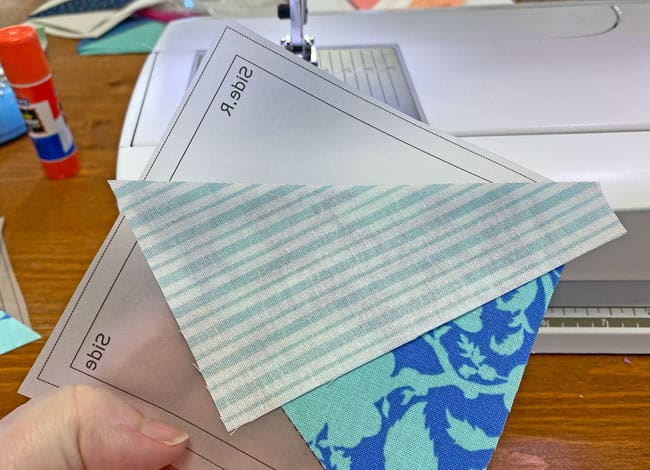
Sew the seam, starting and ending past the outside edges of the unit.
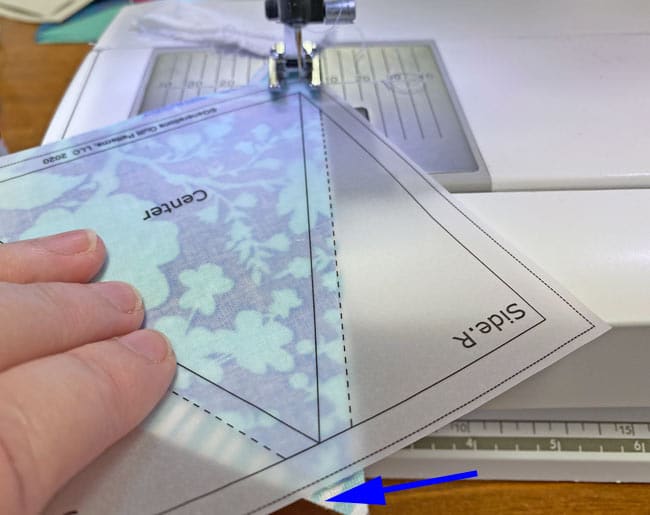
Press.
Repeat the process for the second Side triangle.
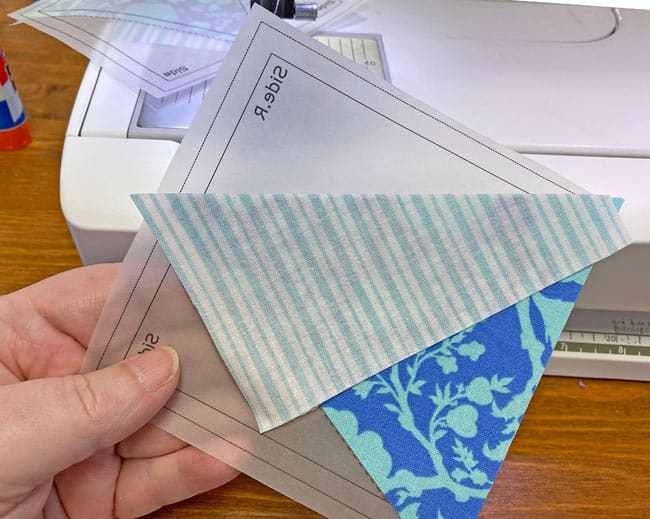
Press.
Repeat for all four TiaS.
At your cutting mat, paper side up, place the 1/4" line on your ruler directly over the solid line on one side of the square that surrounds the block. This gives a more consistently accurate trim than trying to match the edge of your ruler to the dashed outside lines.
Cut away the excess fabric with your rotary cutter.
Repeat for all four sides of each Triangle in a Square.
Remove the paper from your trimmed TiaS. The outside edges are on the straight grain. This is the same result you'd get using specialty rulers or templates.
Helpful Tip
You may find it easier, with less pulling on the stitches if you rip the pattern in the middle of a side instead of starting at one of the ends. This seems to put less stress on the bottom corners.
Return your sewing machine to your every day piecing settings and install your favorite 1/4" presser foot.
HST
Make 4
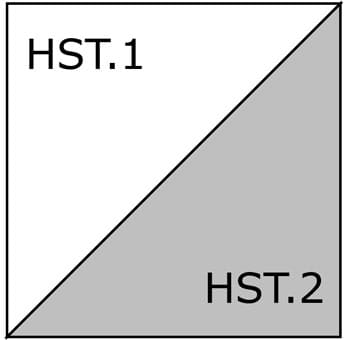
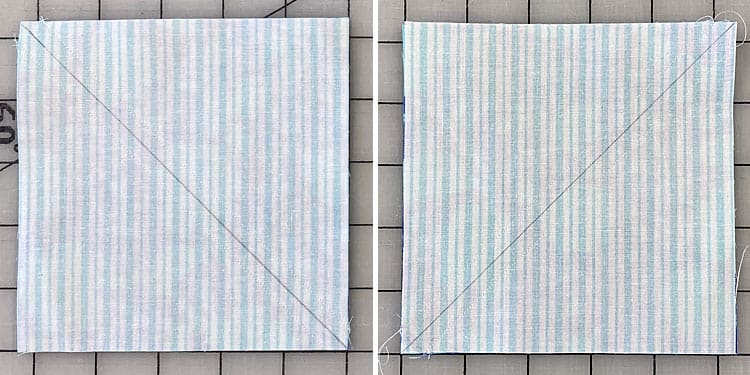
Draw a diagonal line on the backside of the two lighter HST.1 patches. A mechanical pencil is perfect for the job because its lead leaves a consistent mark.
So that the print runs in the same direction through the block, draw the diagonal in opposite directions, as shown in the picture below. This gives us HST with the stripe in the correct direction.
With RST, layer an HST.1 and HST.2 together, pinning to hold the edges even.
With your favorite 1/4" presser foot installed, stitch 1/4" away from both sides of the line. Repeat for the second pair.
Press the pairs flat.
Cut each in half along the draw line.
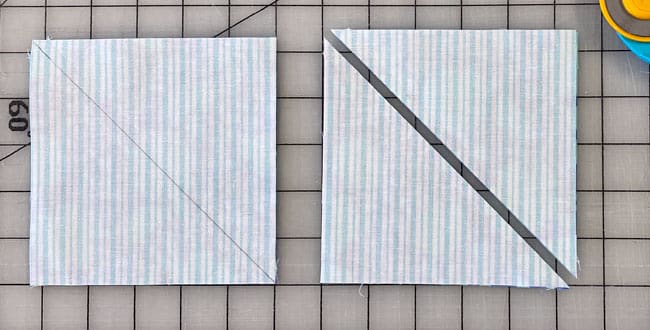 One pair of squares stitched 1/4" away from both sides of the line (left) and cut in half between the stitching (right)
Back to the ironing board and pressing the HSTs open with the SA towards the darker HST.2.
Use the chart below and trim your HSTs to the size that corresponds to your chosen block size.
HST Dimensions | |
|---|---|
| Finished Block Size | Trim HST to… |
| 4½'' | 2" x 2" |
| 6" | 2½" x 2½" |
| 9" | 3½" x 3½" |
| 12" | 4½" x 4½" |
| 18" | 6½" x 6½" |
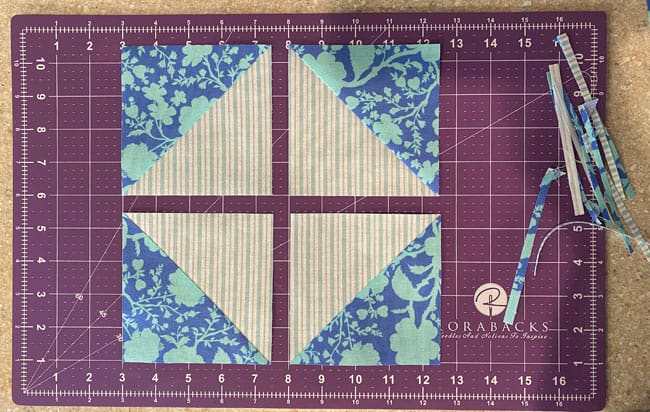
🌟 Time to Assemble Your Eight Pointed Star 🧵
Arrange your cut and stitched patches into this Eight Pointed Star design. All the edges of the 'B' fabrics are touching each other.
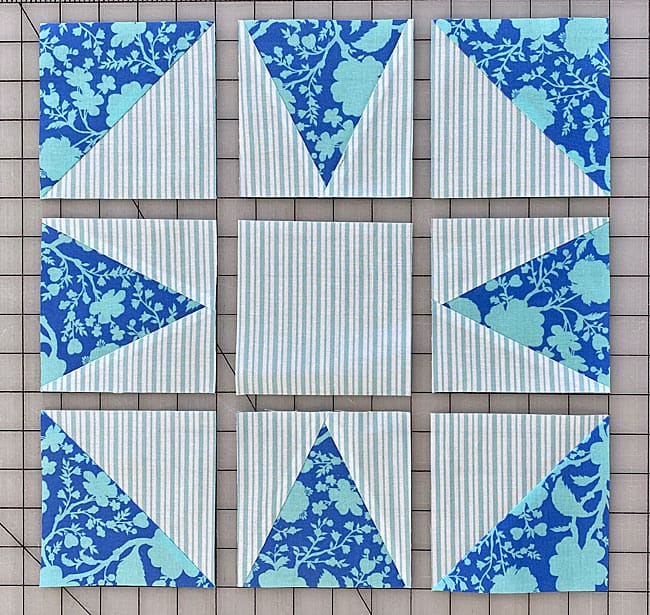
Sew the units in each row together. The angles of the seams for the TiaS and HSTs are different at the corners. If you've trimmed accurately, they'll go together effortlessly.
🔧 Tool Tip: Try IBC Glass Head Silk Pins for precision pinning.
Press these seams away from the TiaS in all the rows.
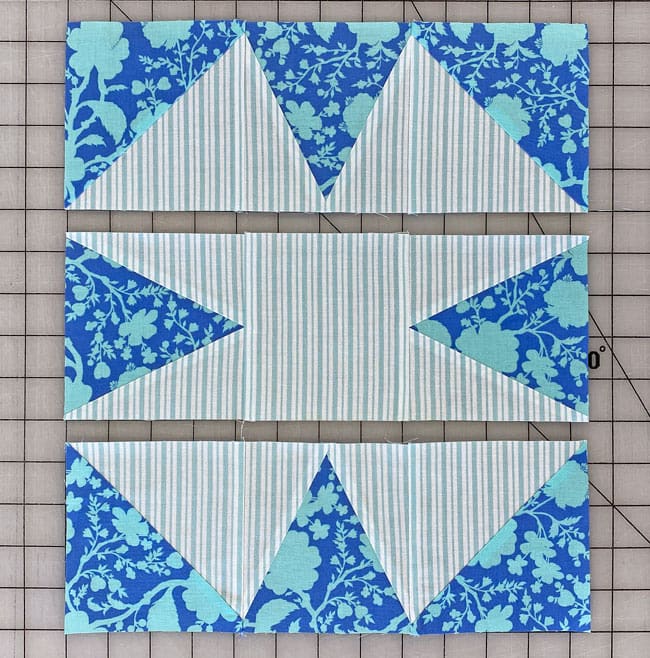
Now sew the rows together. Pin as needed to keep the match points from shifting.
These final seams are pressed away from the center.
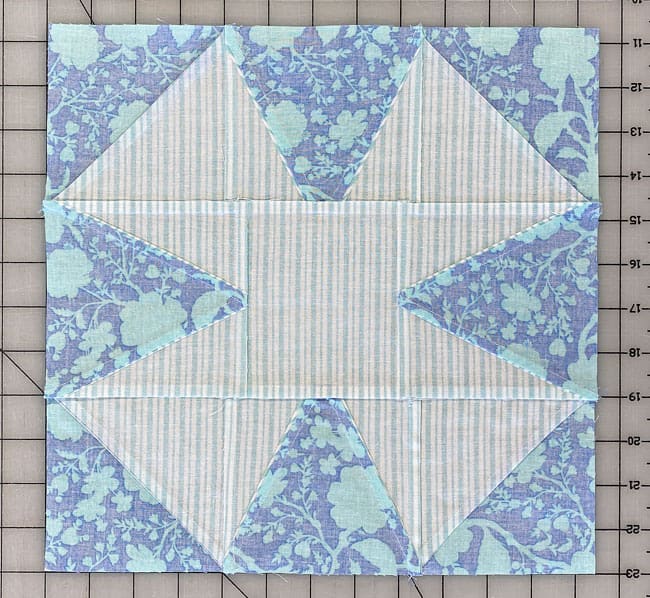
Let's take a closer look at our stellar creation!
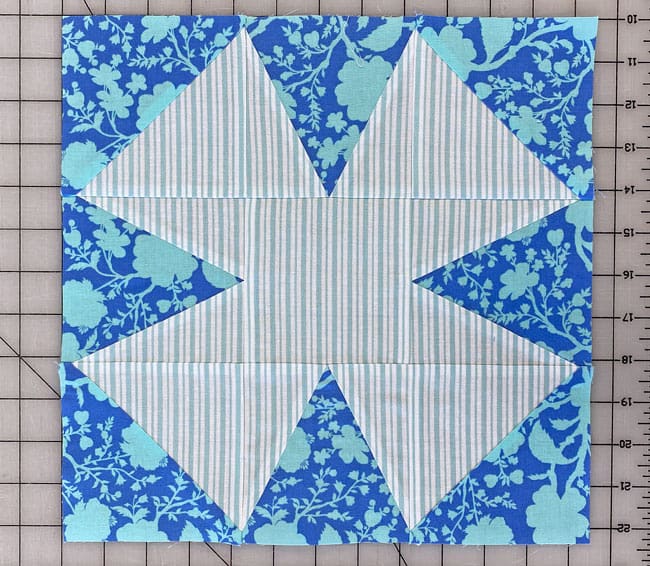
🎉 Congrats, Quilter! 🧑🚀 Your Eight Pointed Star quilt block is ready to shine! ✨
🚀 What stellar project will you launch it into next? 🌠
And remember, that in the quilting cosmos, YOU are the brightest star! 🌟💖
Until next time, may your seams be straight, and your bobbins be full! 🧵💫
🌟 A Galaxy of Eight Pointed Stars 🌠
Hold onto your cosmic quilting hats, Star Gazers! 🧑🚀 Just when you thought you had this constellation figured out, the quilting universe throws us a curveball. Turns out, our Eight Pointed Star isn't flying solo in the quilt cosmos!
Whether by celestial design or a wrinkle in the space-time continuum, quilt blocks often masquerade under multiple aliases. Our stellar friend here is no exception! (And don't even get us started on its cousin, the 'Eight Point Star' - no 'ed' needed for that space oddity!)
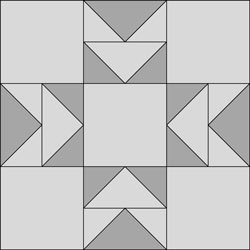
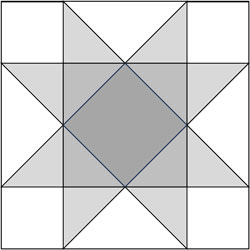
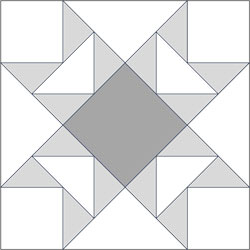
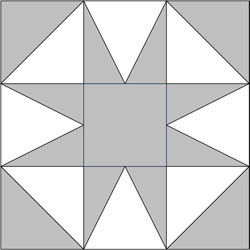
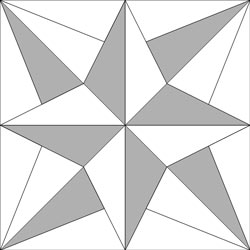
Here are six more cosmic creations, all answering to the name "Eight Pointed Star". It's like a galactic family reunion!

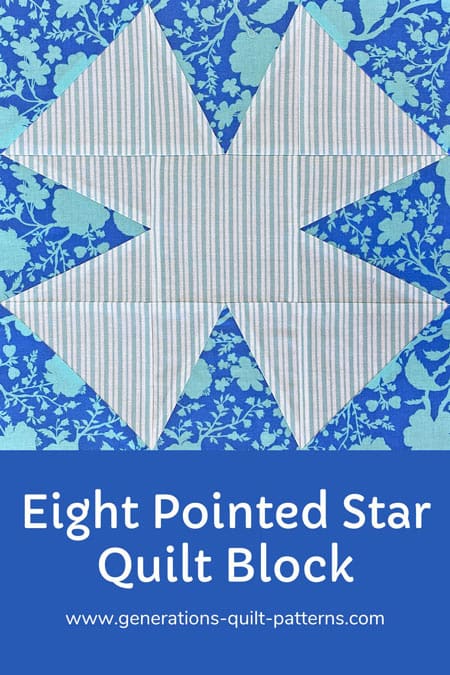
📌Star light, star bright, pin this tutorial for tonight! ✨
🌟 Your future self will thank you when it's time to quilt. 🧵🪡
🔭 Looking for something truly stellar?
You've finished your star quilt block, and you're ready for more!
Browse our collection of 60 stellar star quilt block patterns. All have instructions and cutting charts in multiple sizes. If templates or paper piecing is used in the tutorial, there's a free download for you of those materials.

Eeny. Meenie. Miney. Moe.
Which star quilt block will you sew?
For a star-studded quilting experience, choose from 100+ bedazzling star quilt patterns—for beginners and beyond—click here.
For even MORE blocks to make... 🧩🎨

...visit our Free Quilt Block Pattern Library, with over 230+ blocks to choose from in multiple sizes.
Free downloads are included in all sizes for any blocks require paper piecing patterns or templates.
- Home
- Free Quilt Block Patterns
- Eight Pointed Star Quilt Block
