This post contains affiliate links for which I receive compensation
Echo Quilting
by Eileen
(Homewood, IL)
Eileen asks...
If one is not to turn the quilt under the needle, how does one navigate around a large center motif?Julie replies
Echo quilting is generally stitched with your sewing machine set-up for free motion quilting...darning(or hopping) foot installed and feed dogs down or covered.YOU are in control of moving the quilt under the needle. YOUR combination of machine speed and hand speed controls stitch length.
Let's see how this applies...
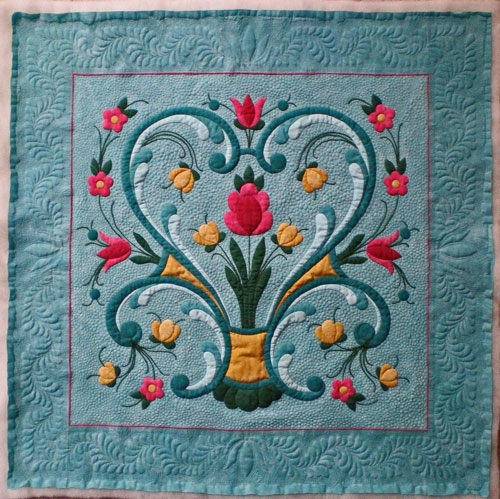
This is the current quilt that I'm working on, the quilting is almost finished...
Applique Quilt Pattern
Approximately 27" square
A quilt this size would be relatively easy to turn under the needle for the ditch or echo quilting of the large blue scrolls. (While these scrolls are ditch quilted and not echo quilted, the technique is virtually the same.)
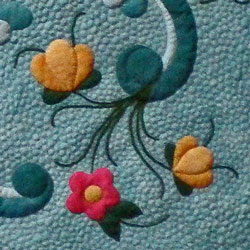
But now take a look at some of the hand embroidered stem work...

Rogaland Rosemaling
You would not want to be turning the quilt under the needle to ditch or echo quilt around this stem work. It's just too intricate.
For this quilt, I used Hobbs 100% Wool Batting.
When it's pin-basted, it is really puffy. Where there's a lot of quilting it smushes down to almost nothing; where there's no stitching there's lots of puff and dimension.
I like that for applique. By ditch quilting around all of the stem work first, I controlled the puff. That way I wouldn't be quilting tucks into the front of my quilt.
When North isn't North...
When I teach free motion quilting, students identify a North, South, East, and West side to their quilts. While free motion quilting, they keep the N side furthest from them, the S side closest. These sides do not change position during the stitching of a single line of quilting.You can turn the quilt before you begin another line if it reduces the amount of quilt under the sewing machine's arm or if it's easier.
Turning the quilt in the middle of a quilting line creates a huge opportunity to...
- Bend or break needles
- Quilt in tucks because the quilt wasn't properly situated on the sewing machine table (I know that stopping to readjust things in the middle of quilting just isn't my forte! I'm too impatient.)
- Create jagged lines of quilting from the additional stopping, adjusting, and starting.
The perfect illustration is the feathered border quilting design...

from Rogaland Rosemaling
This identical feathered border is on all four sides. I'd quilt the side closest to me (Now S could really be E or W or N) from left to right and right to left. Once finished, I turned the quilt a quarter turn and began the next side, repeating until all four were done.
Now if the quilt is much larger, I don't want all that quilt under the arm of my domestic sewing machine. I'll have to quilt the borders from top to bottom and bottom to top.
Learning to free-motion quilt in all directions is easiest on your smaller quilts. So even though it may be tempting to turn the quilt, under the needle, it's the PRACTICE and CONFIDENCE you gain quilting these smaller pieces that is the reason you don't turn the quilt under the needle.
For a complete rundown of how I quilted Rogaland Rosemaling please see the article called Quilting Applique Quilt Patterns.
I hope this has helped you, Eileen. Remember, it's YOUR quilt. YOU are in charge. These guidelines are meant as an aid in your decision-making as to how to proceed to quilt YOUR quilt.
Piecefully,
Julie Baird
Editor
Comments for Echo Quilting
|
||
|
||
|
||
|
||


