- Home
- Free Quilt Block Patterns
- Doris' Delight Quilt Block
Doris' Delight Quilt Block: Where precision📐 meets passion❤️ in perfect harmony!🎶
Because Ordinary Quilts are Sew Last Season! 🌟✂️📅💃
This post contains affiliate links, for which I receive compensation.
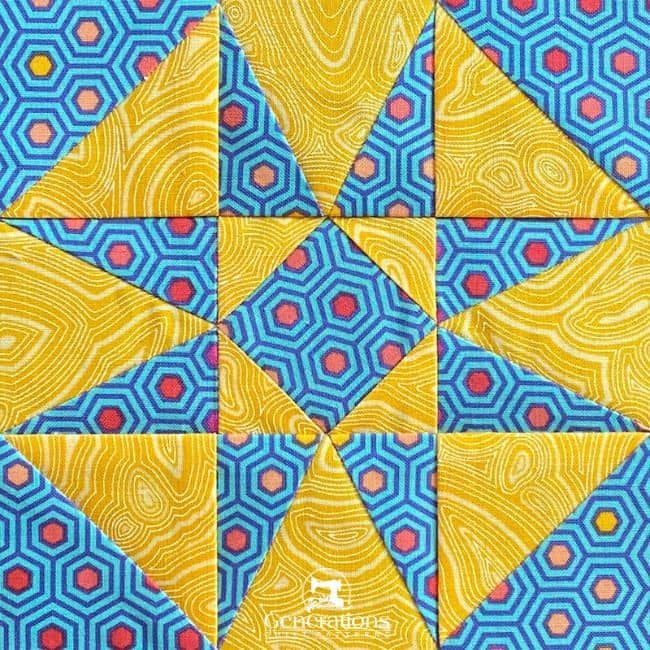
The Doris' Delight quilt block is mesmerizing, isn't it?
This little beauty packs a big punch with its bold lines and sharp points, challenging you to take your quilting skills to the next level. But don't worry, we've got you covered with a super simple technique that'll make you look like a pro.
Not a specialty ruler in sight!
The best part?
You've got free downloads of the paper piecing pattern in five different sizes, along with a coloring page and cutting chart. So let your imaginative juices flow and create your masterpiece.
Buckle up and join us for a fun and thrilling piecing ride. Your quilting skills are about to soar to new heights!
🧭Ready to dive into the delightful details?
Use these handy links to navigate through our Doris' Delight Star quilt block tutorial faster than a needle through cotton! Let's get this fabric party started! 🎉🧵
- A cutting chart in five sizes with downloads of the chart and block design
- Paper piecing patterns for the TiaS and SiaS units to download and print
- Every so often we just can't get to our sewing machines—something else comes first. Then Pin or bookmark this for later.
Cut. Sew. Press. Let's turn fabric into MAGIC!
📋General Instructions
Several abbreviations are used on this page. They are:
- SA - seam allowance
- RST - right sides together
- HST - half square triangles
- SiaS - square in a square
- TiaS - triangle in a square
- Bac - background fabric
Highlighted in yellow, pressing instructions are easy to spot.
To press, first press the patches in the closed position as they came off your sewing machine. This sets the seam, melding the fibers of the threads into the fibers of the fabric.
Then press the SA to the dark unless otherwise noted.
Download and print paper piecing patterns and templates
To download the pattern, use the most current version of Adobe.
For accurate results, on Adobe's Print Menu page, under 'Page Size and Handling' set 'Custom Scale' to 100%. Then print.
Click here to see what it looks like on the Print Menu page.
Choose your finished block size from the chart below.
Print the corresponding number of pages for a total of 4 TiaS units—don't forget to print its template, too—and 1 SiaS unit.
Print the Patterns | |||||
|---|---|---|---|---|---|
| Finished Block Size | Square in a Square | Triangle in a Square | |||
| Copies to print | SiaS Size | Copies to print | TiaS Size | Templates | |
| 6" | 1 | 2" | 1 | 2" | Print 1 |
| 9" | 1 | 3" | 1 | 3" | |
| 12" | 1 | 4" | 2 | 4" | |
| 15" | 1 | 5" | 4 | 5" | Print 1 |
| 18" | 1 | 6" | 4 | 6" | Print 1 |
After printing, use the 1" square graphic on the printed page(s) to double-check that your patterns printed at the correct size.
Then cut out the required number of patterns from your copies. A rough cut is good enough—an 1/8"-1/4"-ish away from the outside dashed square.

Not sure which paper to use?
Take a look at my review of several of the most popular brands available to us quilters on the market.
You want a super-easy paper to tear away—less stress on the stitches.
The newest quilt fabrics to tickle your fancy...
Click the images below to see the full collection. We share any commercial and/or free patterns that showcase them, too. (For inspiration, of course!)
✂️Cutting patches for a Doris' Delight quilt block
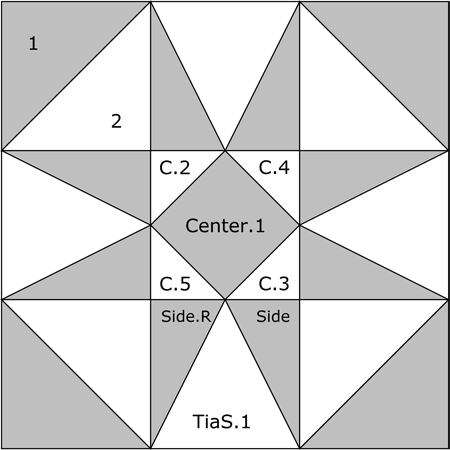 Doris' Delight quilt block design
Sample Block Size: 6" finished / 6½" unfinished
Grid: 6x6
Attribution: Farmer's Journal
AKA: OK, this blew my skirt up. This block is also known as...wait for it...STORM AT SEA...who knew?!!!
Design Type: Star | Even 9-patch
Don't forget to label your patches. It's the secret sauce to a smooth quilting experience.
The sample is made with fabrics from Tula Pink's True Colors line. These prints are FAB-U-LOUS and deserve a place in your stash. I reach for them all the time.
To print a copy of the block design and cutting chart to use at your cutting table, click here.
 | Cutting Chart for a~ Paper PLUS Traditional Piecing ~ | ||||||
|---|---|---|---|---|---|---|---|
| Patch | Fabric | Qty | Finished Block Size | ||||
| 6'' | 9'' | 12'' | 15'' | 18'' | |||
| 1 | A | 2 | 3¼'' x 3¼'' | 4¼'' x 4¼'' | 5¼'' x 5¼'' | 6¼'' x 6¼'' | 7¼'' x 7¼'' |
| 2 | Bac | 2 | 3¼'' x 3¼'' | 4¼'' x 4¼'' | 5¼'' x 5¼'' | 6¼'' x 6¼'' | 7¼'' x 7¼'' |
| Center.1 | A | 1 | 1⅞'' x 1⅞'' | 2⅝'' x 2⅝'' | 3⅜'' x 3⅜'' | 4⅛'' x 4⅛'' | 4¾'' x 4¾'' |
| C.2, C.3 C.4, C.5 | Bac | 2 | 2⅜'' x 2⅜'' | 2⅞'' x 2⅞'' | 3⅜'' x 3⅜'' | 3⅞'' x 3⅞'' | 4⅜'' x 4⅜'' |
| TiaS.1 | Bac | 4 | 3" x 2¾'' | 4'' x 3¾'' | 5" x 4¾'' | 6'' x 5¾'' | 7" x 6¾'' |
| Side, Side.R | A | 4 | 2⅞'' x 3¼'' | 3⅜'' x 4¼'' | 3⅞'' x 5¼'' | 4⅜'' x 6¼'' | 4⅞'' x 7¼'' |
| Unfinished Block Size | 6½'' | 9½'' | 12½'' | 15½'' | 18½'' | ||
| Grid Size | 1'' | 1½'' | 2'' | 2½'' | 3'' | ||
🪡Assemble the units for a Doris' Delight
Since we're paper piecing the first two units for this block, it's time to get our sewing machine ready for the job.
We need to make a few adjustments to our sewing machine settings to paper piece.
- Reduce your stitch length to 16–20 stitches per inch (1.3-1.6 mm). This perforates the paper and stabilizes the seam when you remove the pattern. [Learn more about stitch length here.]
- Reduce your machine's speed or just plain slow down. Sew only as fast as you can AND stay on the solid stitching line.
- Install an open toe appliqué foot (sometimes called an 'embroidery' or 'satin stitch' foot) if you have one (it makes it easier to see where you're stitching).
- Use a larger needle (90/14) IF you have problems removing the pattern. Personally, I use an 80/12 Microtex Sharp for paper piecing without any issues.
SiaS Unit
Make 1
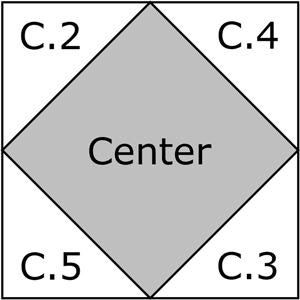 SiaS unit
Use a dot of Elmer's Washable Glue Stick to hold the wrong side of Center.1 in place on the unprinted side of the pattern. Use the dashed guidelines to quickly, accurately position the patch.
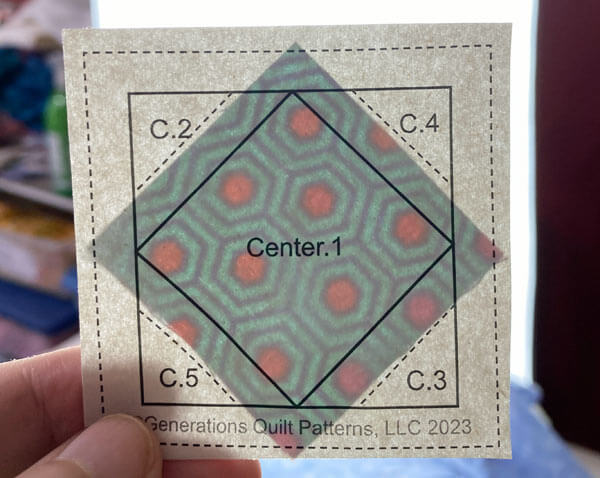 Notice that this patch doesn't extend all the way to the edges?
Not a problem.
As long as there's enough fabric for the SA, simply line up the next patch with the dashed lines and then sew.
With RST, line up the long bias edge of C.2 with one side of the Center.1.
If you've got eagle eyes, you might notice that I'm stitching C.3 in this sample. Since the Corners are all the same fabric, it really doesn't make a difference. We simply sew patches on opposite sides first.
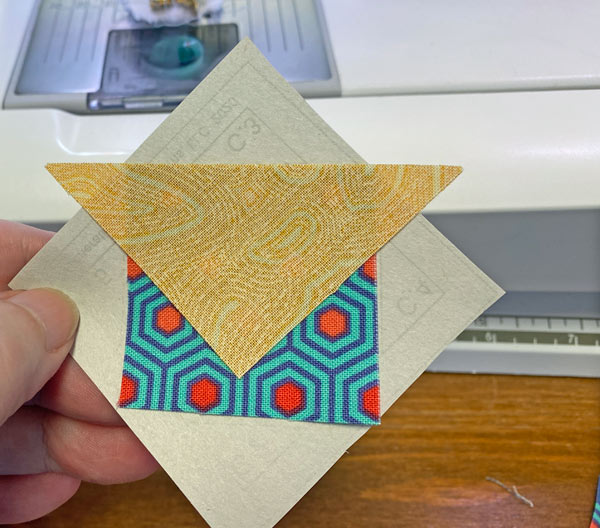
Stitch on the solid line, starting and ending outside the outside dashed square.
Since these seams run from edge to edge they are candidates for chain piecing which speeds up the piecing process.
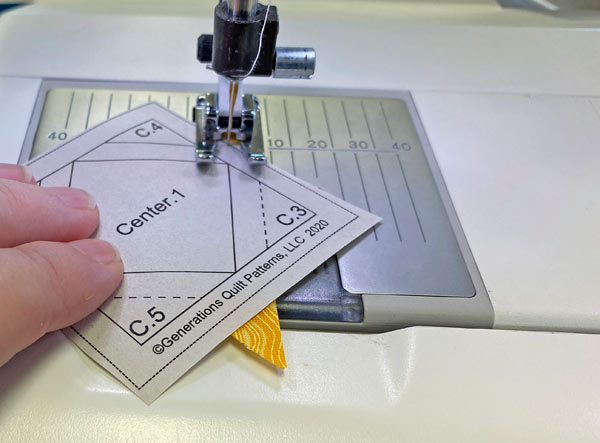
Press.
With RST, add the C on the opposite side. For our 6" sample Doris' Delight block, this 2" finished SiaS is just too small to stitch both first and then go to the ironing board. You can't get a good press when the unit it this small. Add one patch, then press. Add the next, etc.
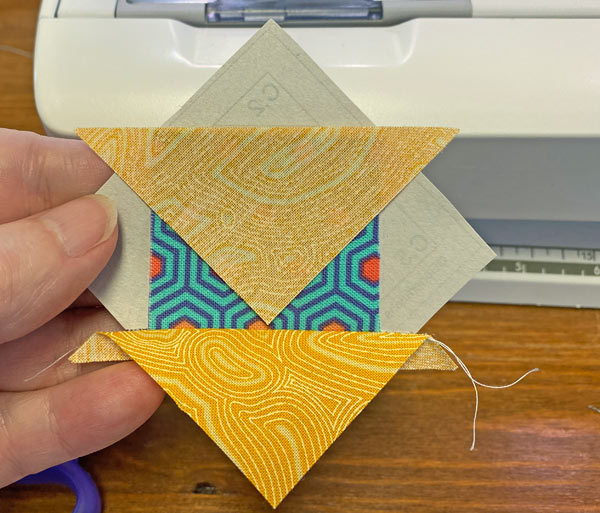
Add the remaining two C in the same manner, with one last press. Make it a good one!
This is the finished SiaS. Not quite ready for prime time, is it?
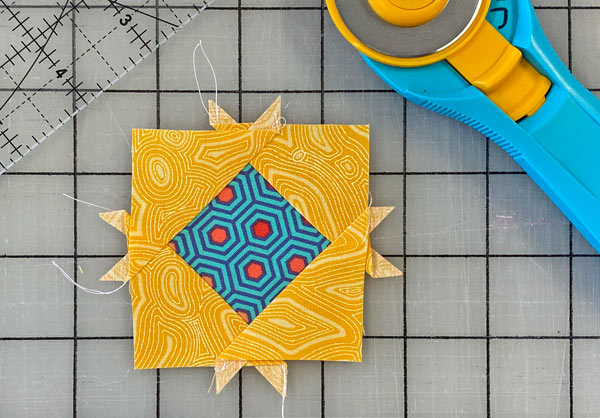
At your cutting mat, pattern side up, line up the 1/4" line on your ruler with one side of the solid square that surrounds the block.
Trim away the excess.
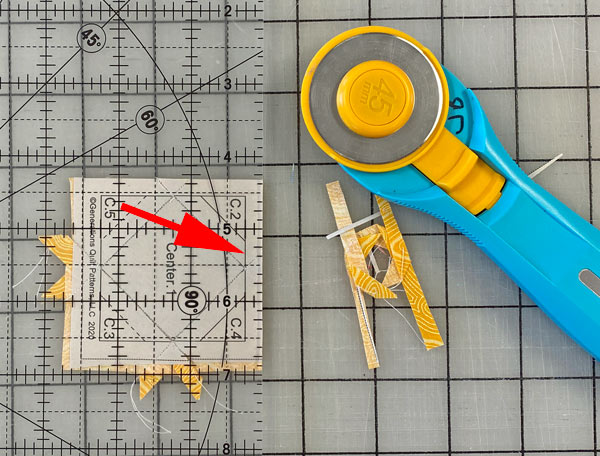
Repeat for the 3 remaining sides.
Remove the paper (it has no further purpose) and set the unit aside for now.
TiaS Unit
Make 4
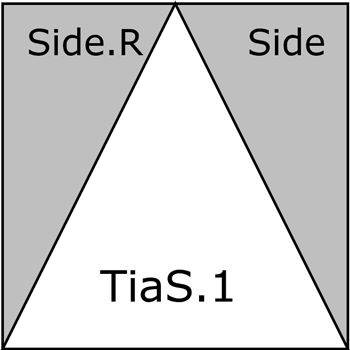 TiaS unit
Now for the magic of those pointy-points. Two seams and a bit of ripping paper and you've got the perfect star points.
First up is a bit of subcutting. This in combination with the dashed guidelines on the pattern saves you a bit of time in your piecing.
These patches are oversized, so our cutting doesn't have to be so precise. Close is good.
Trim the TiaS template so that the top and bottom edges are exactly on the line. It doesn't matter whether the sides are exact or not. They'll get trimmed when you trim away the excess.
The Width of the TiaS.1 patch is on the top and bottom, the Height is on the sides. Refer to your cutting chart if you need to.
Layer all four TiaS.1 patches right sides up, edges even. Position the paper template on the stack so all the top and bottom edges are even, too.
Cut away the excess with your rotary cutter.
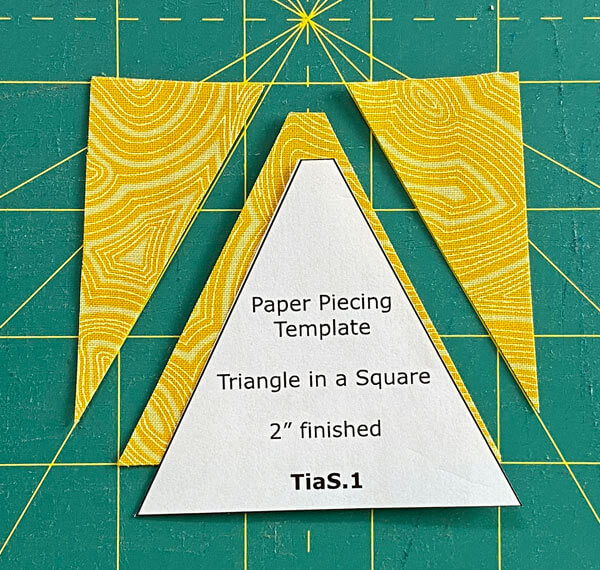
Position the Side/Side.R patches in pairs that are each right sides together. We do this so that we automatically cut pairs of mirror-imaged patches.
Make a mark 5/8" in from the top left, and 5/8" in from the bottom right.
Line up your ruler with the marks at the edges of the patches and cut the rectangles in half.
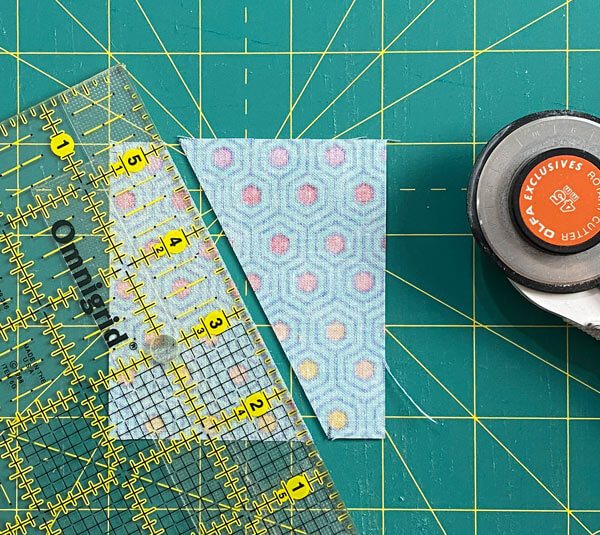 Make sure that the Width is on the top and bottom and Height is on the sides. Refer to your cutting chart if needed.
After all this subcutting, you'll have 4 sets of patches that look something like this.
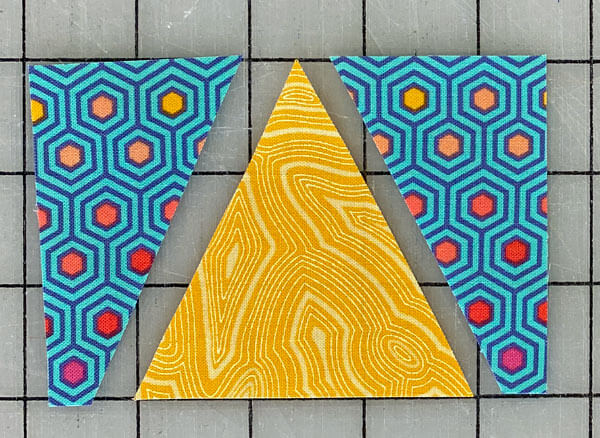 A Side, a TiaS.1, and Side.R patches
Use that Elmer's Glue Stick again to position the TiaS.1 on the wrong side of the pattern.
Those dashed lines sure some in handy, don't they?
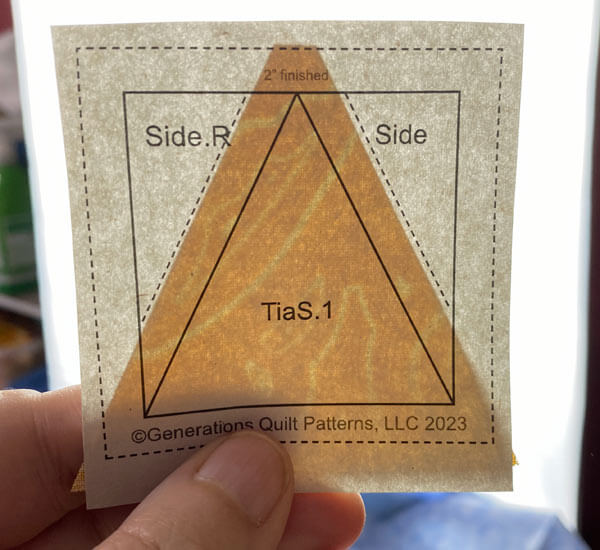
HELPFUL TIP: These Side and Side.R patches are cut so when you position each over the Center, the small point on the short end of the Side matches the point at the bottom of the Center. (red arrow)
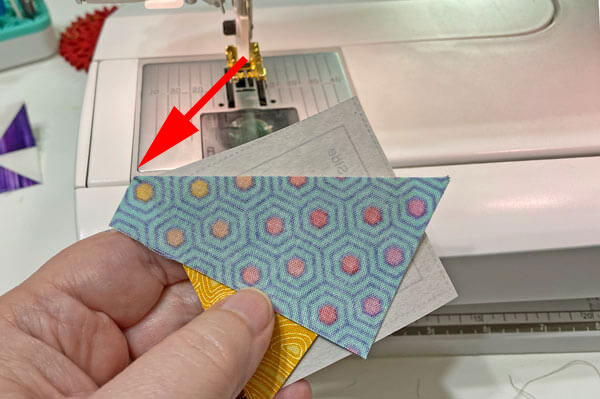
Stitch, starting and ending past the outside edges.
Press.
Repeat for the second Side patch.
Here it is in need of a trim-job.
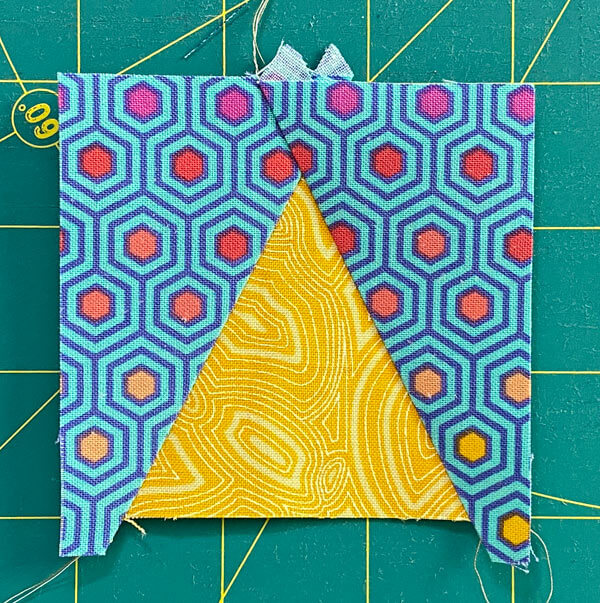
After a good job at your ironing board, trim each side of each TiaS, just like you did for the SiaS.
Here, I've just finished trimming the second side.
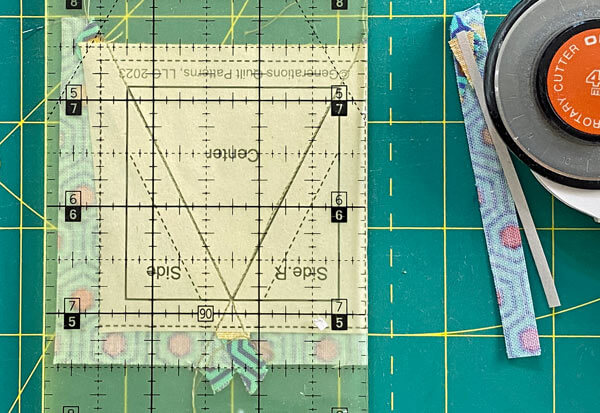 The 1/4" line on the ruler is positioned directly over the solid line around the block. Then the excess is trimmed away.
After trimming, remove the paper pattern. All our outside edges are on straight of grain for stability. The paper no longer serves a purpose.
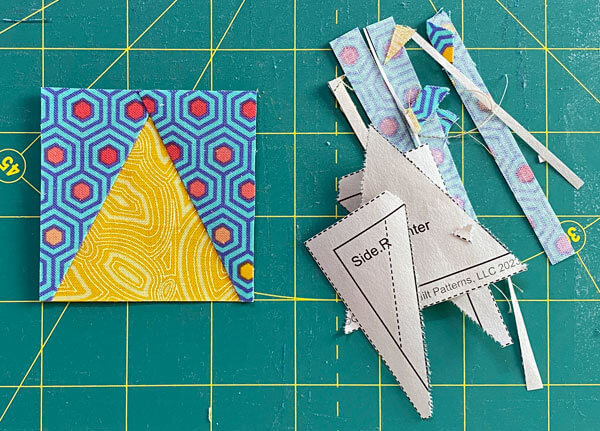 Only 3 left to trim!
The paper piecing is complete. From this point forward, return your stitch length to the one you regularly use for piecing and install your favorite 1/4" presser foot.
Half Square Triangles
Make 4
From this point forward, you'll use a 1/4" seam allowance to make the HST and assemble the patches into the Doris' Delight block.
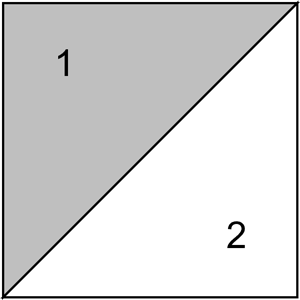 HST
HSTDraw a diagonal line on the backside of the lighter of the #1 or #2.
Pin to hold the edges together if it helps. Stitch 1/4" from both sides of the line.
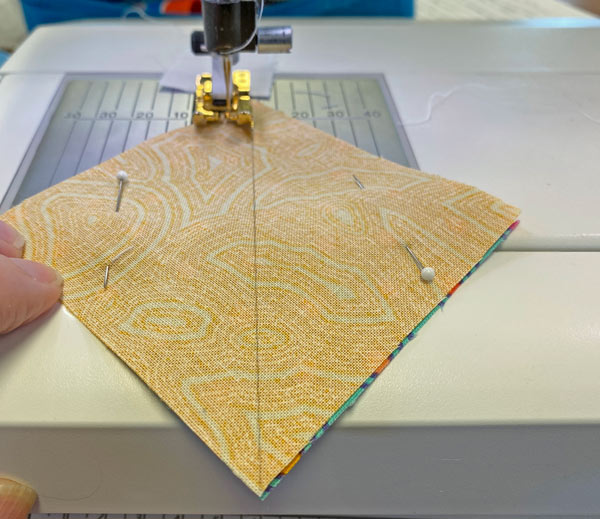
Press.
Cut the pairs in half between the stitching.
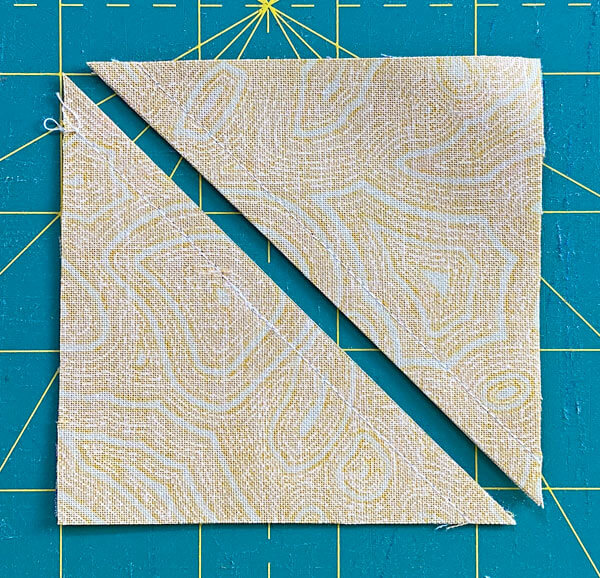 You can use either a rotary cutter or scissors for this
Find your Finished Block Size in the chart below and its corresponding 'Edge-to-Edge size.
| Finished Block Size | HST Edge-to-edge Measurement |
|---|---|
| 6" | 2½" x 2½" |
| 9" | 3½" x 3½" |
| 12" | 4½" x 4½" |
| 15" | 5½" x 5½" |
| 18" | 6½" x 6½" |
At your cutting mat with a square ruler (because a square quilting ruler always has a diagonal line on it), match the 45° line with the seam line (red arrow). Position the ruler so that you can cut a HST the size listed in the chart.
Trim the two exposed edges.
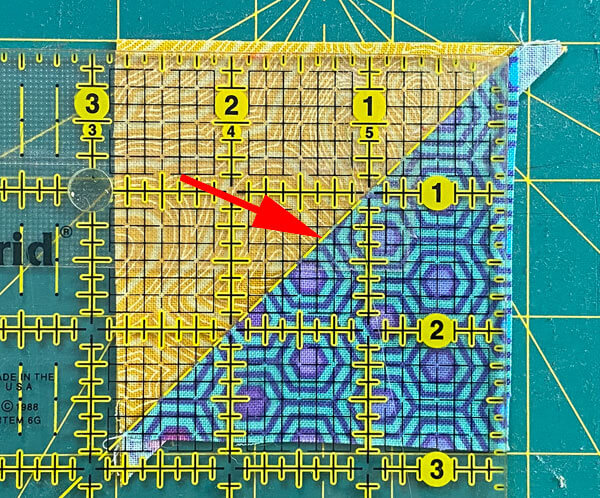 For our 6" sample block, we're cutting our HST to 2-1/2" square
Flip the half-trimmed HST so that your trimmed edges are underneath the ruler. Line up the 'Edge-to-Edge' measurement lines with those trimmed edges (blue arrows), diagonal line directly over the seam (red arrow).
Cut away the remaining excess fabric.
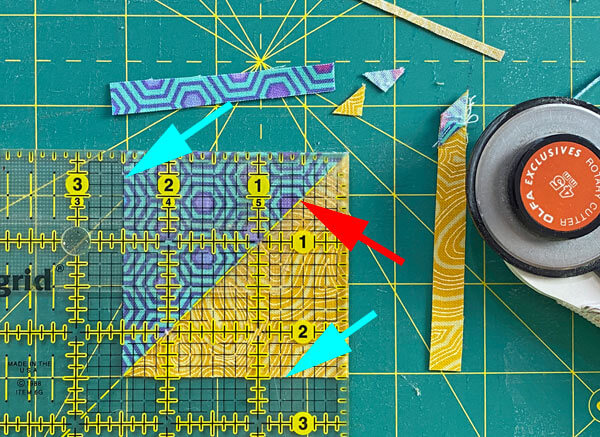
Our first pair of #1 and #2 is trimmed.
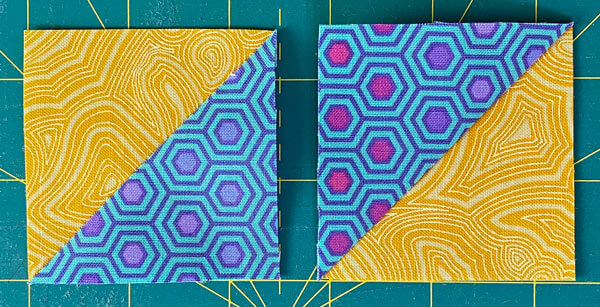 Just what we want...a diagonal seam that splits the opposite corners exactly in two. Sweet!
Off to finish the second pair.
Welcome to my Brain-Fart Island!
Did you spot it?
I completely missed taking the photos when I made the Doris' Delight sample block...maybe it was the late afternoon Moscato at the Quilt Barn?
Well, that's my story and I'm sticking to it! ;)
These are brand-new samples. But since I fussy cut the original patches, I'd run completely out of the red/orange/yellow hexagon area of the fabric.
🧩Assemble your Doris' Delight quilt block
Arrange your patches into the Doris' Delight quilt block design.
HSTs, in the Corners with the background—yellow in our sample—toward the inside, TiaSs on the sides with the background at the outside edge and the SiaS in the very center of the block.
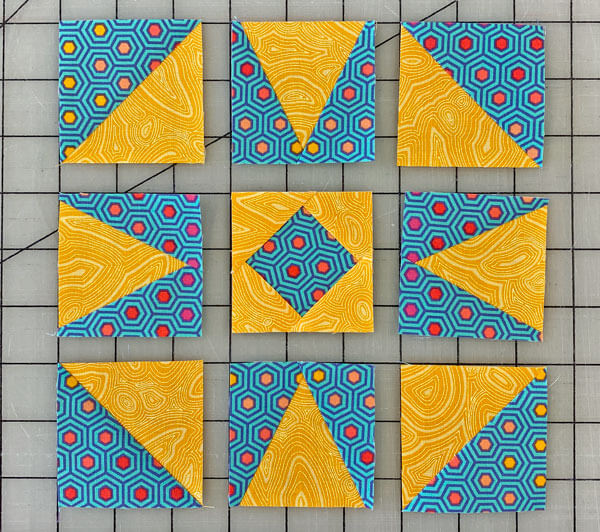
Sew the units in each row together. Pin if needed to help get a good match where the seam of the HST and TiaS meet.
Since we took the time to sew on a line and trim to perfection, keeping those edges even is the last step in getting the most out of your paper piecing. Pinning helps keep them even.
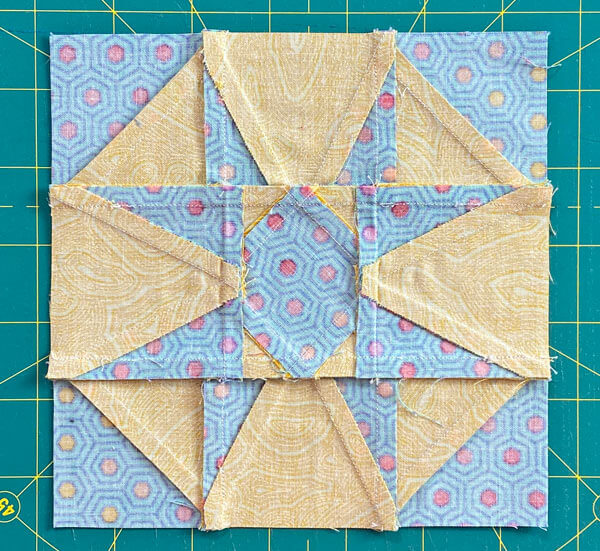
SA are pressed away from the TiaSs in all three rows.
Stitch the rows together. If you come up to a lumpy-lump, stop with your needle down through the fabrics. Raise the presser foot and then set it back down on top of the lump. Continue stitching.
This simple action can help you avoid pushing the top layer out of position and getting a bad match at a point or SA.
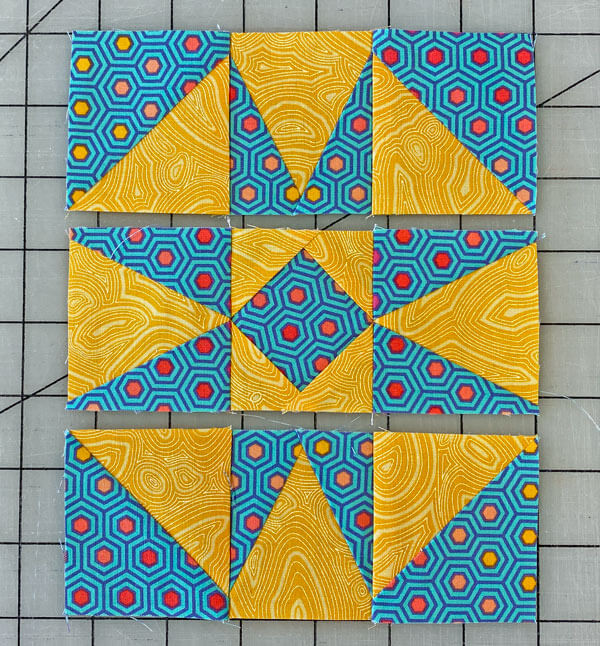
These final 2 SAs are pressed away from the middle row.
This really turned out to be a stunning block. The slight variation in the dots from Tula Pink's True Colors line really move your eyes around the design, don't they?
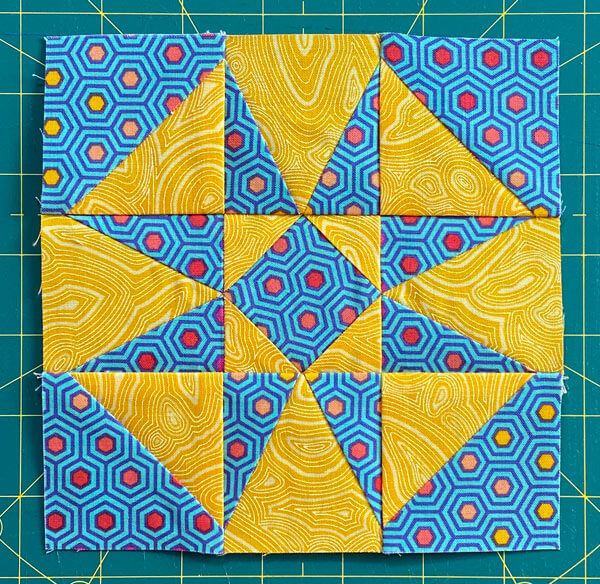 Voila! Pointy-perfection with ease!
Here is the backside, so you can see how all the pressing works together.
Ready to dive into the delightful world of Doris' Delight? 🏊♀️🌟
Grab your fabric, fire up that sewing machine, and let's create some quilting magic together! 🧵✨
Remember, in the realm of Doris' Delight, every stitch is a step towards perfection. So let's get piecing and turn those ordinary fabrics into extraordinary art! 🎨🧶
Happy quilting, and may your points always be sharp and your seams always straight! 📐💯
📌Loving these delightful details?
Pin this tutorial and spread the quilting joy! It's like a virtual high-five for your future self! 🙌📌
🔭 Looking for something truly stellar?
You've finished your star quilt block, and you're ready for more!
Browse our collection of 60 stellar star quilt block patterns. All have instructions and cutting charts in multiple sizes. If templates or paper piecing is used in the tutorial, there's a free download for you of those materials.

Eeny. Meenie. Miney. Moe.
Which star quilt block will you sew?
For a star-studded quilting experience, choose from 100+ bedazzling star quilt patterns—for beginners and beyond—click here.
For even MORE blocks to make... 🧩🎨

...visit our Free Quilt Block Pattern Library, with over 230+ blocks to choose from in multiple sizes.
Free downloads are included in all sizes for any blocks require paper piecing patterns or templates.
- Home
- Free Quilt Block Patterns
- Doris' Delight Quilt Block
