- Home
- Free Quilt Block Patterns
- Diamond Ring Quilt Block
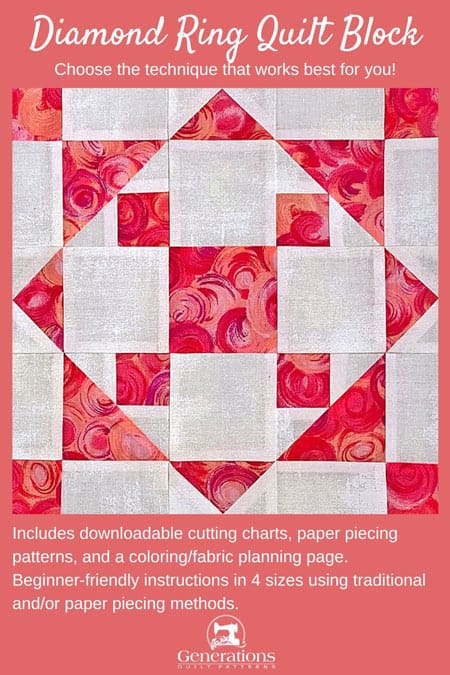
Diamond Ring Quilt Block Tutorial: 8", 10", 12", and 16" finished blocks
This post contains affiliate links, for which I receive compensation.
Dear Diamond Ring,
We all know who's really a girl's best friend~~
Yours Sincerely,
Chocolate Cake
Except we, Quilters, know that the Diamond Ring quilt block IS our best friend.
Using simple techniques, we'll have all those points perfectly pointy and matched up tout suite!
Seams that nest and accurate 1/4" seam allowances are key.
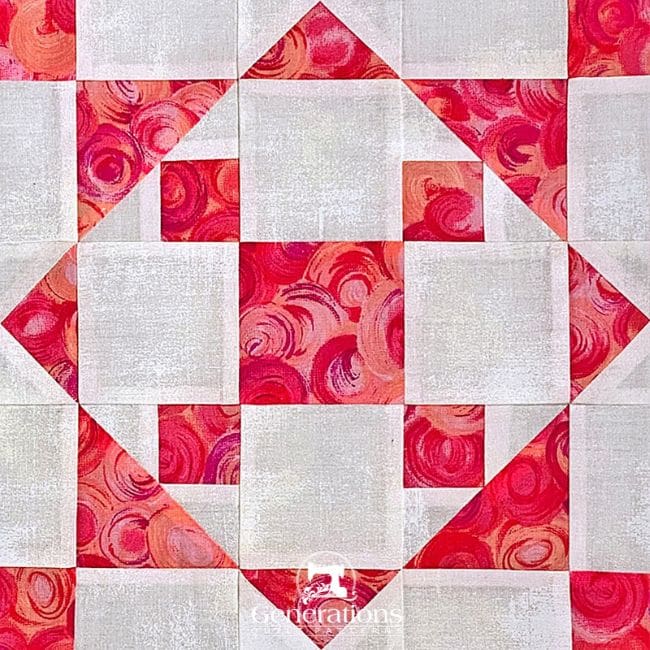 If you like it, put a 'Pin' on it!
To help you be successful, 'free-goodies' is our middle name. These are available right here in this tutorial:
- Downloadable cutting charts and block designs in four sizes
- Paper Pieced
- Traditionally Pieced
Let's get busy and 'put a ring on it'!
Hate to Paper Piece?
Don't worry, I've got you covered.
📋 General Instructions
⚡ PRINTING TIP: Need help printing this tutorial? Click here for easy instructions!
Several abbreviations are used on this page. They are:
- SA - seam allowance
- RST - right sides together
- BW - Brave World units
- FG - Flying Geese units
- FGSides - Flying Geese sides...well this isn't exactly an abbreviation but I didn't want you think it was a typo later on... :)
- Bac - Background fabric
A 1/4" SA is used throughout this tutorial.
When pressing, first press the patches in the closed position just as they came off your sewing machine. This sets the seam, melding the fibers of the threads into the fibers of the fabric.
Then press the SA to the dark unless otherwise noted.
Pressing instructions are highlighted in yellow throughout this tutorial to make them easy to spot.
Take a quick Sewing Test to confirm your 1/4" seam allowance is exact. It's worth the couple of minutes it'll take.
And finally, starched quilt fabric just makes everything easier and more accurate. Learn the how's and why's of starching here.
📥 Download and print paper piecing patterns
NOTE: If you'd prefer not to paper piece ('cause it's like sticking a needle in your eye), click here to go directly to the cutting chart and instructions for a traditionally pieced Diamond Ring block.
To download the pattern, use the most current version of Adobe.
For accurate results, on Adobe's Print Menu page, under 'Page Size and Handling' set 'Custom Scale' to 100%. Then print.
Click here to see what it looks like on the Print Menu page.
Choose your finished block size from the chart below and print the corresponding number of pages for a total of 4 BWs and 4 FG.
Print the BW and FG Paper Piecing PatternsPrint 1 copy each for 1 block, except 2 copies of the BW for the 16"block | ||
|---|---|---|
| Finished Block Size | Finished FG Unit Size | Finished BW Unit Size |
| 8" | 1" x 2" | 2" |
| 10" | 1¼' x 2½" | 2½" |
| 12" | 1½" x 3" | 3" |
| 16" | 2" x 4" | 4" |
After printing, use the 1" square graphic on the printed page(s) to double check that your patterns printed at the correct size.
The newest quilt fabrics to tickle your fancy...
Click the images below to see the full collection. We share any commercial and/or free patterns that showcase them, too. (For inspiration, of course!)
✂️ Cutting patches for a paper pieced Diamond Ring quilt block
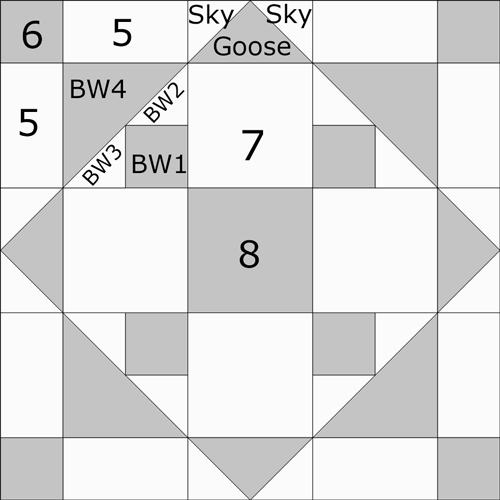 Diamond Ring design
Sample Block Size: 10" finished / 10½" unfinished
Grid: 8×8
Attribution: Clara Stone
AKA: Fanny's Favorite (Ladies Art Company), Grandma's Choice (Needle Craft Supply), My Favorite (Nancy Cabot), Old Favorite (Nancy Cabot)
Design Type: Uneven 9-patch, small center |. Paper Piecing
Label your patches. We use the numbers all through this tutorial.
It's important to choose fabrics with high contrast so all the points you piece show up.
In the sample block, my go-to, a neutral Moda Grunge, is used for the background (Bac) and an older fun little swirly pink is used for the darker A fabric. (I oh-so wish I could find more of this one...)

 | Cutting Chart for a~ Paper Piecing ~ | ||||||
|---|---|---|---|---|---|---|---|
| Patch | Fabric | Qty | Finished Block Size | Sub Cut | |||
| 8'' | 10'' | 12'' | 16'' | ||||
| BW-1 | A | 4 | 1¾'' x 1¾'' | 2'' x 2'' | 2¼'' x 2¼'' | 2¾'' x 2¾'' | --- |
| BW-2 BW-3 Sky | Bac | 8 | 2⅜'' x 2⅜'' | 2⅝'' x 2⅝'' | 2⅞'' x 2⅞'' | 3⅜'' x 3⅜'' | |
| BW-4 | A | 2 | 3⅜'' x 3⅜'' | 3⅞'' x 3⅞'' | 4⅜'' x 4⅜'' | 5⅜'' x 5⅜'' | |
| Goose | A | 1 | 3⅝'' x 3⅝'' | 4⅛'' x 4⅛'' | 4⅝'' x 4⅝'' | 5⅝'' x 5⅝'' | |
| 5 | Bac | 8 | 1½'' x 2½'' | 1¾'' x 3'' | 2'' x 3½'' | 2½'' x 4½'' | --- |
| 6 | A | 4 | 1½'' x 1½'' | 1¾'' x 1¾'' | 2'' x 2'' | 2½'' x 2½'' | --- |
| 7 | Bac | 4 | 2½'' x 2½'' | 3'' x 3'' | 3½'' x 3½'' | 4½'' x 4½'' | --- |
| 8 | A | 1 | 2½'' x 2½'' | 3'' x 3'' | 3½'' x 3½'' | 4½'' 4½'' | --- |
| Unfinished Block Size | 8½'' | 10½'' | 12½'' | 16½'' | na | ||
| Grid Size | 1'' | 1¼'' | 1½'' | 2'' | na | ||
After all the patches are cut, check to see that you've got the subcutting done, too. Use the little symbols in the cutting chart to help. Don't forget to label them. It's easy to get the #6s and BW1s mixed up.
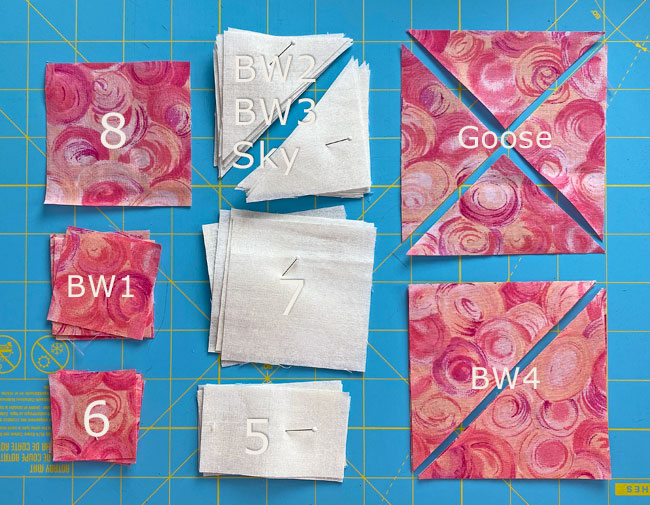 The cut patches for a paper pieced Diamond Ring quilt block
Tip for using fabrics whose back and front are easily confused
I love the look of Moda's Grunge for my backgrounds. The subtle texture adds movement to the blocks without distracting from your piecing.
But man-O-man, it sure is easy to confuse the right and wrong sides. <hangs head in shame>
To keep my patches straight, I'll lay all my Grunge patches, say the #7s, right side up, and then put a pin through the top. The patches can't get mixed up. I simply remove the bottom patch to use in construction. Without looking, I know which way is up.
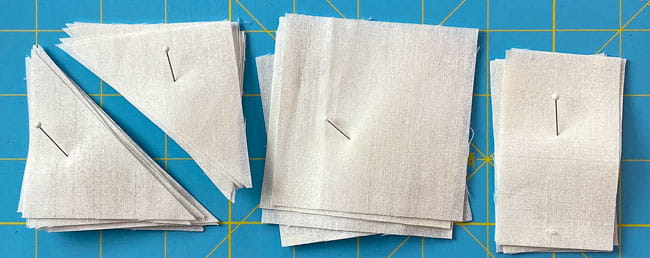
In the photo above, you can see where the #5, #7, and BW2, BW3 and Sky patches are pinned this way.
A simple solution for a pesky problem.
🪡 Paper piecing the units for a Diamond Ring block
To prepare your paper piecing patterns, cut out four of each for the FB and BW units. Don't bother to cut exactly on the outside dashed line.
A bit beyond is good enough for now.
We need to make a few adjustments to our sewing machine settings to paper piece.
- Reduce your stitch length to 16–20 stitches per inch (1.3-1.6 mm). This perforates the paper and stabilizes the seam when you remove the pattern. [Learn more about stitch length here.]
- Reduce your machine's speed or just plain slow down. Sew only as fast as you can AND stay on the solid stitching line.
- Install an open toe appliqué foot (sometimes called an 'embroidery' or 'satin stitch' foot) if you have one (it makes it easier to see where you're stitching).
- Use a larger needle (90/14) IF you have problems removing the pattern. Personally, I use an 80/12 Microtex Sharp for paper piecing without any issues.
Use the tiniest dab of Elmer's Washable Glue Stick to position the BW-1 and Goose to the unprinted side of the corresponding pattern. The patches need to stay put for the first seam…not for eternity.
The dashed guidelines make positioning quick, easy and accurate to do.
Once all 8 are in place, you can put away the glue stick.
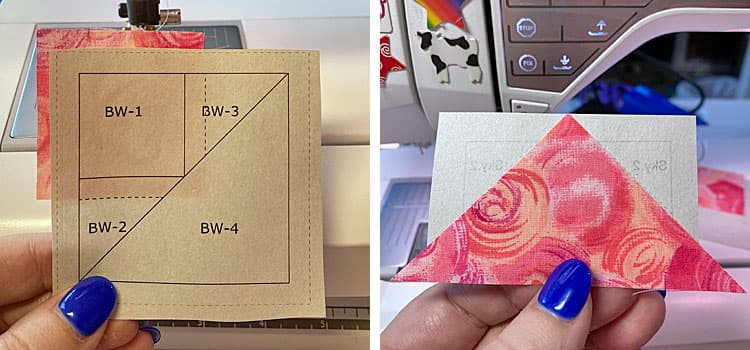
Can you use pins?
Of course, you can! But they have a tendency to distort the pattern. Gluestick is quick, easy, and cheap...and readily available.
Brave World (BW)
Make 4
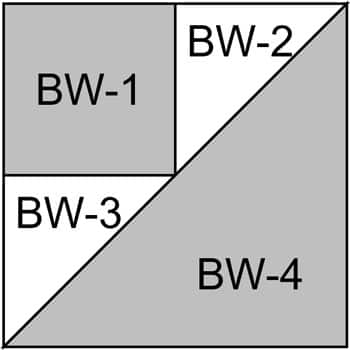
With RST, line up the short side of a BW2 with the edge of BW1.
Since we're adding a lighter patch over a darker one, I've nudged BW2 a few threads past the edge of BW1 (pink arrow) to prevent the darker fabric from shadowing through the top of the block. The patches are cut big enough to do this.
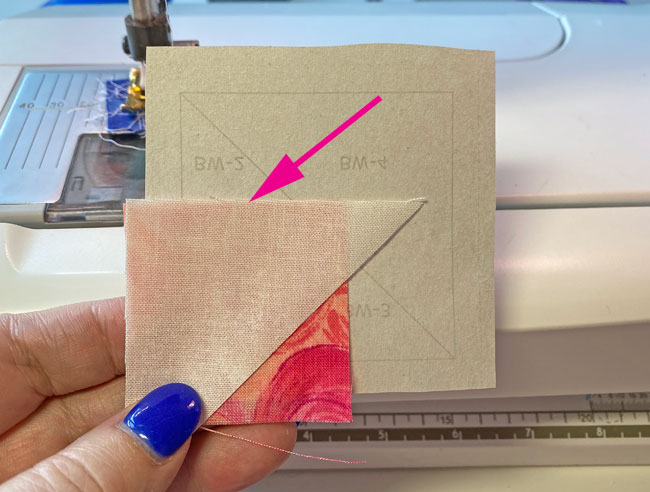 Do take a second to flip open BW2 while you're holding it to make sure you've got it in the right position.
Sew, starting and ending a generous 1/4" past the solid line between the two patches on the pattern.
All your seams are stitched this way. The stitching that crosses these stitches secures them...just like in traditional piecing.
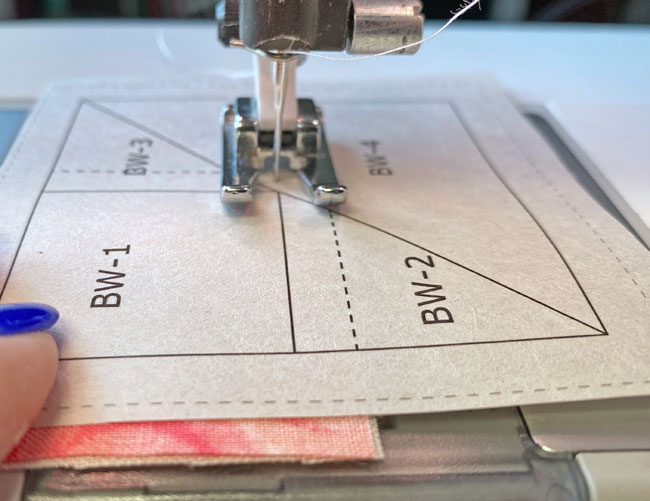
Press.
Repeat these steps when you add BW-3 to the adjacent side of BW-1.
I've done that same 'nudging' here, too. (pink arrow)
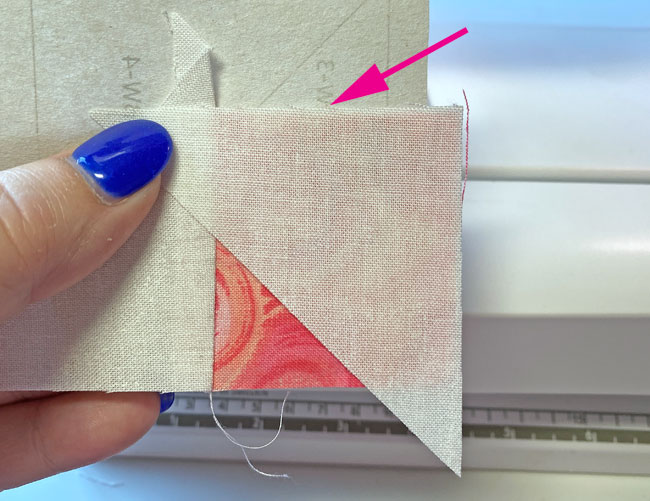
Press.
Trim away any thread tails in the center on the paper side of the pattern with scissors.
There's no need to do anything with the ones on the outside edge of the BW. They'll all be removed as you trim away excess seam allowances.
To create the perfect placement line for BW-4, at your cutting mat, paper side up, align the edge of your ruler with the solid line between BW-4 and BW2/BW3.
With your fingernail, crease the pattern along the solid line and fold it back on itself. You will rip the paper a bit. That is just fine.
If you think it's ripped too much, use a bit of Scotch Brand Magic Tape® to repair it. Remember, NEVER press on the tape with your iron.
Line up the 1/4" line on your ruler with this folded edge and cut away the excess (pink arrow) to create the perfect 1/4" SA.
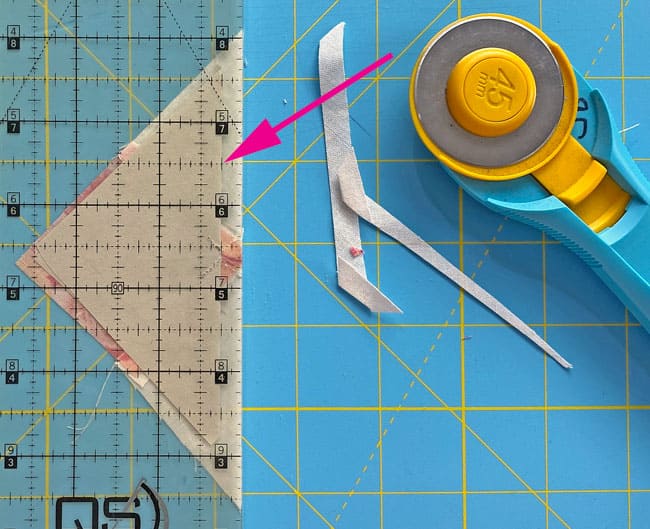
Back at your machine, with RST, align the newly cut edge and the long side of BW4.
This time, we're adding a darker patch over a lighter one. No chance of this shadowing through. No need to nudge BW4.
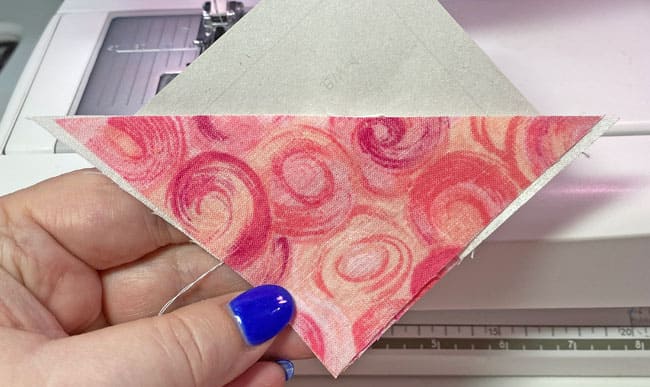
Sew the seam, again starting and stopping outside the dashed lines that surround the block.
Since this stitching runs from outside edge to outside edge, you CAN chain piece this last seam in your BWs. (YES! There's chain piecing in paper piecing!)
Press.
Trim the block to perfection.
At your cutting mat, paper side up, line up the 1/4" mark on your ruler with the solid outline around the BW. Trim away the excess.
Repeat for each side of all four BWs.
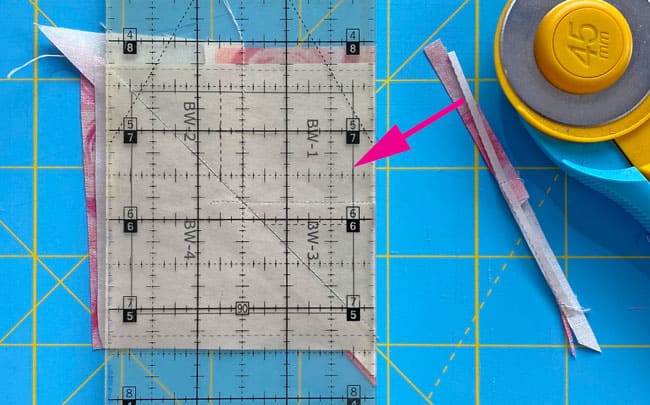
Here's what it looks like before (left) and after (right) trimming.
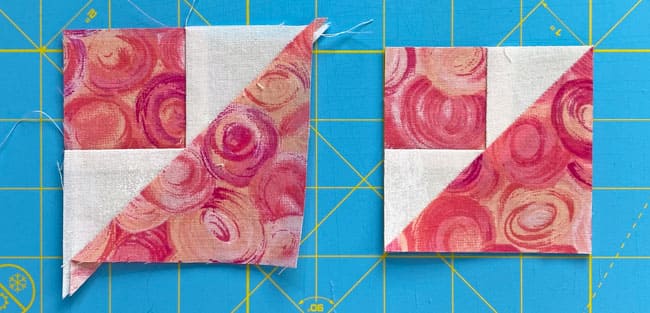 Ooh-la-la! That looks nice!
Remove that paper and give your BWs a final press.
Set aside.

Flying Geese
Make 4
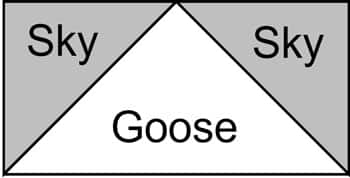
With RST, align the long bias edge of a Sky with either short side of the Goose.
It doesn't matter which side you start on, though I heartily recommend being consistent in your choice.
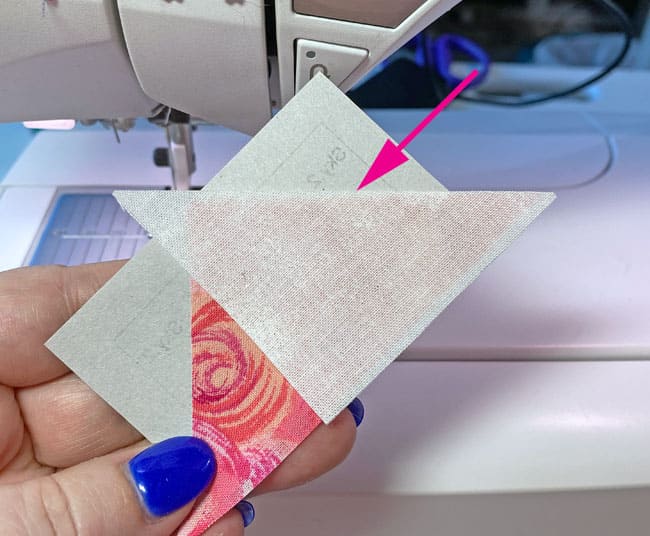 We've nudged the lighter Sky a few threads past the edge of the darker Goose to prevent shadowing.
If you start on the right, always start on the right.
It's easier to keep your patches organized and get a nice rhythm to your stitching when you're making lots of blocks.
Start and stop this seam a generous 1/4" before and after the solid sewing line.
Just like that last seam in the BWs, you can chain piece both seams in your FGs.
Press.
Repeat these steps for the second Sky to complete each FG.
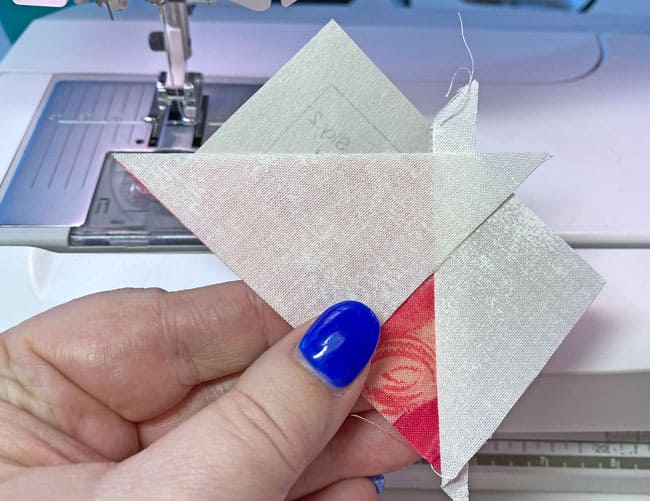
Press.
Remove the papers after trimming to perfection.
Give the units one final press.
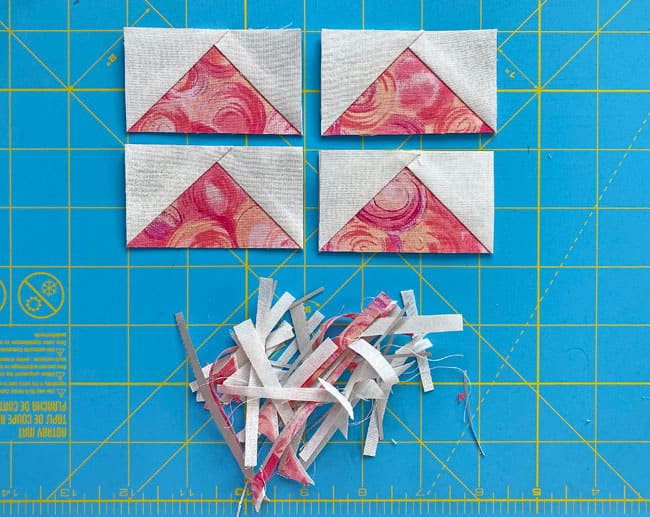

The paper piecing is complete. From this point forward, return your stitch length to the one you regularly use for piecing and install your favorite 1/4" presser foot.
NOTE: From this point forward, regardless of whether you paper pieced or traditionally pieced the units, the instructions are the same.
FGSides
Make 4
With RST, sew a FG to a #7 square.
The SA is pressed toward #7.
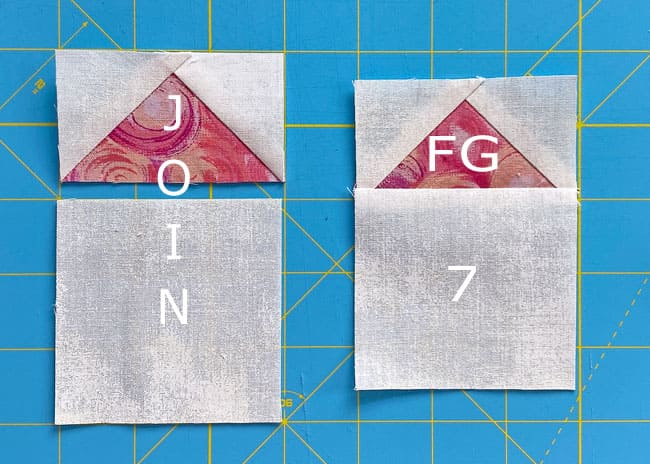
Use the chart below to check your accuracy.
After sewing, all FGSide units measure... | |
|---|---|
| Finished Block Size | Edge-to-edge Measurement |
| 8" | 2½" x 3½" |
| 10" | 3" x 4¼" |
| 12" | 3½" x 5" |
| 16" | 4½" x 6½" |
Corners
Make 4
With RST, sew a #6 to #5, and a #5 to the left side of a BW as shown below.
SAs are pressed toward the #5s.
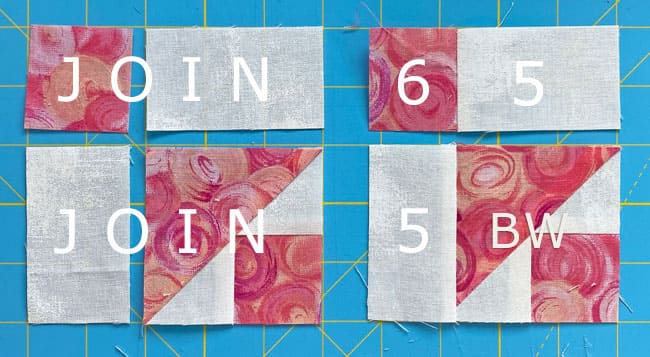
With RST, sew the #5/#6 to the #5/BW. Pin as needed for a good match at the seam. (Those seams nest and make this job easier.)
Press this SA away from the BW unit.
Here is a finished Corner.
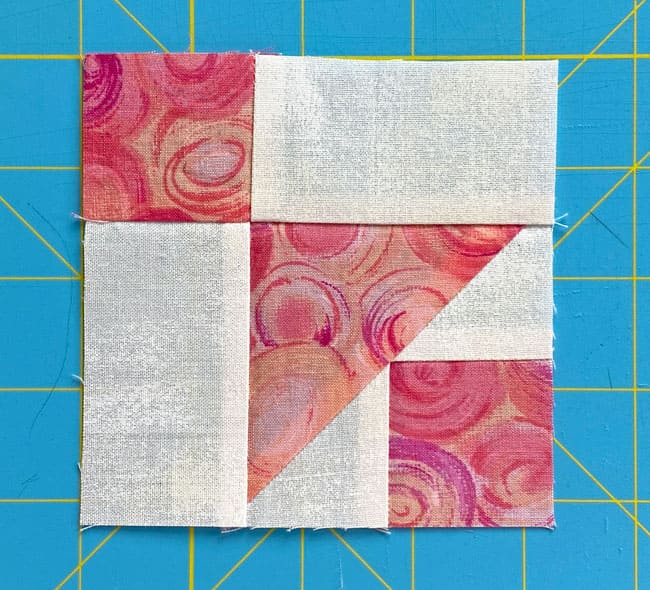
Repeat for a total of four.
After sewing, all Corners measure... | |
|---|---|
| Finished Block Size | Edge-to-edge Measurement |
| 8" | 3½" x 3½" |
| 10" | 4¼" x 4¼" |
| 12" | 5" x 5" |
| 16" | 6½" x 6½" |
🧩 Assemble your Diamond Ring block
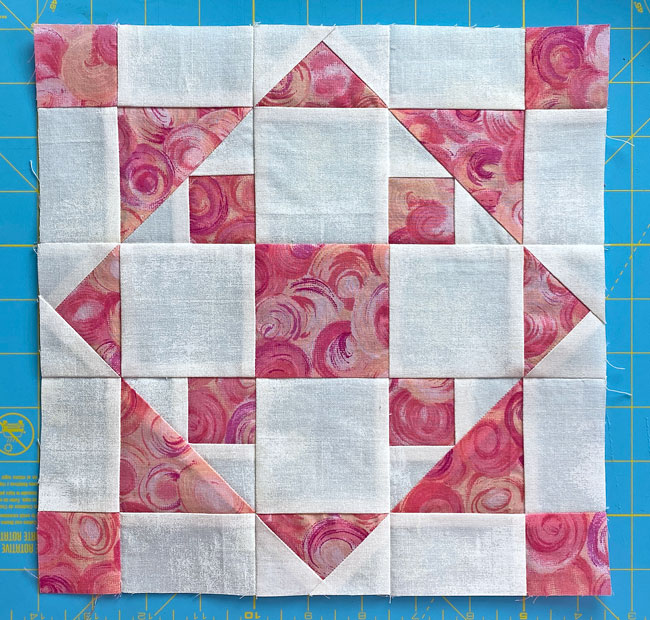
Arrange the #8 center square and all the corner and side units into the Diamond Ring design—dark squares in the four corners with BWs on the inside.
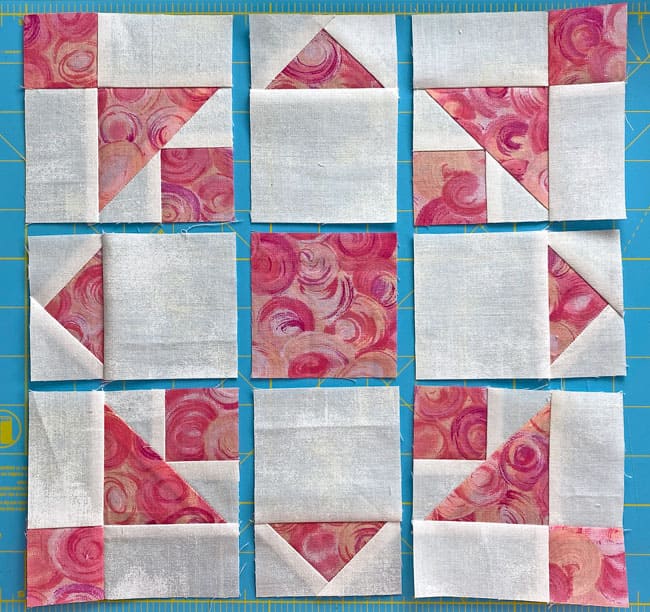
There's a lot of movement in the design already, isn't there? And the piecing was a piece o' cake!
With RST, stitch the patches together into horizontal rows.
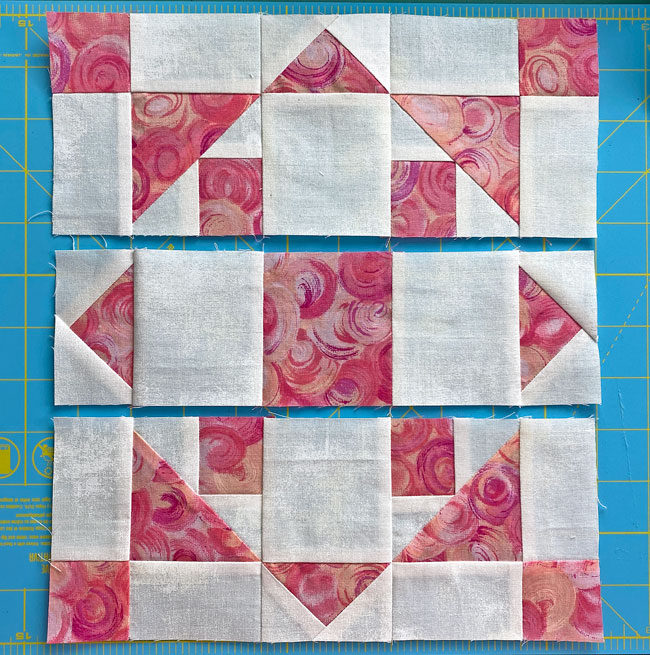
Nested SAs make it easier to match all those pointy-points. (This is one of the biggest benefits of paper piecing—if you've deliberately stitched on the line, the points are effortlessly at the 1/4" seam allowance.)
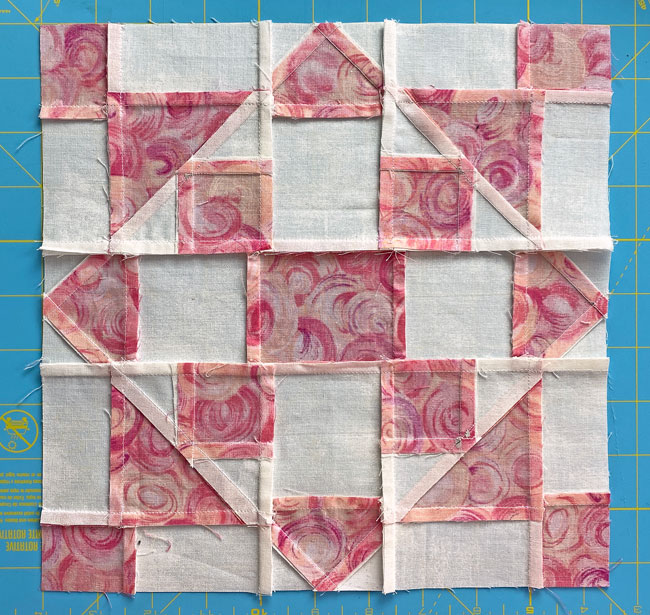
In all these rows, press the SA towards the FGSides.
And from the backside, your Diamond Ring quilt block should look something like this.
Remember to bookmark or Pin this for later!
For even MORE blocks to make… 🧩🎨

...visit our Free Quilt Block Pattern Library, with over 260+ blocks to choose from in multiple sizes.
Free downloads are included in all sizes for any blocks require paper piecing patterns or templates.
- Home
- Free Quilt Block Patterns
- Diamond Ring Quilt Block
