- Home
- Beginner Quilt Blocks
- Diamond in a Square Quilt Block
Diamond in a Square Quilt Block
Technique #3: Rotary Cutting Patches
This post contains affiliate links, for which I receive compensation.
In this tutorial, you'll learn how to rotary cut the patches for a Diamond in a Square quilt block (AKA Square in a Square).
This avoids the waste of the Folded Corners method or the time spent to remove the paper after paperpiecing the units.
There are three different ways to rotary cut the patches using:
On this page you'll find the formulas to do your own patch calculations for standard rotary cutting—with a step-by-step example, of course!
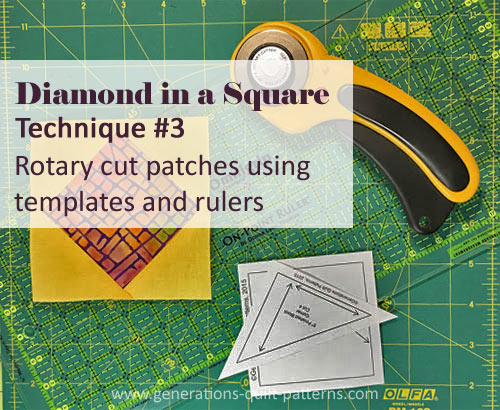
If you prefer to do the math yourself, there's a 'Fraction to Decimal' conversion chart for you to download.
If you're math adverse, don't worry. There's a Cutting Chart to download for units ranging from 2" to 12" finished in 1/2" increments.
Next
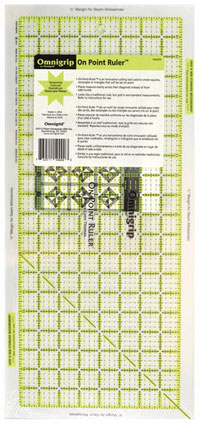
we discuss how to use the On-Point ruler to create these types of units.
For the cost of a ruler, you get to skip the math.
For the third cutting alternative, you'll learn how to print and use templates. If you choose, you can print them right from this page for 2", 3", 4", 5" and 6" finished blocks.
Regardless of how you create the patches, starching your quilt fabric before cutting helps stabilize any bias edges. [Learn more here...]
Finally, you'll learn how to stitch the Diamond in a Square quilt block.
Let's get started!
General Instructions
Throughout this page several abbreviations are used:
- F for finished, i.e. 4"F
- SA for seam allowance
- DinaS for Diamond in a Square
They always appear in bold for easier reading.
The newest quilt fabrics to tickle your fancy...
Click the images below to see the full collection. We share any commercial and/or free patterns that showcase them, too. (For inspiration, of course!)
Using a Traditional Rotary Cutter and Ruler
Sample Size: 4" finished / 4½" unfinished
Grid: 2x2
Attribution: Bruce Johnson
AKA: Broken Sash (Nancy Cabot), Dutch Tile (Nancy Cabot), Friendship Album Quilt (Bruce Johnson), Triangle Design (Woman's World)
Design Type: Basic block
The formulas below result in a Diamond in a Square quilt block with straight of grain on the outside edges for stability. Always calculate the Center Square first because:
- Its the easiest! You already know the Finished Block Size, and,
- Its value is used in the calculations for the corner triangles
The Formulas
Center Square
1 per block
Step 1: Finished Diamond in a Square Block Size ÷ 1.414"
Step 2: Round to the nearest 1/8" (up or down)
Step 3: Add 1/2" for SA
Corner Triangles
2 squares per block, then subcut each in half once diagonally for a total of 4 right triangle patches
Step 1: Finished Diamond in a Square Block Size ÷ 2
Step 2: Add 7/8" for SA (these are actually half square triangles)
Helpful Hint for the Math Curious
If you've read my article on the Quilter's Magic Number, you'll recognize that both calculations start with the value of c² to find a.
If that looks like Greek to you, don't spend another moment thinking about it.
The formulas above use only division and addition. They work just fine. And then there's the chart to download if you'd prefer to avoid the math completely!
The diagram below shows where to find the different values we need.
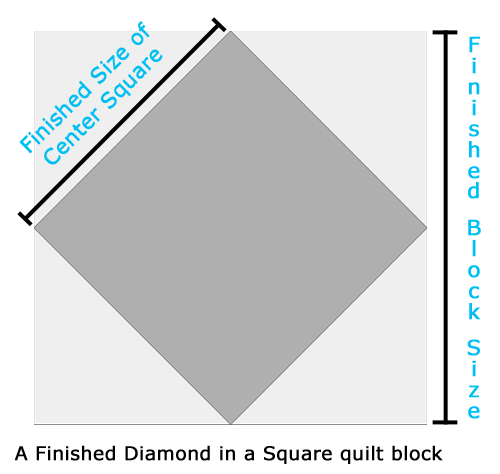 Just like they taught us in grade school--it's good to draw a picture of what you're trying to figure out!
A step-by-step example...
...to calculate the dimensions of the patches for a 4"F Diamond in a Square unit or block.
Start with the Center
Step 1: To calculate the center square, plug the 4"F Diamond in a Sq. Block Size into our formula.
4" ÷ 1.414 = 2.829"
Step 2: Round to nearest 1/8" to make it rotary-cutter-friendly.
Rounding up to 2.875 is closer than rounding down to 2.75. 2.875" or 2-7/8" is the finished size.
Step 3: Because we're cutting a square, add 1/2" for SA
2.875" + .5" = 3.375" or 3-3/8"
We need one 3-3/8" x 3-3/8" patch.
On to the corners
Step 1: Plug the 4"F Diamond in a Sq. Block Size into the formula.
4" ÷ 2 = 2"
Step 2: Because this is a half square triangle, add 7/8" for SA
2" + .875" = 2.875"
We need two 2-7/8" squares. Slice each in half on the diagonal to create four right triangle patches with straight of grain on the two shorter sides.
A Note from Julie:
This first technique, with a traditional ruler, is my least favorite of all the ways to make this block because it's persnickety.
The reason is the math.
It's
not hard—some division and addition—however the results are not quite
rotary cutter friendly. Everything's rounded either up or down.
And that's the rub.
When
you take the time to fine-tune your 1/4" seam allowance and then fudge a
bit on cutting the patches by rounding—well, that just doesn't make
sense to me.
So why am I including this technique?
Simply put, you need to find the methods that work best for YOU and how YOU quilt. It's great to have input from others on what works best for them. But YOU are the most important part of the equation!
Always.
I share my experience and opinion because it may help you decide which way to go for a particular patchwork design.
Finally, store-bought patterns frequently instruct you to rotary cut these patches with your everyday ruler.
After stitching they're just not quite right.
You think it's you.
But it's not you, it's the TECHNIQUE.
I think you deserve to know that.
What if your quarter inch SA is not quite accurate?
Since the seams of this unit are on the diagonal, if your SA is off just a wee bit, it can really throw off its finished dimensions. Take a Sewing Test before stitching to improve the accuracy of your SA. [Learn more here...]
If even after passing the Sewing Test you find your blocks are still a bit off, try adding a 1/2" to the 'Corners' size in the Cutting Chart (far right column).
Stitch the block as usual and then trim to the Unfinished Size.
For example, for a 2-1/2"F Diamond in a Square, cut 2 squares 2-5/8" (2-1/8" plus 1/2" = 2-5/8") for the corner triangles. [Click here to see where in the chart...].
Subcut each on the diagonal once to create a total of 4 right triangles.
Using the On-Point Ruler
An alternative to slogging through the funky math is a specialty ruler.
I first came across the On-Point when deciding how to piece an antique pattern in the Designing Quilts section on this site.
It is used for on-point shapes like the center of our Diamond in a Square.
To use it, simply cut your patch at the DinaS's FINISHED dimensions.
First cut a strip with the On-Point whose width is equal to the finished DinaS block dimensions. Then subcut that strip into widths the same dimension.
For a 4"F DinaS block, cut a strip using the 4" lines on the ruler. Then subcut at 4" for a 4"F square. (i.e. for a 6" block, use the 6" lines.)
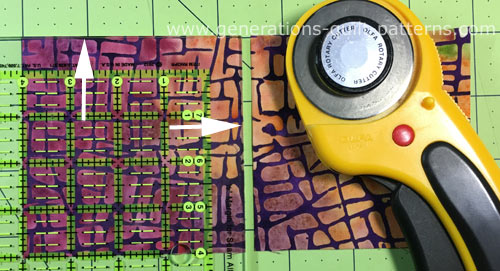 Use the Finished DinaS dimensions to cut your center square.
In the photo above the center patch is cut. While it's hard to see, the edges of the ruler extend to the points of the white arrows. That 'extra' space around the edge is how the seam allowances are automatically, exactly added to the patch dimensions.
Easy Peasy!
The ruler does all the funky math for you. The patch is the exact size you need. No fudging.
Then switch back to your standard rotary ruler to cut the corners. Just use the same cutting chart on this page and cut ONLY the corner patches.
[Skip down to Sewing the Diamond in a Sq...]
Templates for a Diamond in a Square
Another way to skip the fussy math and cut truly accurate patches is to use templates.
You can download paper templates in 2"F, 3"F, 4"F, 5"F and 6"F sizes by clicking here. (All of the sizes are included in the single 2-page download.) Be sure to use Adobe for your downloads so all the information on the template pages is visible.
To learn how to accurately print and cut with them, go to 'How to Print and Use Free Quilting Templates'. The example on that page IS this 4"F Diamond in a Square.
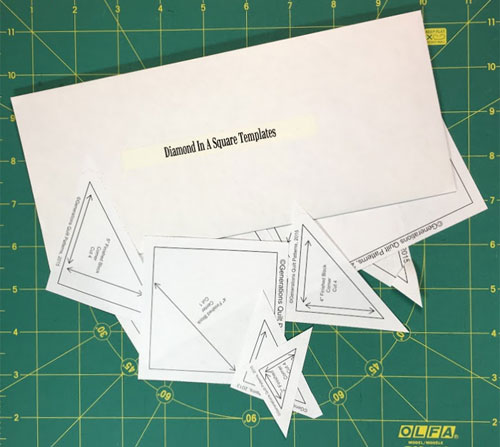 It's easy to store your templates in a marked envelope for future use, or pin the image above to return here to print as needed.
Check the accuracy for yourself
Measure the centers for each block size.
You'll see that most are pretty close to the number in the cutting chart. But they are all 'not quite'.
These templates are correct—there was no rounding to make them easier to cut.
That's why I prefer all the other methods to make this unit over using your every day ruler to measure and cut the patches from a cutting chart.
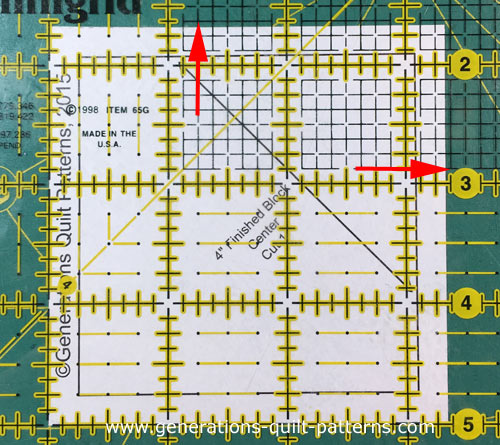 The red arrows show the 3-3/8" line
In the picture above, the template for a 4"F Diamond in a Sq is measured. It is slightly smaller than the 3-3/8"x3-3/8" patch required for a rotary cut unit. The template is the more accurate of the two methods.
Remember though, what's most important is what works best for YOU!
Sew A Diamond in a Square
The stitching instructions are exactly the same whether you use your every day or On-Point rulers or templates.
All SA are 1/4" and are pressed out toward the triangles.
Fold the long edge of the triangles in half and finger-press to mark the centers.
Mark each side in the same manner to find the centers of the square.
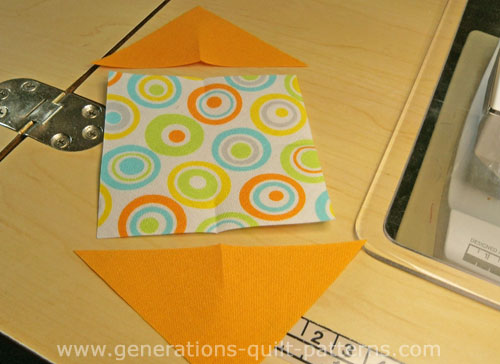 You'll be matching the finger-pressed creases.
With right sides together, match the crease of a triangle patch with the crease of the square. Pin to hold them in position. (The point of the triangle matches the center crease in the opposite side of the square.)
Stitch.
Repeat for the opposite side. For the smaller units, you'll need to
press after each triangle is added instead of after pairs of opposite
triangles.
Press the SA away from the center.
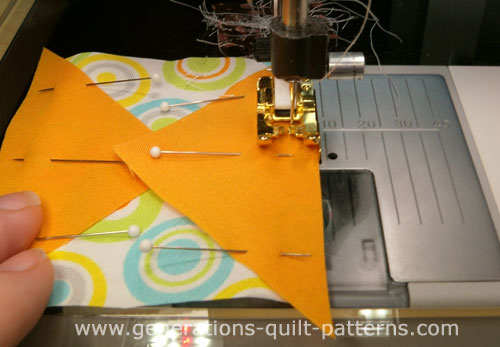 Yes! Pins are helpful to hold the matched creases together.
After stitching, you can see that the corner triangles are a bit longer than the edge of the square. That is correct.
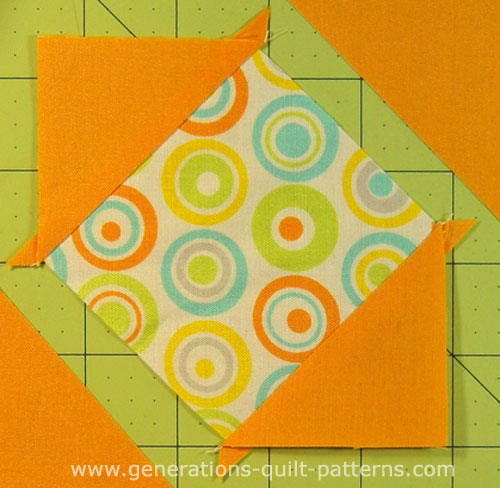
You can choose to trim off the dog ears at this time or leave them for later. I usually leave the trimming for after I've added the second pair of triangles.
That's my habit. Yours may differ. Do what makes sense for you.
Repeat the process for the third and fourth corners.
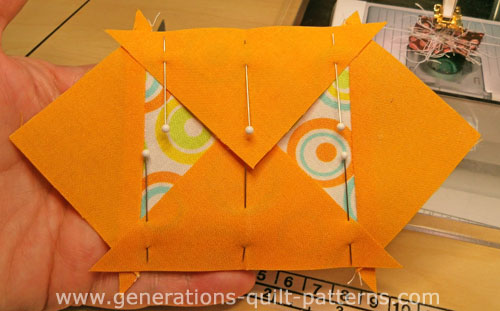 Yep, those dog ears are peaking out.
This time when you stitch, your quarter inch SA should fall directly in the notch (red arrow) created by the patches.
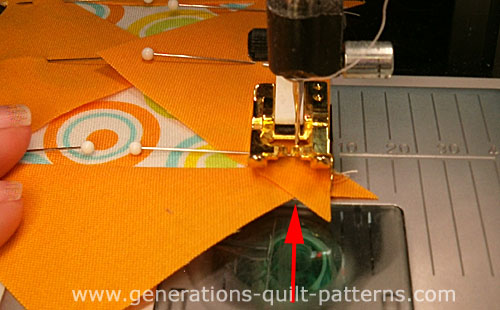 Aim for the notch created by the overlap of the patches for a good quarter inch SA.
If you started with oversized triangles, trim down to the unfinished measurement for your Diamond in a Square unit. There should be a 1/4" between the outside edge of the DinaS and the points of the center. Click here to see the ruler placement on a completed unit.
Trim any remaining dog ears and give your patchwork a final press.
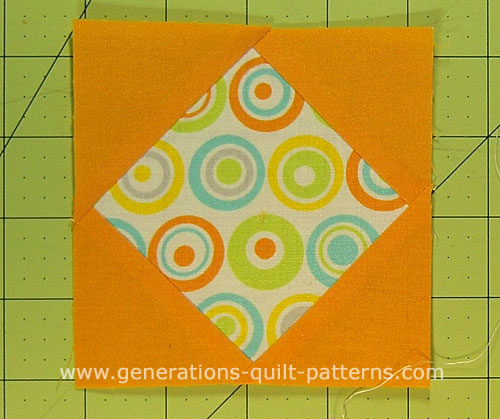 When you're stitching line goes directly through the center of the notch, the outside edges are nice and straight.
Free Diamond in a Square Downloads
Here are the promised downloads for this technique.
Print them all.
Or choose just what you need.
- Diamond in a Square Cutting Chart (this is what is shown below)
- Templates for 2"F, 3"F, 4"F, 5"F and 6"F blocks or units.
You are welcome to print as many copies as you'd like for your own personal use.
| Block Size | Cut Patches for... | |||
|---|---|---|---|---|
| Finished | Unfinished | Center Square Cut 1 | Corners Cut 2** | |
| 2" | 2 1/2" | 1 7/8" | 1 7/8" | |
| 2 1/2" | 3" | 2 1/4" | 2 1/8" | |
| 3" | 3 1/2" | 2 5/8" | 2 3/8" | |
| 3 1/2" | 4" | 3" | 2 5/8" | |
| 4" | 4 1/2" | 3 3/8" | 2 7/8" | |
| 4 1/2" | 5" | 3 5/8" | 3 1/8" | |
| 5" | 5 1/2" | 4" | 3 3/8" | |
| 5 1/2" | 6" | 4 3/8" | 3 5/8" | |
| 6" | 6 1/2" | 4 3/4" | 3 7/8" | |
| 6 1/2" | 7" | 5 1/8" | 4 1/8" | |
| 7" | 7 1/2" | 5 1/2" | 4 3/8" | |
| 7 1/2" | 8" | 5 3/4" | 4 5/8" | |
| 8" | 8 1/2" | 6 1/8" | 4 7/8" | |
| 8 1/2" | 9" | 6 1/2" | 5 1/8" | |
| 9" | 9 1/2" | 6 7/8" | 5 3/8" | |
| 9 1/2" | 10" | 7 1/4" | 5 5/8" | |
| 10" | 10 1/2" | 7 5/8" | 5 7/8" | |
| 10 1/2" | 11" | 7 7/8" | 6 1/8" | |
| 11" | 11 1/2" | 8 1/4" | 6 3/8" | |
| 11 1/2" | 12" | 8 5/8" | 6 5/8" | |
| 12" | 12 1/2" | 9" | 6 7/8" | |
**Cut each square once diagonally for a total of 4 right triangles.
Several methods to make a Square in a Square
These tried and true techniques get the job done without the mental, the math gymnastics!
The first is 'folded corners' (which you may have already used for a Snowball quilt block).
The second is paper piecing (my personal favorite) with several sizes of the Square in a Square quilt block available as a free downloads.
Finally, you can choose to piece it using rotary cut patches using either your every ruler or templates or a specialty ruler called the 'On-Point'.
- Home
- Beginner Quilt Blocks
- Diamond in a Square Quilt Block
