- Home
- Free Quilt Block Patterns
- Diamond Cross Quilt Block
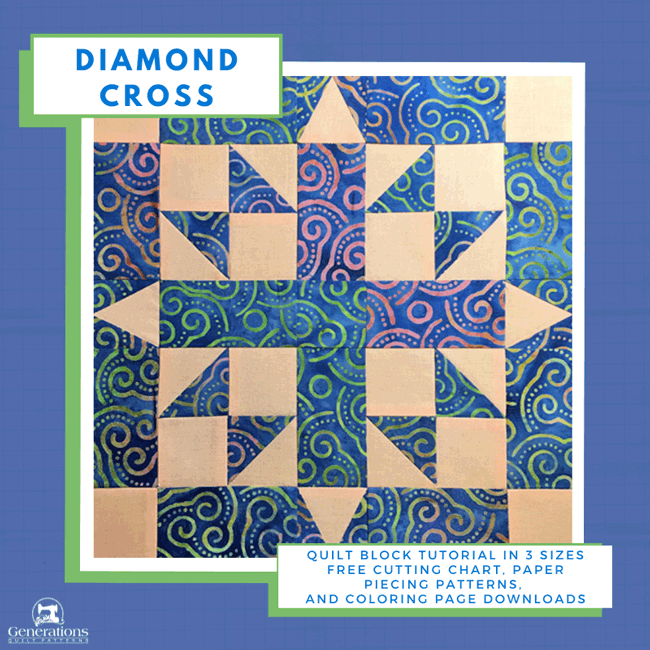
Diamond Cross Quilt Block Tutorial in 3 sizes: 7", 10-1/2", and 14" finished
From our Free Quilt Block Patterns Library
This post contains affiliate links, for which I receive compensation.
Who doesn't love quilt blocks that are easy to piece AND stunning to look at?
The Diamond Cross quilt block (aka Ratchet Wheel) is the answer to your prayers.
This tutorial will show you how to make Diamond Cross blocks in three different sizes, with a bit of paper piecing thrown in to make it easier than it looks. Simple construction techniques (including the 8-at-a-time HST method) make this block an ideal project for confident beginning quilters.
The fully illustrated step-by-step tutorial makes it easy to follow along, and the free downloads put everything at your fingertips.
Say goodbye to boring blocks.
General Instructions
You'll find several abbreviations used on this page. They are:
- SA – seam allowance
- RST – right sides together
- HST – half square triangles
- TiaS - triangle in a square
- BU – Bow unit
Pressing instructions are highlighted in yellow throughout this tutorial to make them easy to find.
When instructed to press, first press the patches in the closed position just as they came off your sewing machine. This sets the seam, melding the fibers of the threads into the fibers of the fabric.
Then press the SA to the dark unless otherwise noted.
Take a Sewing Test to check the accuracy of your 1/4” SA before starting. It's a good habit to get into. ;)
If you'd like to starch your quilt fabric before beginning (one of my best tips for accurate cutting, sewing and pressing) learn the how's and why's here.
Download/print paper piecing pattern or templates for TiaS
You'll need the most current version of Adobe installed on your computer to download the pattern.
On the Adobe Print Menu page, under 'Page Size and Handling' set 'Custom Scale' to 100% before printing for accurate results. Click here to see what it looks like on the Print Menu page.
Choose your finished block size from the chart below. Print 1 copy of the pattern per block and 1 copy of the Template to use to subcut the triangle shapes.
Paper Piecing Patterns for TiaS UnitsClick on the number in that column. Print that number of copies. | ||
|---|---|---|
| Finished Block Size | Size of Unit | Templates |
| 7" | 1" | Print 1 copy of the templates |
| 10½" | 1½" | |
| 14" | 2" | |
After printing, use the 1" square graphic on the printed page(s) to confirm the patterns are printed at the correct size.
The newest quilt fabrics to tickle your fancy...
Click the images below to see the full collection. We share any commercial and/or free patterns that showcase them, too. (For inspiration, of course!)
Step 1: Cutting patches for a Diamond Cross block
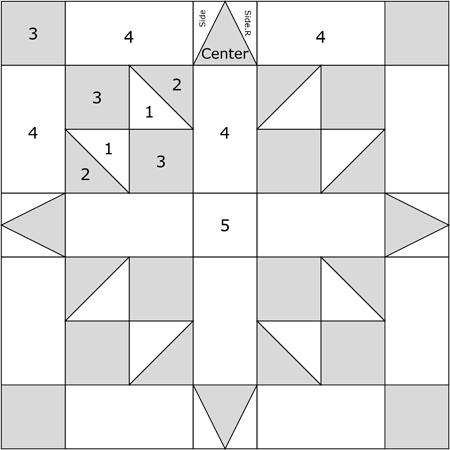 Diamond Cross design
Sample Block Size: 10½" finished / 11” unfinished
Grid: 7×7
Attribution: KC Star
AKA: Rachet Wheel
Design Type: Uneven 9-patch
YOU are always in charge of the fabrics you choose for your own blocks.
In that spirit, I decided to swap lights and darks in the design, which is why the fabrics are labelled 'A' and 'B' to avoid confusion. I selected a variegated batik and a Bella Solid to work with.
If you're interested in using batiks, check out some new ones from our favorite fabric brands here.
My go-to online source for Bella Solids is Green Fairy Quilts—who's frequently got a sweet discount on one of my favorite fabrics.
Please label all your patches. We use their numbers throughout this tutorial.
 | Cutting Chart for a~ Paper PLUS Traditional Piecing ~ | ||||
|---|---|---|---|---|---|
| Patch | Fabric | Qty | Finished Block Size | ||
| 7'' | 10½'' | 14'' | |||
| 1 | Light | 1 | 4¼'' x 4¼'' | 5¼'' x 5¼'' | 6¼'' x 6¼'' |
| 2 | Dark | 1 | 4¼'' x 4¼'' | 5¼'' x 5¼'' | 6¼'' x 6¼'' |
| 3 | Dark | 12 | 1½'' x 1½'' | 2'' x 2'' | 2½'' x 2½'' |
| 4 | Light | 12 | 1½'' x 2½'' | 2'' x 3½'' | 2½'' x 4½'' |
| 5 | Light | 1 | 1½'' x 1½'' | 2'' x 2'' | 2½'' x 2½'' |
| Center | Dark | 4 | 1¾'' x 2'' | 2¼'' x 2½'' | 2¾'' x 3'' |
| Side Side.R | Light | 4 | 2¼'' x 2⅜'' | 2¾'' x 2⅝'' | 3¼'' x 2⅞'' |
| Unfinished Block Size | 7½'' | 11'' | 14½'' | ||
| Grid Size | 1'' | 1½'' | 2'' | ||
Step 2: Assemble the units for a Diamond Cross block
Bow Unit (BU)
Make 4
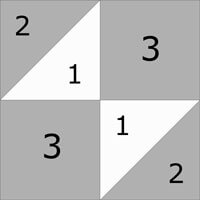
With 8 HSTs in the block, it's a sure thing that we'll use the 8-at-a-time method for making them.
On the back of your #1 or #2 square, draw a diagonal line from each pair of corners. I used a Bohin Mechanical Chalk Pencil on the darker of the two, as it was the easiest for me to see.
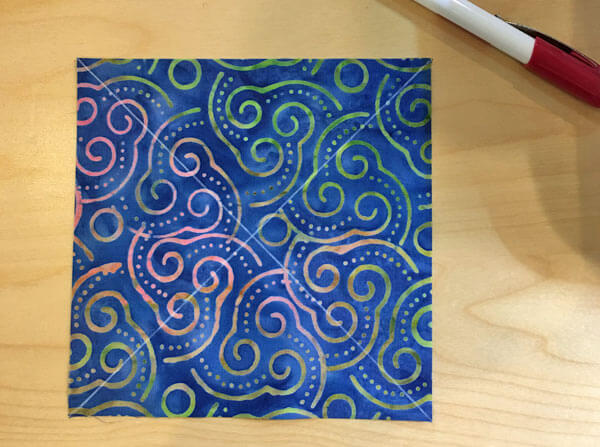
With your 1/4” presser foot installed, sew 1/4” away from both sides of both lines.
 The marked diagonal lines are used as stitching guides
After sewing, press the squares flat and then move to your cutting mat.
To cut #1/#2 patch into four equal size squares, find the Center Measurement that corresponds to your Finished Size in the chart below.
HST Dimensions | ||
|---|---|---|
| Finished Block Size | Center Measurement | Trim HST to… |
| 7" | 2⅛" | 1½" |
| 10½" | 2⅝" | 2" |
| 14" | 3⅛" | 2½" |
Line up that measurement on your ruler with the edge of your block (yellow arrow). For the 10½" sample, it's 2⅝” (yellow arrow below)
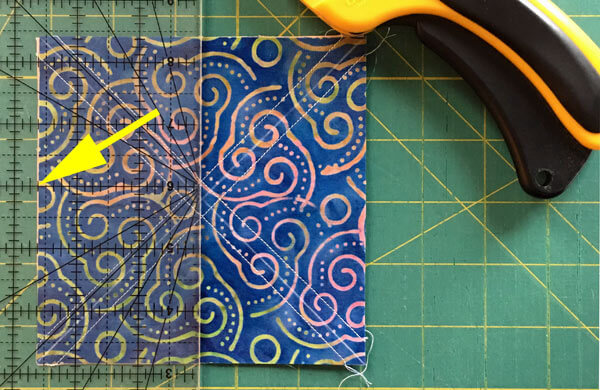
Cut through the center.
Turn your mat a quarter turn and repeat the process to create your four squares.
Cut each apart on the diagonal line. Here are your eight HSTs all ready to be pressed with SA toward the darker fabric.
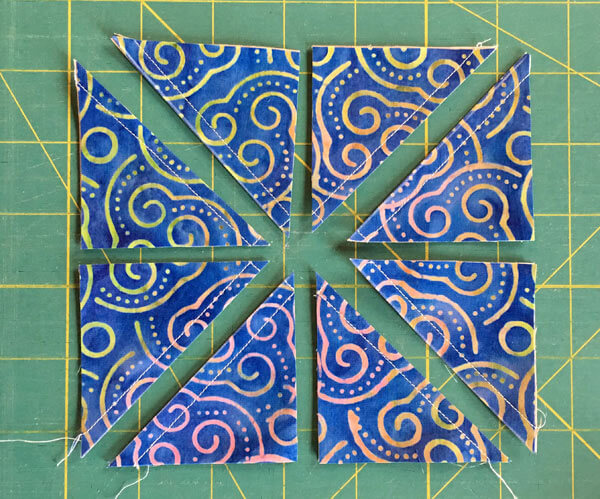
Refer to the chart again. Trim your HSTs to the size that corresponds to your finished block size.
For our 10-1/2" finished sample, they are trimmed to 2"x2”.
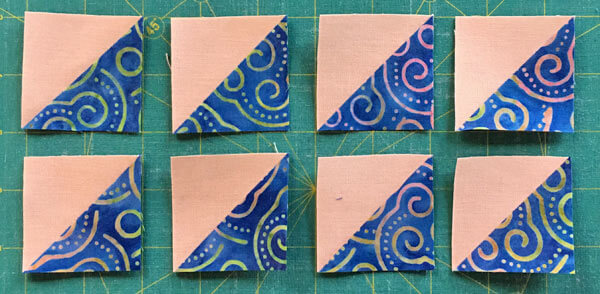
To complete our Bow units, with RST, sew a #3 to the HST with the #1 side of the HST as shown below.
The SA is pressed to the #3 square.
Repeat for a total of 8 pairs.
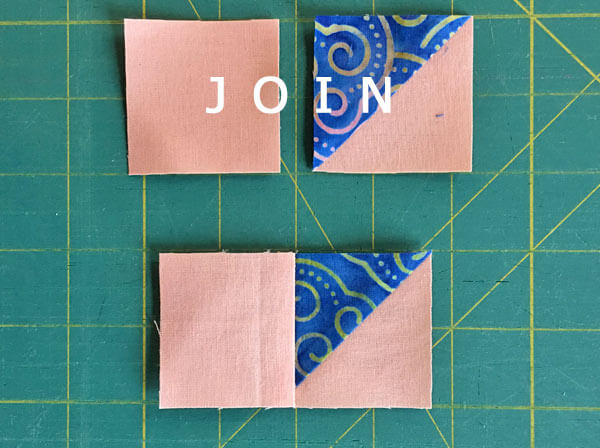
Join two #1/#2/#3 to form a Bow Tie.
To minimize bulk, I twirled or fanned the SA in the center by loosening a few stitches (don't cut the thread tails, just leave them).
Finally, press the SA counterclockwise around the units.
 Two #1/#2/#3 ready to stitch together (left), after sewing (middle), with the SA twirled counterclockwise (right)
Triangle in a Square Units (TiaS)
Make 4
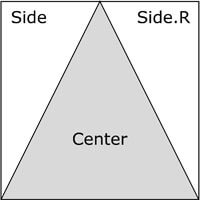
I'm a firm believer that you shouldn't have to buy a specialty ruler simply to try out a block or make a one-off for a sampler-type quilt.
Sew...
...to make our TiaS we use the paper piecing technique.
First we need to get our patches ready by subcutting them.
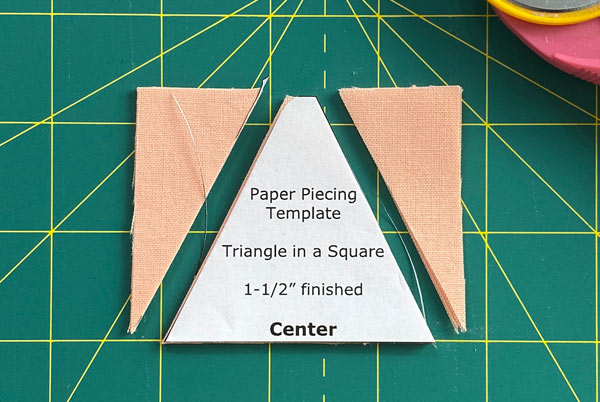
At the cutting mat, stack the four Center Squares. Lay the Center template that you printed on top. The flat top and bottom edge should align with the top and bottom of the square.
With your rotary cutter, cut away the excess. (Close is good enough for this subcutting.)
Now for the four Side/Side.R rectangles. In order to get the mirror image patches needed to construct the unit, layer your four patches in pairs of RIGHT SIDES TOGETHER.
Orient this stack so that the shorter sides are at the top and bottom.
ONLY the 1" finished Tias is different. For that size, the longer 2-3/8" sides should be on the top and bottom.
On the top edge, make a tick mark 5/8" in from the left side. On the bottom, make a tick mark 5/8" in from the right side.
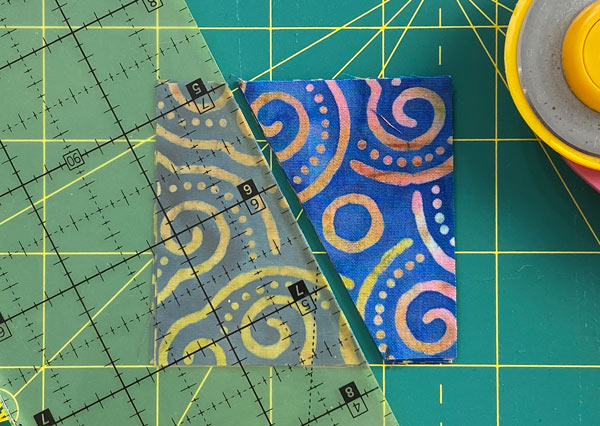 REMEMBER: To get the mirror imaged patches you need, these rectangles must be layered in pairs of RST patches
Line up your ruler with the marks at the top and bottom edge and cut the rectangles in two.
Your resulting pile of patches looks like this after cutting.
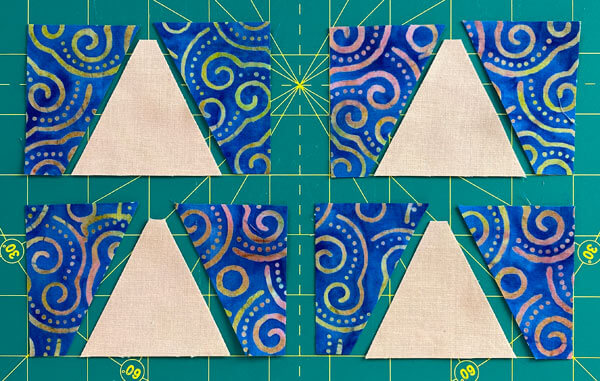 Though it's hard to tell with a batik, these patches are all right sides up
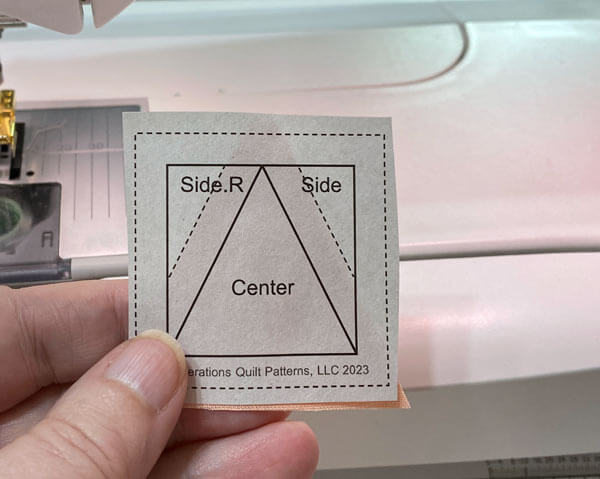
Back at your sewing machine, use a dot of Elmer's Washable Glue stick on the unprinted side of the pattern to hold the Center in place. Use those dashed lines to help you quickly and confidently position it.
General Sewing Machine Setup for Paperpiecing
- Reduce your stitch length to 16–20 stitches per inch (1.3-1.6 mm). This perforates the paper and stabilizes the seam when you remove the pattern. [Learn more about stitch length here.]
- Reduce your machine's speed or just plain slow down. Sew only as fast as you can stay on the stitching lines.
- Install an open toe appliqué foot (sometimes called an 'embroidery' or 'satin stitch' foot) if you have one (it's easier to see where you're stitching with one installed).
- Use a larger needle (90/14) if you have problems removing the pattern.
- If your machine has a needle stop up, use it. The stitching goes faster when you don't have to lift the presser foot with every seam.
- As you stitch each seam, start and stop a generous 1/4” before and after the solid stitching lines. ALWAYS. Future lines of stitching secure the ends.
After adding each patch, press the unit as it was sewn to set the seam and then open. The SA is automatically pressed towards the last patch added.
Before adding the next patch, take a look to make sure the one you just added covers the space plus seam allowance that it is supposed to.
Steam is optional and usually curls the pattern.
If that bothers you, don't use steam. Sometimes I do. Sometimes I don't.
It truly depends on my mood.
Remember, as you follow this paper piecing tutorial, the printed and the fabric sides of this block are mirror-images of each other.
At last!
Let's sew!
With RST, layer a Side (you can add either side first, it will not affect the outcome of your TiaS).
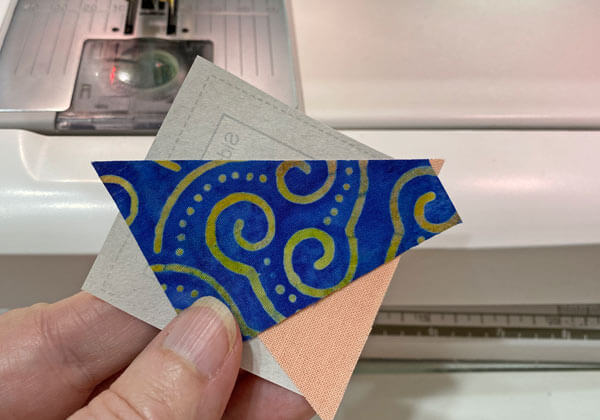
Sew the seam starting and ending past the outside edges of the block
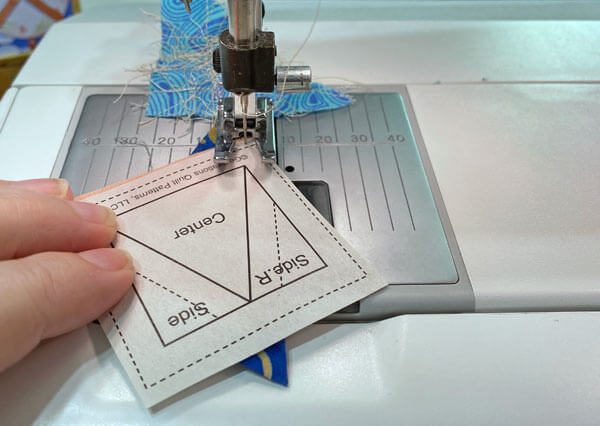
Press.
Repeat for the second Side patch.
Press.
Once all the units are sewn, let's trim this TiaS to perfection.
Back at the cutting mat, with a 1/4" line on your ruler on one of the solid lines that surrounds your TiaS, cut away the excess.
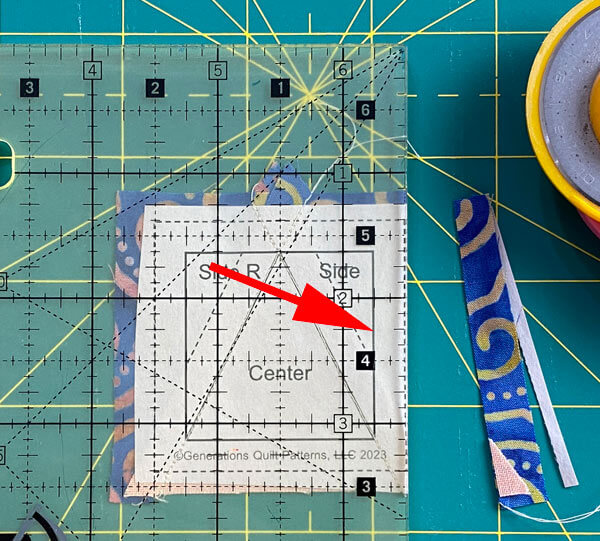
Repeat for all four sides of all four TiaS.
An untrimmed versus a trimmed TiaS.
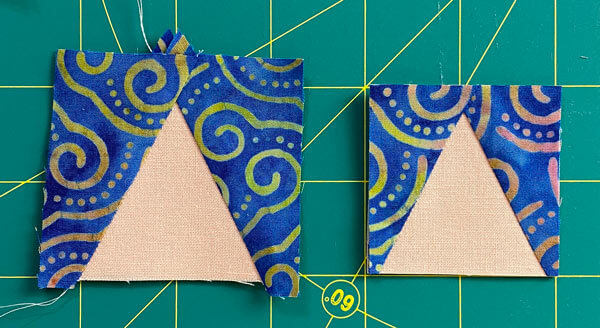 Hot mess vs perfection! So easy to do with paper piecing!
The paper piecing is complete. From this point forward, return your stitch length to the one you regularly use for piecing and install your favorite 1/4" presser foot.
Center

Make 1
Add a #4 to the right side of two bow units (BU). Make sure the HSTs are in the same position in your piecing.
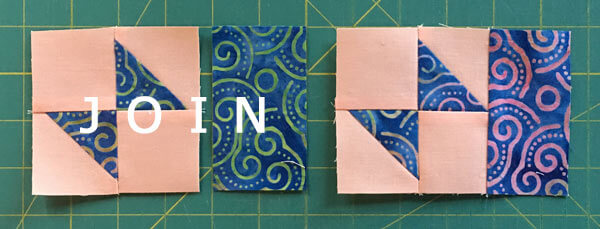 Make 2
Add a BU to the right side of the #4 rectangle. Again, taking care that the HSTs are in the direction as shown below.
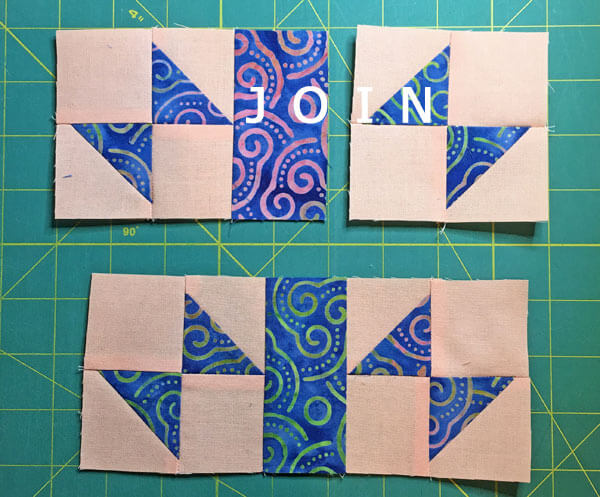 Make 2
With RST, stitch the units in each row together, pressing the SAs towards the #4s in each row.
Stitch a #4 to opposite sides of the #5 square.
 Wow. That pattern in the fabric matched pretty good on the left side, didn't it?!!
Press with the SA away from the #4s.
Stitch the rows together, using the nesting seams to help align the patches. Pin as needed—I always do. :)
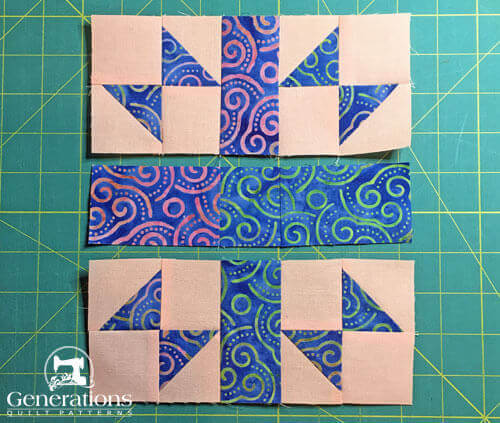
The center looks something like this after stitching. A nice-looking design already, eh?!!
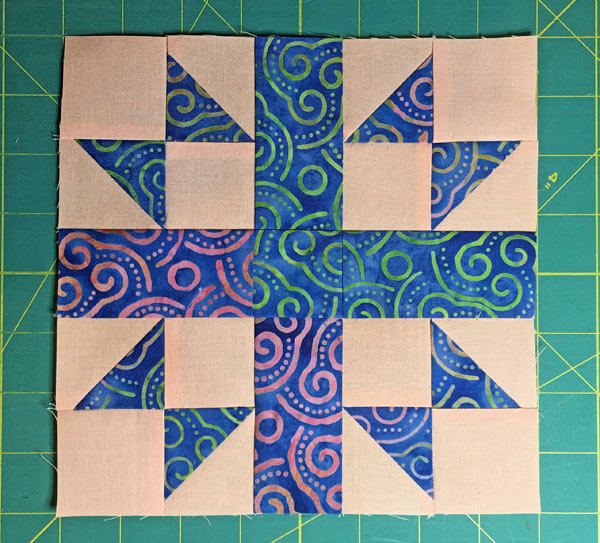
Remember earlier I'd mentioned using a variegated batik?
After finishing this block, if I was making more, my OCD personality would make me restitch this so that the red/blue portion alternated with the green/blue around the center.
It's the only place in the block where it bothered me.
What would you do?
A Note from Julie...
So, why not just cut the center row (2-#4s and #5) as one long strip, you ask?
By piecing in the #5, it's much easier to keep the Bow Units perfectly aligned. The #5 creates the accurate spacing.
Sides
Make 4
 Side unit
With RST, add a #4 to each side of your TiaSs.
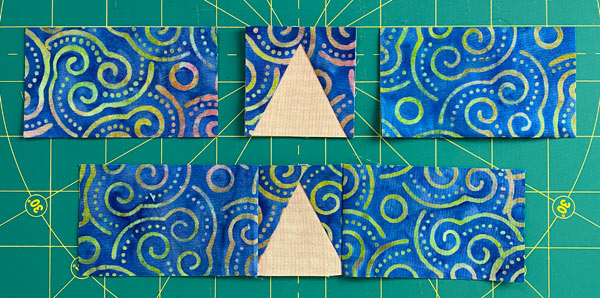
SAs are pressed toward #4 to avoid bulk.
Step 3: Assemble your Diamond Cross quilt block
Arrange the patches to create the Diamond Cross design as shown below.
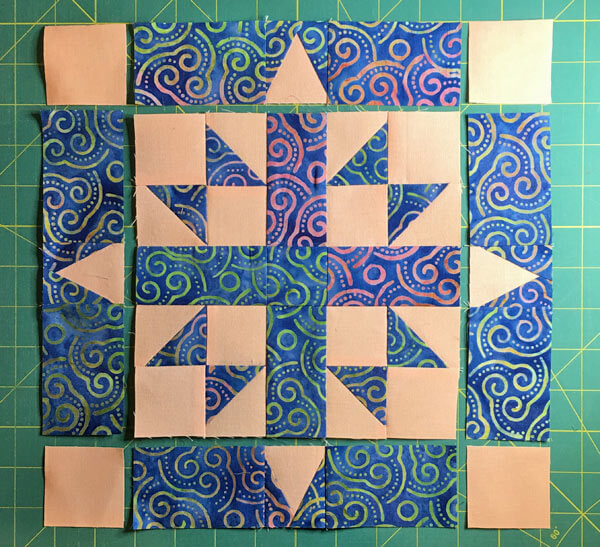
Stitch the units in each row together, pinning as neccesary to ensure a good match where the bottoms of the TiaSs meet the #4 rectangles.
Check out my article on creating 'Perfect Points' for a refresher.
Press these SAs toward the #4 rectangles to reduce bulk.
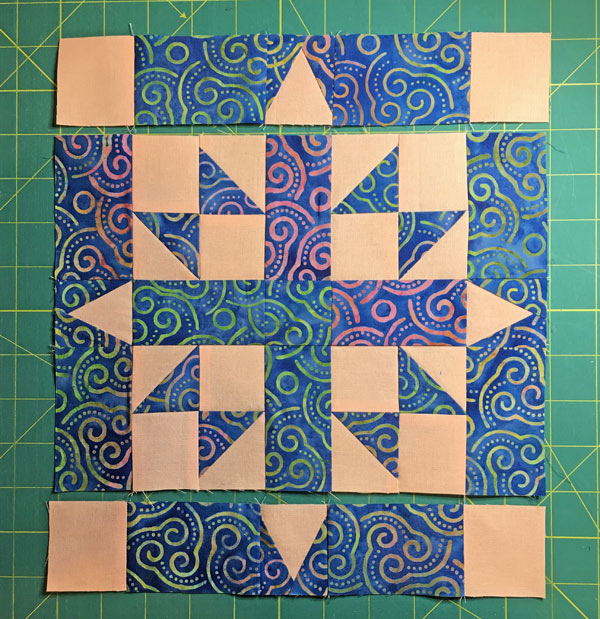
Stitch the rows together.
Press the last two SAs out from the center toward the sides to minimize bulk.
Your Diamond Cross is finished!
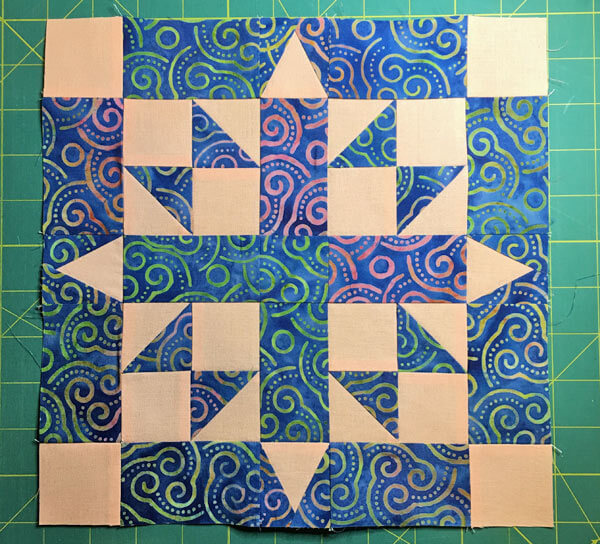
This is really a spectacular block, isn't it.
Here is our sample Diamond Cross from the back side to show how all the seams were pressed.
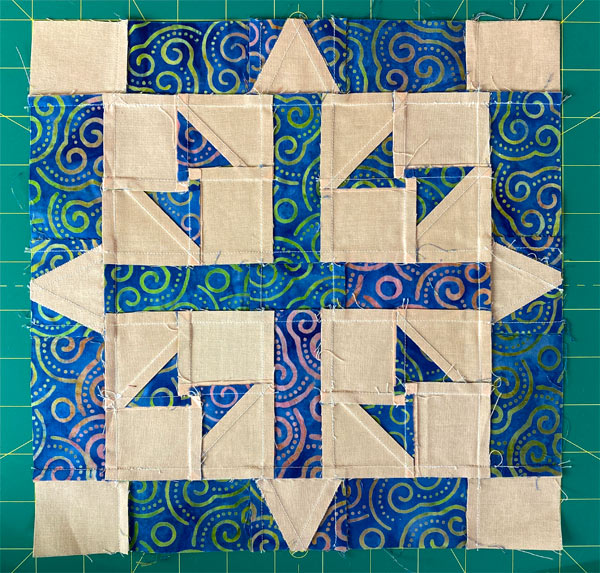
As you can see, I wasn't always so 'perfect' getting the Centers of the TiaSs centered nicely. (That's why I've added dashed guidelines to the paper piecing patterns—makes life so much easier.)
The lesson is, it doesn't always have to be perfect to make you happy.
Enjoy your quilting journey!
What about a different quilt block?
For a list of all the 220+ quilt block patterns on this site, start here.
If you know the name of the block, shorten your search by using these links:
Click here if you're looking for blocks with at least some paper piecing.
Click here if you're looking for the basic building blocks of quilting, i.e., Flying Geese, half square triangles, quarter square triangles, etc., along with several techniques to make each.
And finally, use these links to find blocks in these finished sizes:
- Home
- Free Quilt Block Patterns
- Diamond Cross Quilt Block
