- Home
- Free Quilt Block Patterns
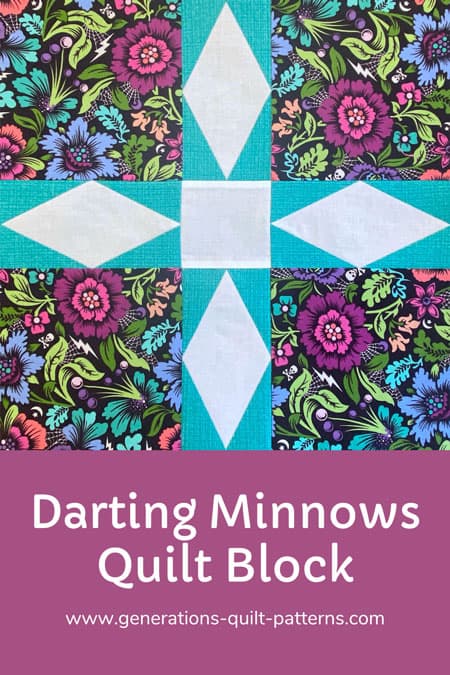
- Darting Minnows Quilt Block
Darting Minnows Quilt Block Tutorial: 5", 7½", 10", 12½" and 15" finished
From our Free Quilt Block Patterns Library
This post contains affiliate links, for which I receive compensation.
Looking for an eye-catching quilt block that comes together quickly?
Meet our Darting Minnows quilt block—with its bold angles and fluid movement, this lively star pattern is sure to brighten up any quilt.
The best part?
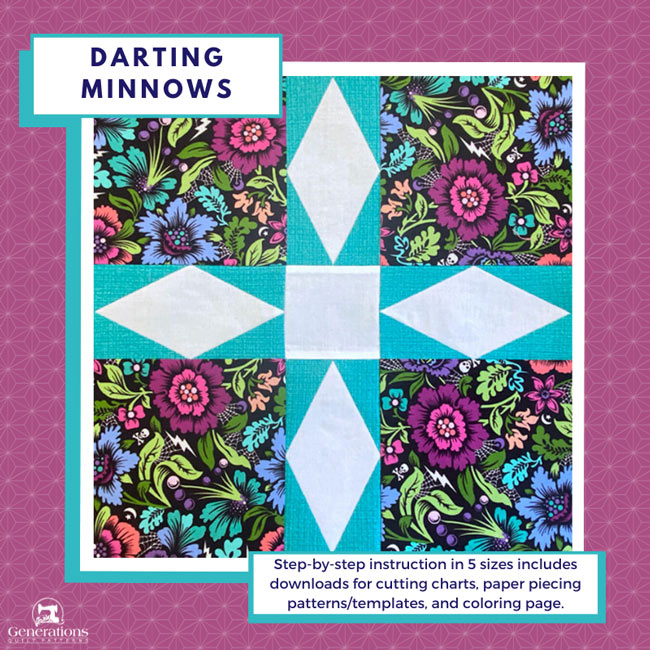
You can whip up this unique design in just a few easy steps.
Before you know it, you'll be making waves with this striking block!
Stitch up some magic and let Darting Minnows bring pops of color dancing across your next quilt.
As always, beginner-friendly, illustrated instructions are the backbone of the tutorial. There's more free goodies available for you to download to help you. They are:
- No time to quilt? Pin or bookmark this to make later
Cut. Sew. Press. Turn your fabric into MAGIC!
General Instructions
Several abbreviations are used on this page. They are:
- SA - seam allowance
- RST - right sides together
- DR - Diamond Rectangle
A 1/4" SA is used in this tutorial.
Highlighted in yellow, pressing instructions are easy to spot.
To press, first press the patches in the closed position as they came off your sewing machine. This sets the seam, melding the fibers of the threads into the fibers of the fabric.
Then press the SA to the dark unless otherwise noted.
Download and print the paper piecing patterns and template
To download the pattern, use the most current version of Adobe.
For accurate results, on Adobe's Print Menu page, under 'Page Size and Handling' set 'Custom Scale' to 100%. Then print.
Click here to see what it looks like on the Print Menu page.
Find your finished block size from the chart below. Print the corresponding number of pages for a total of 4 Diamond Rectangle (DR) units.
Print Diamond Rectangle | |||
|---|---|---|---|
| Pattern | Templates Print 1 copy | ||
| Darting Minnows Finished Block Size | # of Copies to Print | DR Finished Size | 5" | 1 | 1"x2" | Print 1 |
| 7½" | 1 | 1½ x 3" | |
| 10" | 1 | 2"x4" | |
| 12½" | 2 | 2½"x5" | |
| 15" | 2 | 3"x6" | |
After printing, use the 1" square graphic on the printed page(s) to double-check that your patterns printed at the correct size.
Then cut out the required number of patterns from your copies. A rough cut is good enough—an 1/8"-1/4"-ish away from the outside dashed rectangle.

Not sure which paper to use?
Take a look at my review of several of the most popular brands available to us quilters on the market.
You want a super-easy paper to tear away—less stress on the stitches.
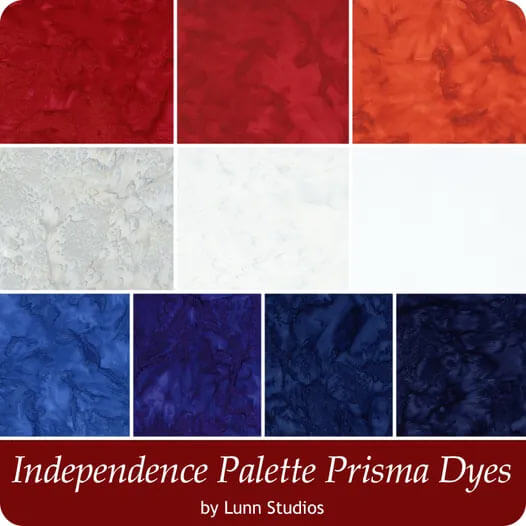
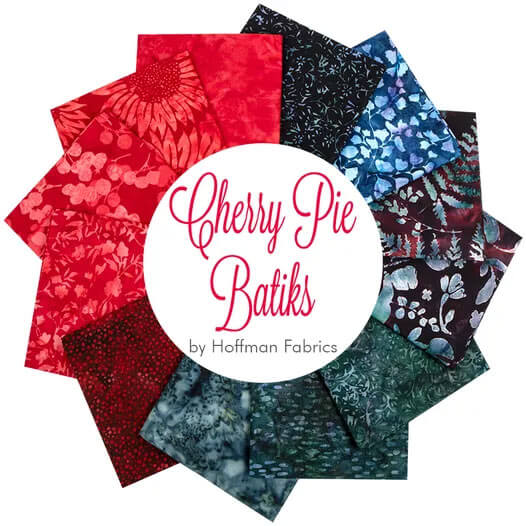
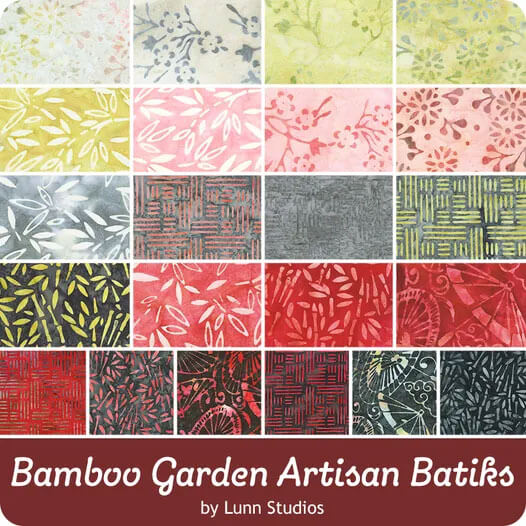
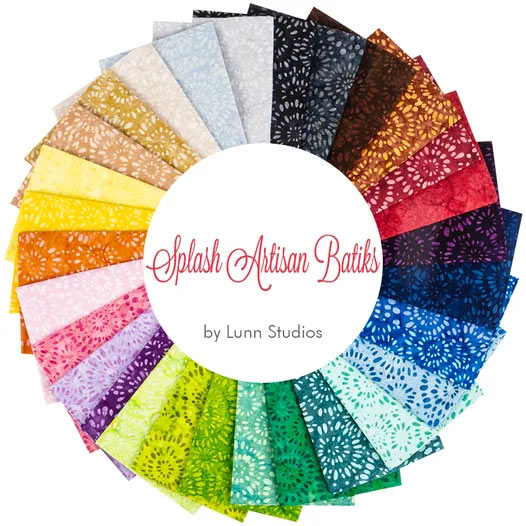
The newest quilt fabrics to tickle your fancy...
Click the images below to see the full collection. We share any commercial and/or free patterns that showcase them, too. (For inspiration, of course!)
✂️ Cut the patches for your Darting Minnows
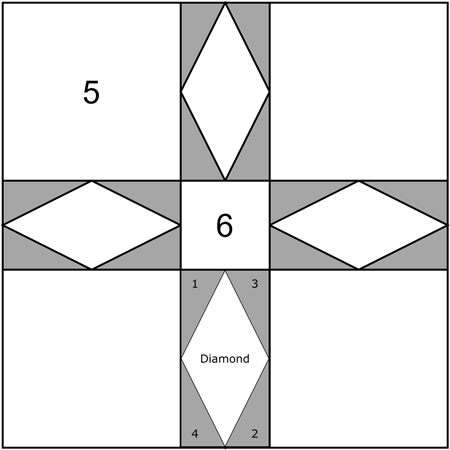 Darting Minnows quilt block
Sample Block Size: 15" finished / 15½" unfinished
Grid: 5x5
Design Type: Uneven 9-patch, small center | Paper Piecing | Star
I'd gone fabric shopping on a Friday afternoon, and lucked into one of our local quilt shops offering $1 off EVERY fat quarter. So I treated myself...like any quilter would. Seriously, you know how it goes, when it's a good deal, you just start pulling fabrics.
When I got home, I saw this one and really fell in love with the colors and the pattern and knew I needed a block with some big patches to showcase it. The tutorial for the Diamond Rectangle had gone up just that week and I wanted to have a block for you to have a reason to make some of those units.
That's how Darting Minnows came to life. :)
BTW, the print is from the Deja Vu Nightshade collection by Tula Pink, called Equinox Spider Blossom. (Did you catch the little skull and cross bones?)
Label your patches, you'll use them throughout this tutorial.
To print a copy of the block design and cutting chart to use at your cutting table, click here.
 | Cutting Chart for a~ Paper & Traditional Piecing ~ | ||||||
|---|---|---|---|---|---|---|---|
| Patch | Fabric | Qty | Finished Block Size | ||||
| 5'' | 7½'' | 10'' | 12½'' | 15'' | |||
| 1, 2, 3, 4 | Medium | 8 | 2⅜'' x 2¼'' | 2⅝'' x 2¾'' | 2⅞'' x 3¼'' | 3⅛" x 3¾" | 3⅜'' x 4¼'' |
| 5** | Light | 4 | 2½'' x 2½'' | 3½'' x 3½'' | 4½'' x 4½'' | 5½'' x 5½'' | 6½'' x 6½'' |
| 6 | Light | 1 | 1½'' x 1½'' | 2'' x 2'' | 2½'' x 2½'' | 3'' x 3'' | 3½'' x 3½'' |
| Diamond | Light | 4 | 1½'' x 2½'' | 2'' x 3½'' | 2½'' x 4½'' | 3'' x 5½'' | 3½'' x 6½'' |
| Unfinished Block Size | 5½'' | 8'' | 10½'' | 13'' | 15½'' | ||
| Grid Size | 1'' | 1½'' | 2'' | 2½'' | 3'' | ||
**For our sample block, I made an executive decision and used a dark for the #5 patches. Remember. YOU are the designer.
Subcutting the Diamond Rectangle patches
Layer the eight #1-#4 rectangles in pairs of RST. Line up all the edges into a neat stack.
With a pencil, make a mark 5/8" in from the top left and bottom right edges (red arrows). Double-check that the width of the rectangle is at the top and bottom.
NOTE: Only the #1-#4 patches for the smallest, 5" finished block, are shorter than they are wide by an 1/8".
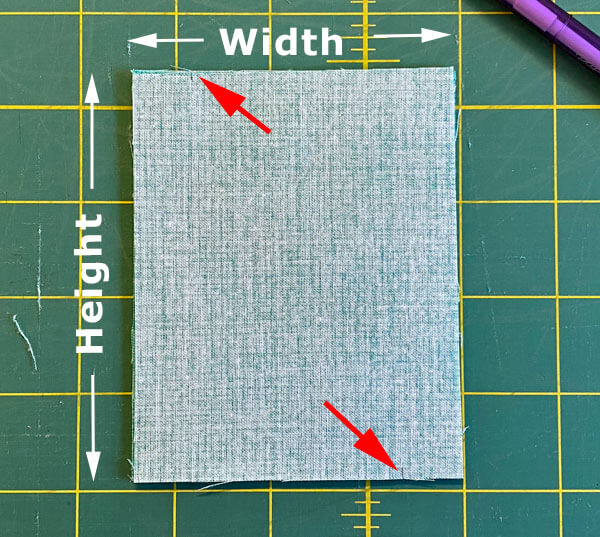
Line up the edge of your ruler with these marks and cut all four in half.
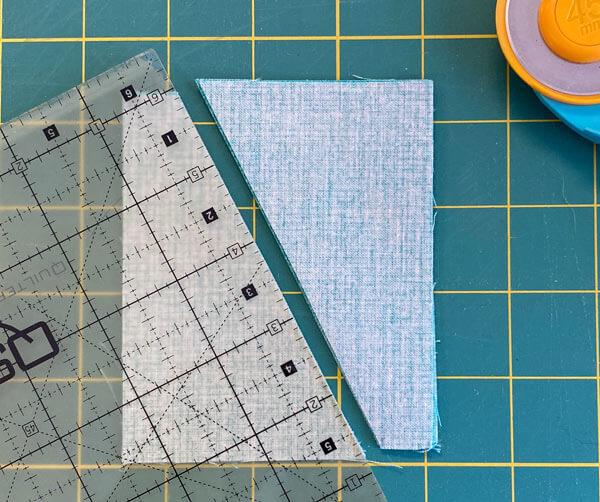
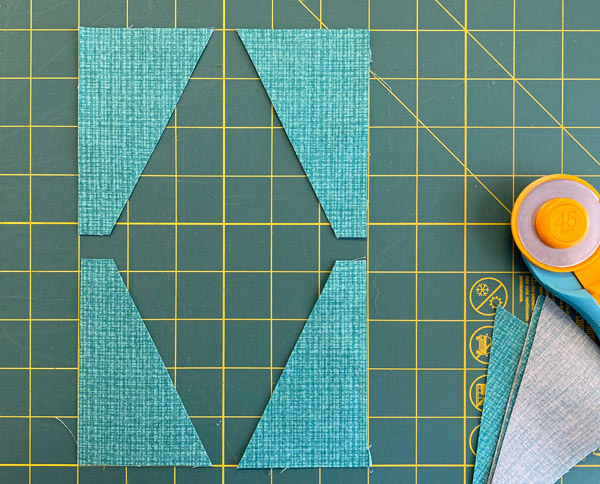
You should now have 4 groups of mirror image patches that look like this:
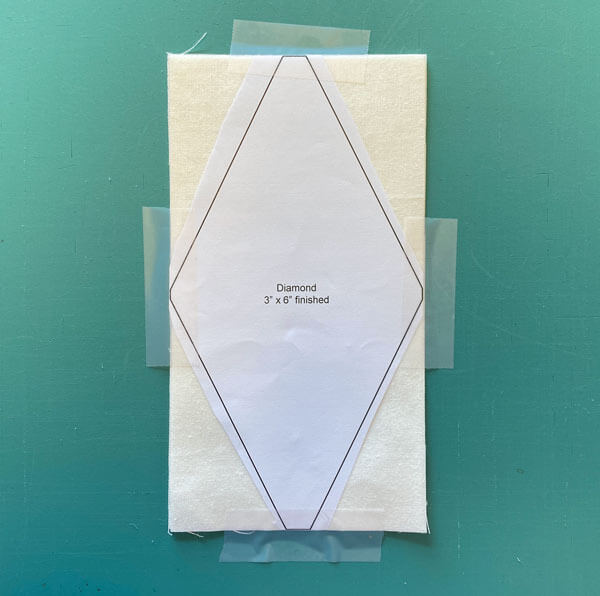
Cut out the Diamond template—exactly on the short straight lines at the top, bottom and side edges. Along the diagonals, neatness doesn't score you any brownie points. A rough cut will do.
Layer the Diamond fabric rectangles. They can be right or wrong side up. This patch is symmetrical, so it doesn't make a difference for this shape.
I've used some removable tape to help hold the template in place while cutting. It's easy to peel off the mat when you're finished.
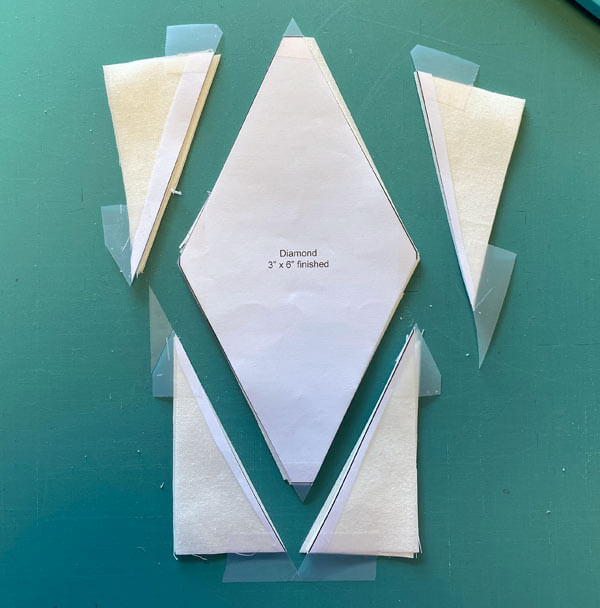
Cut away the excess fabric with your rotary cutter.
Voila! The Diamonds are ready, too.
We need to make a few adjustments to our sewing machine settings to paper piece.
- Reduce your stitch length to 16–20 stitches per inch (1.3-1.6 mm). This perforates the paper and stabilizes the seam when you remove the pattern. [Learn more about stitch length here.]
- Reduce your machine's speed or just plain slow down. Sew only as fast as you can AND stay on the solid stitching line.
- Install an open toe appliqué foot (sometimes called an 'embroidery' or 'satin stitch' foot) if you have one (it makes it easier to see where you're stitching).
- Use a larger needle (90/14) IF you have problems removing the pattern. Personally, I use an 80/12 Microtex Sharp for paper piecing without any issues.
🪡Assemble the Diamond Rectangles
Make 4
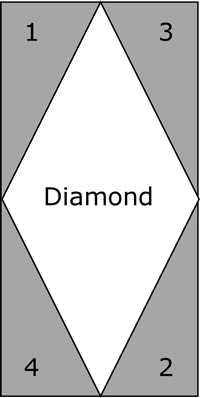 Diamond Rectangle
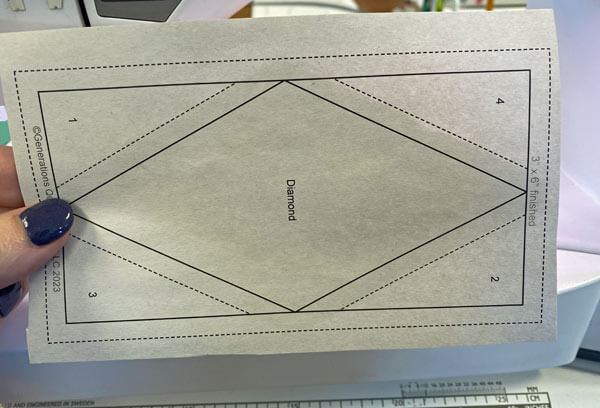
Use a dot of Elmer's Washable Glue Stick to hold the Diamond patch in position between the dashed guidelines on the unprinted side of each pattern.
You can just make out the shadow of the patch in the photo below.
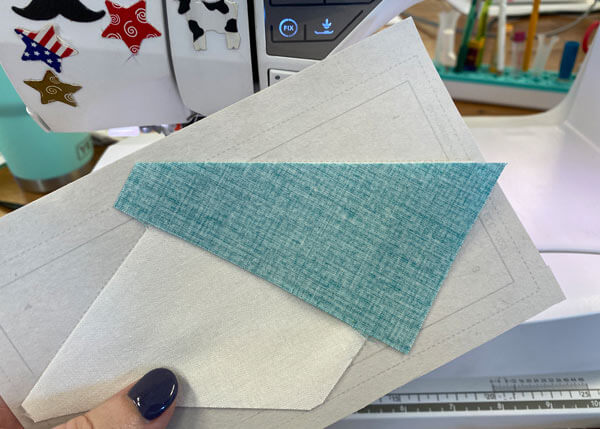
With RST, match the long bias edge of #1 with the corresponding side of the Diamond. The patches you cut are generously sized to make it as foolproof as possible to position them correctly the first time. Note the overhang of the #1 below.
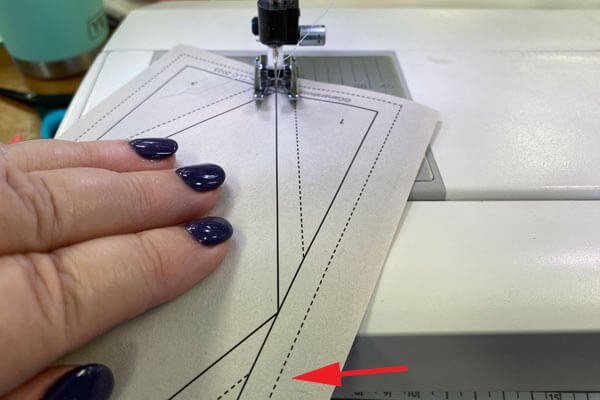
Stitch from the printed side, starting and ending (red arrow) past the outside dashed rectangle that surrounds the patch.
Since these seams run from one edge to the other, you can chain piece these seams. A time-saver for sure! (Who knew there was chain piecing in paper piecing, eh?!!)
For the smaller DRs you'll want to press after adding each one—they're too small to get your iron into.
But with this large 3"x6" DR in our sample, add the second side triangle, #2, to the opposite side of the Diamond. Stitch as before.
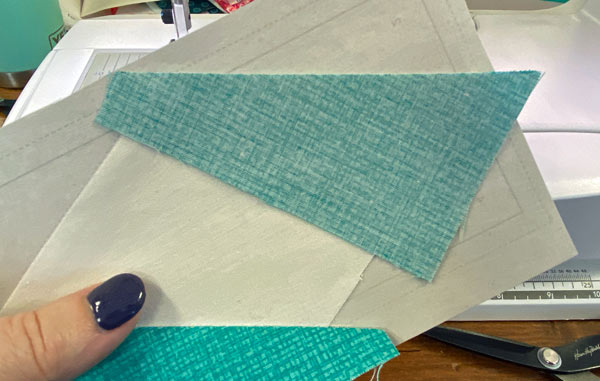
Press.
Repeat these steps for #3 and #4.
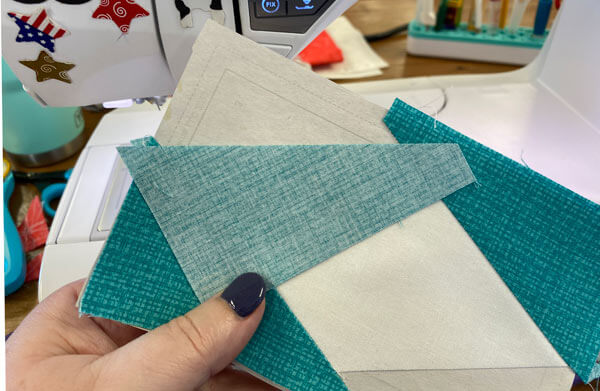
Once all four side triangles (#1-#4) are stitched, give all your DR a good press.
At your cutting mat, position the 1/4" line of your ruler over the solid line that surrounds the DR (red arrow) and trim away the excess.
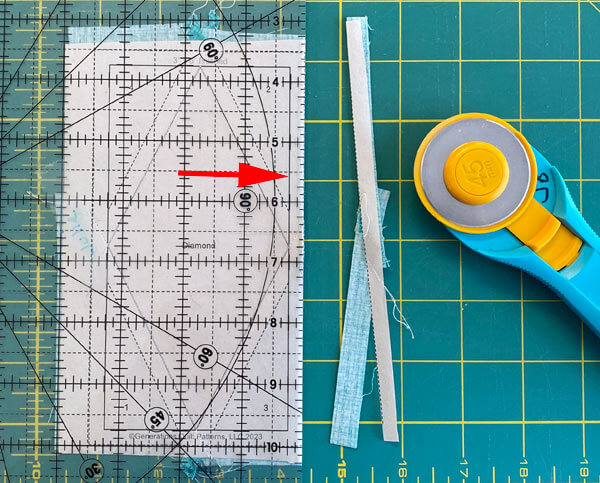
Repeat for all the sides on all four units.
Here's an untrimmed (below left) versus a trimmed (below right) DR. They sure clean up nice, don't they?
Since we took the time to stitch on the line, all those pointy-points are exactly 1/4" away from the edge. That'll make putting our block together easy-peasy!
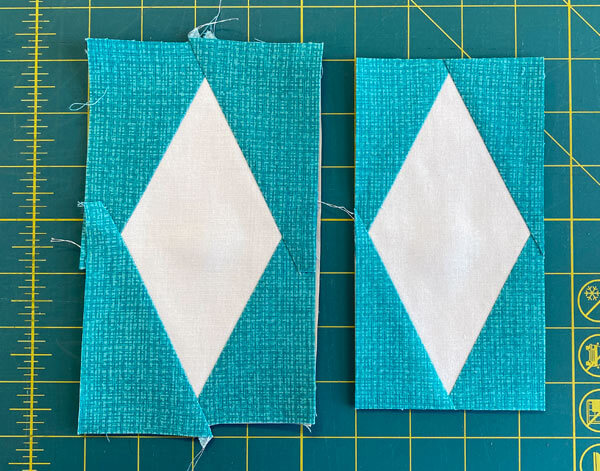
Remove the paper from all the DRs.
Since the side triangles were subcut from rectangles, all the outside edges of our units are on the straight of grain. They are a stable edge just as on any traditionally pieced block.
The paper no longer serves a purpose.
The paper piecing is complete. From this point forward, return your stitch length to the one you regularly use for piecing and install your favorite 1/4" presser foot.
🧩 Assemble the Darting Minnows quilt block
Arrange the cut patches and DRs to form the Darting Minnows quilt block—solid square in the corners.
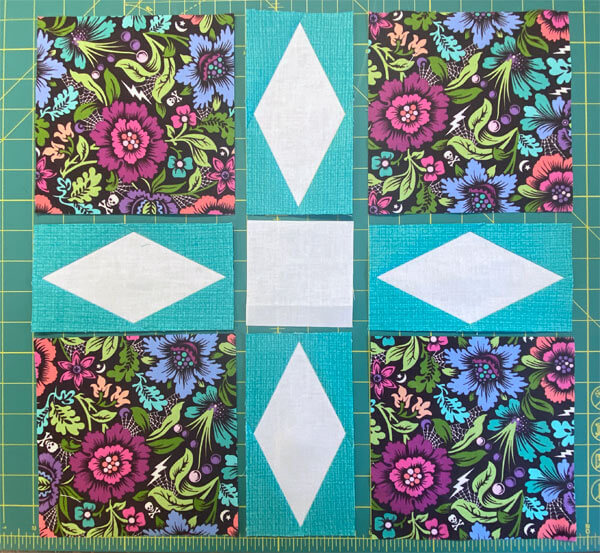
With RST, stitch the units in each row together.
Press the SAs away from the DRs, and towards the #2 in the center row.
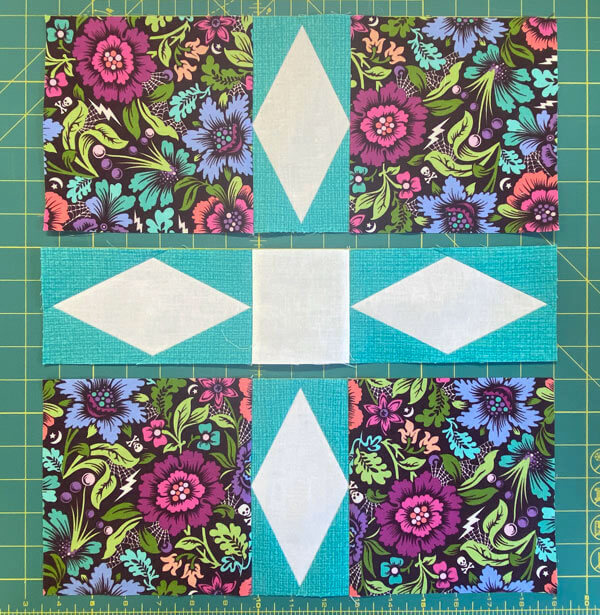
Finally, sew the rows together, pinning as necessary to help keep the edges even.
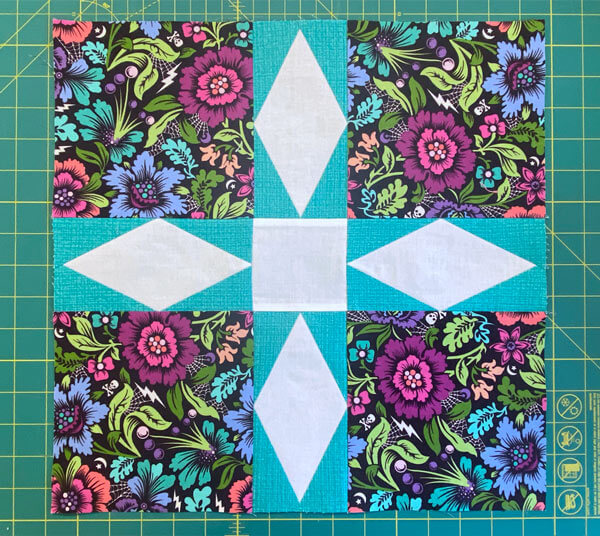
Here's the block from the unfinished side. SAs all nice and neatly pressed.
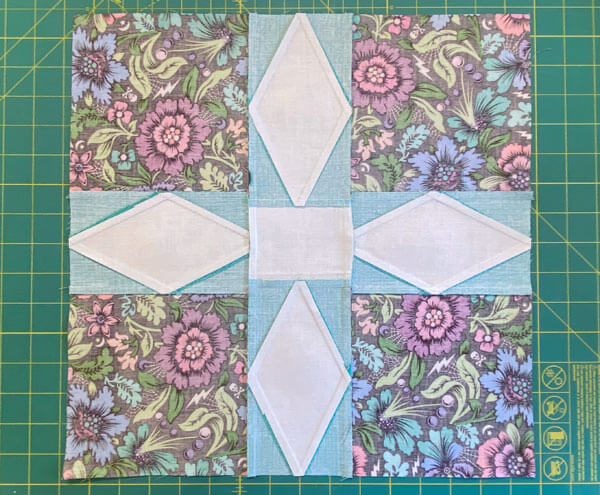
With just some basic tools, a bit of fabric, and our easy tutorial, you'll be stitching up the lively Darting Minnows block in no time! No specialty rulers required—this beginner-friendly block comes together with simple cutting and piecing.
Just follow our illustrated steps for painless paper piecing.
Before you know it, you'll have a stack of striking diamonds ready to dart across your quilt.
With our handy cutting chart to guide you through sizing, getting the perfect fit is a cinch.
Whether you're new to quilting or an experienced stitcher, Darting Minnows is a fun, budget-friendly way to wow with movement and color.
So grab some scraps and let this electric star inject your next project with pops of pizzazz!
📌 Hooked on this design? 🎣
🎣 Hooked on this design? Pin the Darting Minnows quilt block tutorial and reel it in when you're ready to make waves in your quilting! 🏄♀️🧵
🔭 Looking for something truly stellar?
You've finished your star quilt block, and you're ready for more!
Browse our collection of 60 stellar star quilt block patterns. All have instructions and cutting charts in multiple sizes. If templates or paper piecing is used in the tutorial, there's a free download for you of those materials.

Eeny. Meenie. Miney. Moe.
Which star quilt block will you sew?
For a star-studded quilting experience, choose from 100+ bedazzling star quilt patterns—for beginners and beyond—click here.
For even MORE blocks to make... 🧩🎨

...visit our Free Quilt Block Pattern Library, with over 230+ blocks to choose from in multiple sizes.
Free downloads are included in all sizes for any blocks require paper piecing patterns or templates.
- Home
- Free Quilt Block Patterns
- Darting Minnows Quilt Block
