- Home
- Free Quilt Block Patterns
- Crows Foot Quilt Block
Master the Crow's Foot Quilt Block
From our Free Quilt Block Patterns Library
This post contains affiliate links, for which I receive compensation.
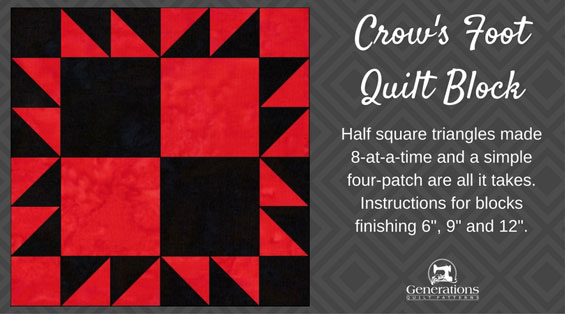
The Crow's Foot quilt block is quite dynamic!
Not because the piecing is difficult, but rather due to its use of color.
Other than that, all there is to it are half square triangles (which we'll make 8 at a time to streamline the process) and a simple four patch.
Truly, it's that straight forward. Just as the crow flies.
Let's begin!
📋 General Instructions
1/4" seam allowances are used throughout.
Seams are pressed toward the darker fabric unless other wise noted.
Several common abbreviations are used in this Crow's Foot tutorial:
- SA - seam allowance
- HST - half square triangle
- RST - right sides together
HSTs can get a bit lumpy. You may want to try out my favorite pressing technique to bend them to your will!
It's simple. It's quick.
And you'll have the flattest quilt blocks with virtually no effort!
The newest quilt fabrics to tickle your fancy...
Click the images below to see the full collection. We share any commercial and/or free patterns that showcase them, too. (For inspiration, of course!)
Step 1: Cutting for a Crow's Foot block
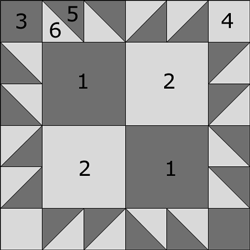 Crow's Foot design
Sample Size: 6" finished / 6½" unfinished
Grid: 6x6
Attributed to: Nancy Page
AKA: Large Star (Ladies Home Journal)
Design Type: 4-patch
Choose two fabrics with nice contrast.
For this sample's red and black fabrics, shadowing of the black fabric through the top of the red wasn't a problem.
However, if you're using a white or other light-neutral, you may want to grade the seam allowances a bit to ensure the darker fabric doesn't show through the top—especially where the seams are 'twirled'.
 | Cutting Chart for a~Traditional Piecing ~ | ||||
|---|---|---|---|---|---|
| Patch | Fabric | Qty | Finished Block Size | ||
| 6" | 9" | 12" | |||
| 1 | D | 2 | 2½" x 2½" | 3½" x 3½" | 4½" x 4½" |
| 2 | L | 2 | 2½" x 2½" | 3½" x 3½" | 4½" x 4½" |
| 3 | D | 2 | 1½" x 1½" | 2" x 2" | 2½" x 2½" |
| 4 | L | 2 | 1½" x 1½" | 2" x 2" | 2½" x 2½" |
| 5 | D | 2 | 4¼" x 4¼" | 5¼" x 5¼" | 6¼" x 6¼" |
| 6 | L | 2 | 4¼" x 4¼" | 5¼" x 5¼" | 6¼" x 6¼" |
| Unfinished Block Size | 6½" | 9½" | 12½" | ||
| Grid Size | 1" | 1½" | 2" | ||
Step 2: Create the units for the Crow's Foot quilt block
Four Patch
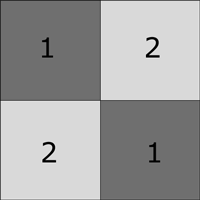 Make 1
Make 1
With RST and your favorite quarter inch foot installed, stitch a #1 to a #2.
Repeat for the second pair.
Press each pair as stitched, then open and press again with the SA to the dark.
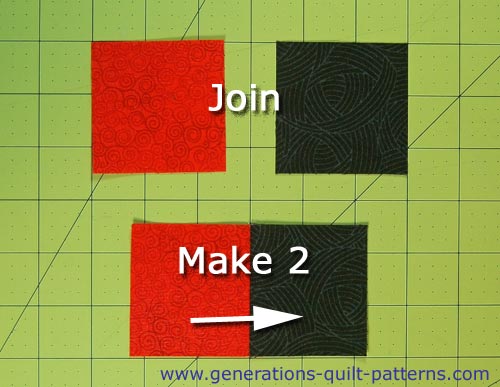
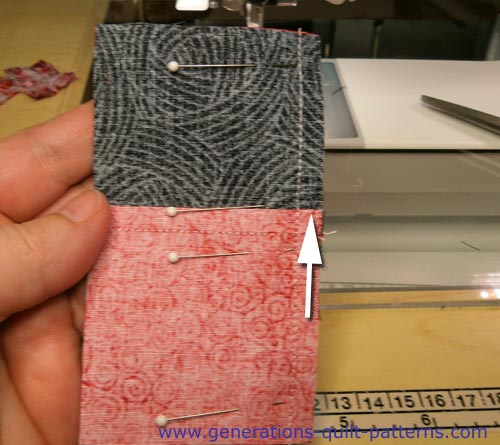
With RST, sew the pairs together alternating the colors.
I prefer to feed my patch into the machine with the SA on top pointing into the needle area (white arrow). There's less chance of it flipping over that way.
Pin if it helps you get a nice match where the seams meet.
To reduce the bulk, loosen the few stitches on the backside of the block in the SAs. (Don't cut off their thread tails, they are just a 1/4" long and won't be in the way. You need them for the stability of the block.)
Press again with the SA 'twirling' around the center in the same direction. Twice it goes to the light fabric—that's where you'll need to check if the darker fabric shadows through to the top.
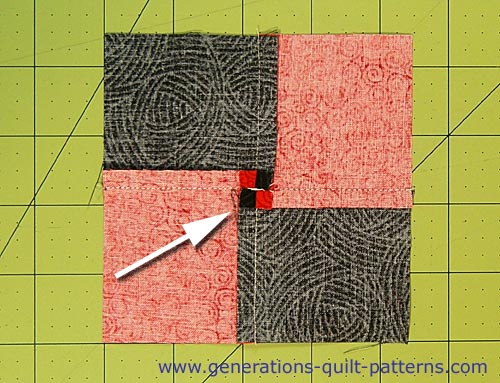 The Crow's Foot four patch is complete.
Half Square Triangles (HST)
Make 16
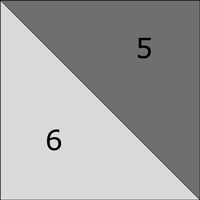 Make 16
For blocks like our Crow's Foot with multiples of 8 HSTs, the 8-at-a-time method is my hands-down favorite. [For more detailed instructions on this technique click here.]
Draw a diagonal line through both pairs of corners on the back side of the two #6 squares.
With your favorite quarter inch foot installed, stitch a quarter inch away from both sides of both lines for both pairs of #5/#6 patches.
After stitching your patches look like this.
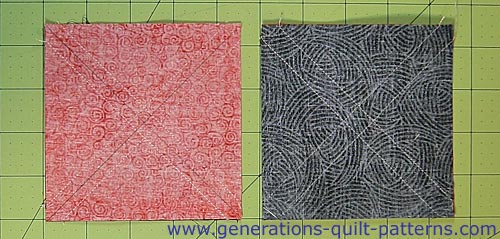 If you're using a white/light chalk marker, it's easier to mark the diagonals on the darker #5 patches.
Give the patches a quick press to set the stitches.
Now from the chart below find your Center Measurement for the finished block size you choose.
| Finished Block Size | Center Measurement | Trim HSTs to... |
|---|---|---|
| 6" | 2⅛" | 1½" x 1½" |
| 9" | 2⅝" | 2" x 2" |
| 12" | 3⅛" | 2½" x 2½" |
Align that ruler mark with the edge of the #5/#6 patch. Cut the unit in half from top to bottom.
For our 6" sample block, the measurement is 2⅛ (white arrow).
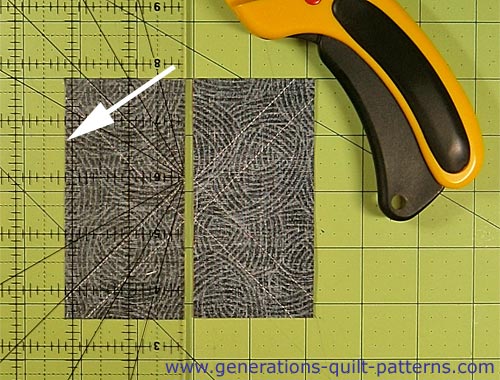
Now cut the #5/#6 in half using the same measurement from side to side.
If you can turn your mat, excellent. If you can walk around your cutting table, even better. If you must move your patches to turn them, just be careful lining them back up again before cutting in half again.
After this second cut, you now have four pairs of sewn #5/#6 squares that are equal to the Mid Point Measurement. (For the 6" sample that means four 2-1/8" squares.)
Cut each in half between the two diagonal lines of stitching to create 8 half square triangle units.
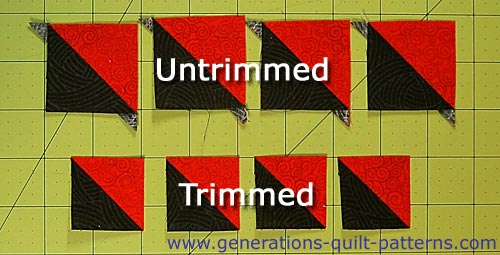
Repeat for the second #5/#6 pair for a total of 16 HST.
Referring back to the chart just above, find the 'Trim HSTs to' dimension that corresponds to your finished block size and trim all 16.
For the 6" sample that number is 1½".
Top, Bottom and Side Units
First we need to join pairs of HST together.
Use the diagram to join them correctly. It's easy to mistakenly get them swapped around.
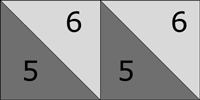 Make 8
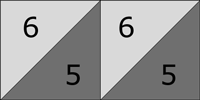 Make 8
After stitching, press toward the dark #5 patch.
Next join two pairs as shown below. The one on the right below is flipped from its position above.
Put these aside for the sides of your four patch.
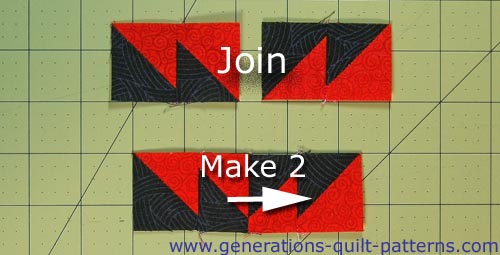
Join the remaining four pairs in the same manner. Press.
Add a #3 dark square to the #6 HST. Add a #4 light square to the #5 HST. (The colors are alternating all the way across this unit.
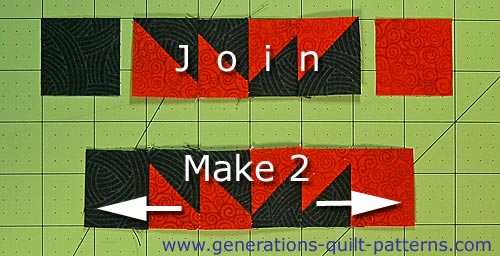 Press with the SA toward the outside edges
Step 3: Assembling the Crow's Foot block
Arrange your patches into the design. The smaller outside corner squares are the same fabric as the corresponding corner of the inner four patch.
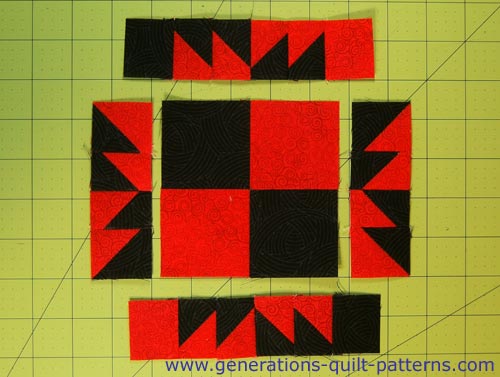
With RST, stitch the units in the center row together.
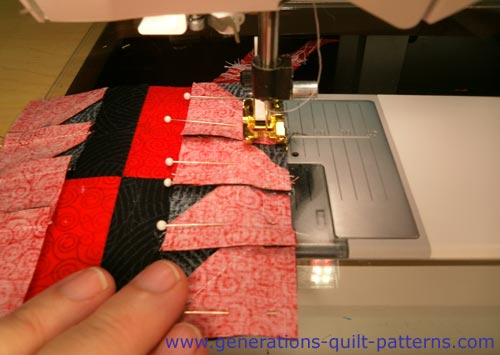 Use pins to help hold the patches together for perfect points.
Press the center unit, SA toward the center to reduce bulk.
HSTs can be a bit lumpy in the seam allowance. This is the perfect time to try my secret pressing technique.
Click here to see how easy it is to make your seams lie wickedly flat!
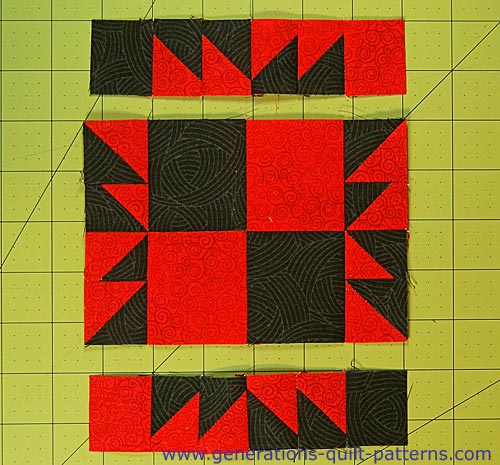
Stitch the rows together, pinning as needed—there's lots of points to match.
I chose to press these final two seams in towards the center, too.
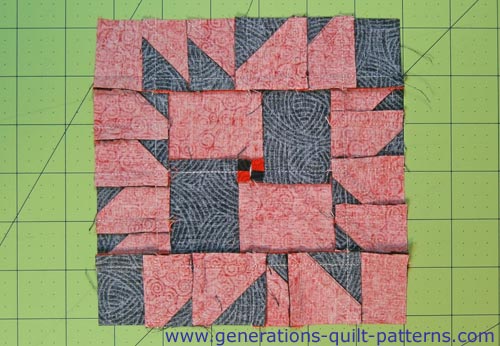
From the front, this is our completed Crow's Foot quilt block.
Isn't it amazing how simply playing with the color placement can have such a big impact?!!
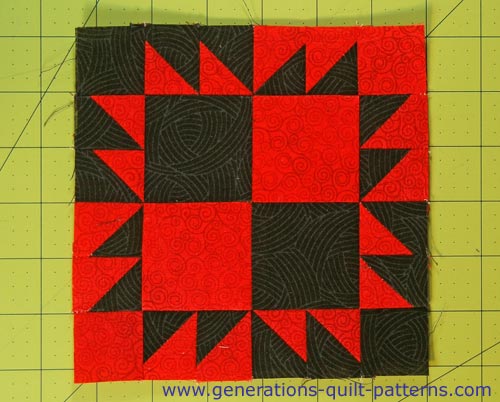 Crow's Foot quilt block
Another block that plays with color in much the same way is the 'Massachusetts'.
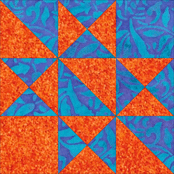 Massachusetts block
Again, nothing but standard units. This time it's HSTs, quarter square triangles and two cut squares. Click here for the instructions to make it.
Easy Peasy!
And finally.
Just because the sample was set up as a two fabric block doesn't mean you can't make all your blocks totally scrappy.
Simply make sure that's there's plenty of contrast between your light and dark fabric selections.
It'll be stunning.
What about a different quilt block?
For a list of all the 220+ quilt block patterns on this site, start here.
If you know the name of the block, shorten your search by using these links:
Click here if you're looking for blocks with at least some paper piecing.
Click here if you're looking for the basic building blocks of quilting, i.e., Flying Geese, half square triangles, quarter square triangles, etc., along with several techniques to make each.
And finally, use these links to find blocks in these finished sizes:
For even more blocks to make...
For you, are quilt block designs like potato chips...
...you can't have just one?!!
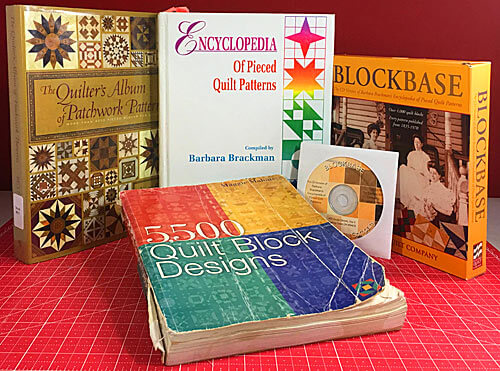
Check the amazing resources I rely on for all the quilt block designs you see on this website.
To see if they're worthy of a spot in YOUR quilting library, CLICK HERE.
