- Home
- Free Quilt Block Patterns
- Crown and Thorns Quilt Block
Crown and Thorns Quilt Block
Instructions Written for the Beginning Quilter
This post contains affiliate links, for which I receive compensation.
Skill Level: Confident Beginner
The Crown and Thorns quilt block with all it's prickly points shouldn't stop you in your tracks.!
Making half square triangles is a breeze with the Quick Pieced method and I'll show you just how easy it is!
No special tools, rulers or paper piecing needed!
Other names for this spiky block include Georgetown Circle and Memory wreath.
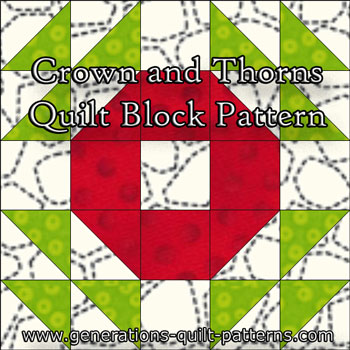
Cutting instructions are included for 4 different sizes. All you need to do is choose a size and liberate three fabrics from your stash.
We're ready to begin our Crown and Thorns block!
📋 General Instructions
Several abbreviations are used in this tutorial:
- SA - seam allowance
- RST - right sides together
- HST - half square triangle
- BAC - background fabric
A good press is crucial in this block due to all the seams. Try our best pressing technique for the flattest patchwork ever!
All seam allowances (SA) are a 1/4" and pressed towards the darker fabric unless otherwise instructed.
The newest quilt fabrics to tickle your fancy...
Click the images below to see the full collection. We share any commercial and/or free patterns that showcase them, too. (For inspiration, of course!)
Step 1: Cut the Crown and Thorns patches
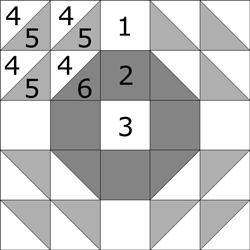
Sample Size: 7½" finished / 8" unfinished
Grid: 5x5
Attribution: Marguerite Ickis
AKA: Crown of Thorns (Capper's Weekly), Georgetown Circle (Carrie Hall and Rose Kretsinger), Memory Wreath (Carrie Hall and Rose Kretsinger)
Design Type: Uneven 9-patch, small center, 25-squares
Personally, I like to cut oversized patches, sew the triangle squares and then trim them to the perfect size. I will add a 1/4" to #4-#6 before I cut them.
This is explained more fully in the tutorial for the technique we'll use.
Choose fabrics with good contrast so that all those points stand out. If it's about anything, this block is about points!
The measurements in the chart for the HST patches (#4-#6) are exact.
All the numbers in the chart are for squares, so 2" means 2"x 2".
Choose a block size, it's time to cut!
 |
Cutting Chart for a~ Traditional Piecing ~ | |||||
|---|---|---|---|---|---|---|
| Patch | Fabric | Qty | Finished Block Size | |||
| 5” | 7-1/2” | 10” | 15” | |||
| 1 | BAC | 4 | 1-1/2” | 2” | 2-12” | 3-1/2” |
| 2 | Dark | 4 | 1-1/2” | 2” | 2-1/2” | 3-1/2” |
| 3 | BAC | 1 | 1-1/2” | 2” | 2-1/2” | 3-1/2” |
| 4 | BAC | 8 | 1-7/8” | 2-3/8” | 2-7/8” | 3-7/8” |
| 5 | Medium | 6 | 1-7/8” | 2-3/8” | 2-7/8” | 3-7/8” |
| 6 | Dark | 2 | 1-7/8” | 2-3/8” | 2-7/8” | 3-7/8” |
| Unfinished Block Size | 5-1/2” | 8” | 10-1/2” | 15-1/2” | ||
| Trim HSTs to | 1-1/2” | 2” | 2-1/2” | 3-1/2” | ||
| Grid Size | 1” | 1-1/2” | 2" | 3” | ||
Step 2: Assemble the units
Two-Square-Pairs
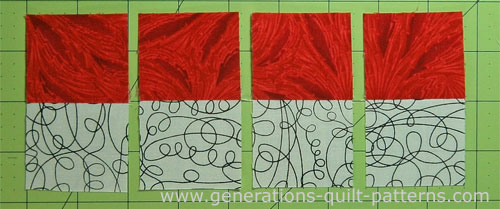
With right sides together, sew a #1 to a #2 square. Press.
Make a total of 4 pairs.
HSTs
Make 4 units
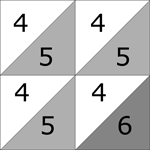
We'll use the Quick Pieced Method for making our half square triangle units. Click here for a refresher if you want one.
To start, draw a diagonal line on the back of all eight of your #4 squares. A mechanical pencil is my marker of choice. It always creates a fine line.
With RST layer each #4 with a #5 or #6 square until all these squares are paired.
Sew a quarter inch away from the line on both sides for all 8 pairs.
Press.
If you added a bit extra to the #4/#5/#6 measurements in the cutting (as I did for this example) you'll need to trim these HSTs to size.
In the Cutting Chart in Step 1 you can find this number at the intersection of the 'Finished Block Size' column and the 'Trim HSTs to...' row. Click here to see it. For our 7-1/2" finished block, they are trimmed to 2"x2".
If you cut using the exact dimensions from the chart, they should be equal to the 'trim to' size. Give 'em haircut if you need to!
If you need more detailed instructions on this method, see Technique #1: Quick Pieced Half Square Triangles.
Now assemble the HST into pairs as shown below:
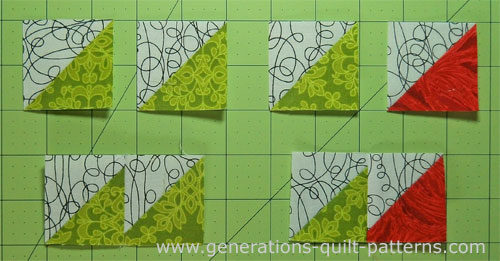
Press so the SA is in one direction for one set and the opposite direction for the other set. It doesn't matter which is which, only that you are consistent.
Sew one pair of each set together.
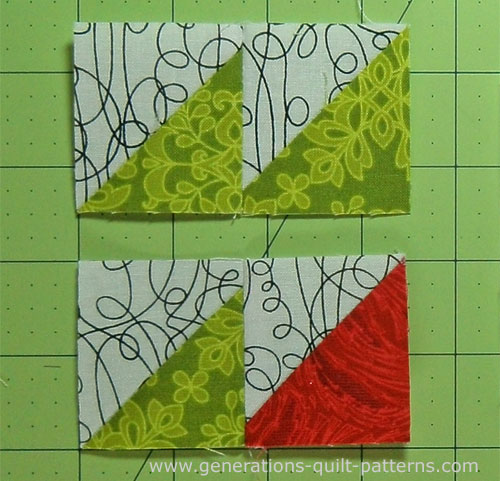
Press and repeat for the remaining 3 pairs. (I do use pins so that the center match comes out nice!)
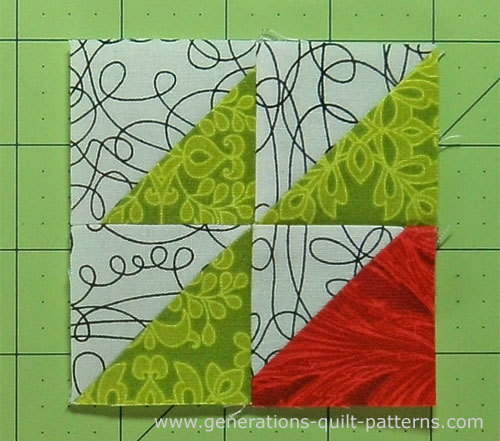
To reduce some of the bulk in the center, loosen a few stitches in the SA in the center of the unit as needed to twirl the seams like this...
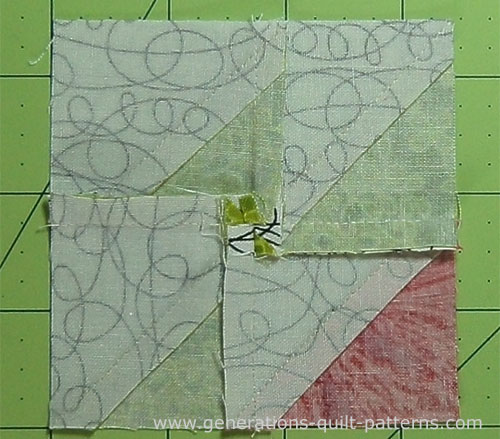
A last pressing, and all your units are ready.
Step 3: Assemble the Crown and Thorns quilt block
Lay out the sewn and cut patches into the Crown and Thorns design.
At this point it looks more like an uneven 9-patch than a 5-patch, don't you think?!
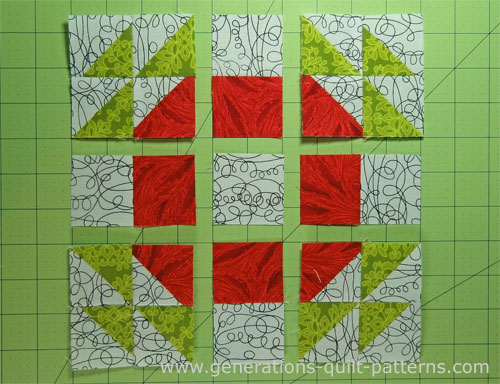
Stitch the units into rows. Press with all the SA toward the two-square-pairs (red and white here).
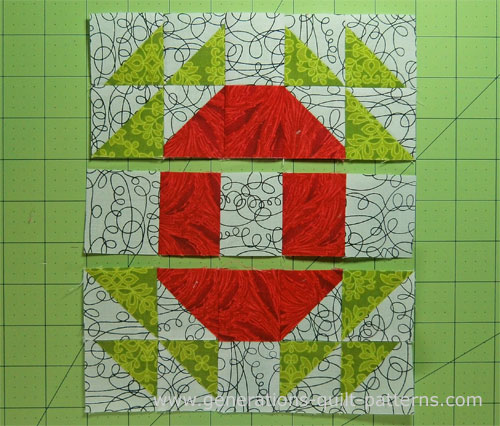
Stitch the rows together. The SA nest to make matching a breeze! Use pins if needed to hold things in place as you sew.
One final press—make it a good one—and your Crown and Thorns quilt block is finished!
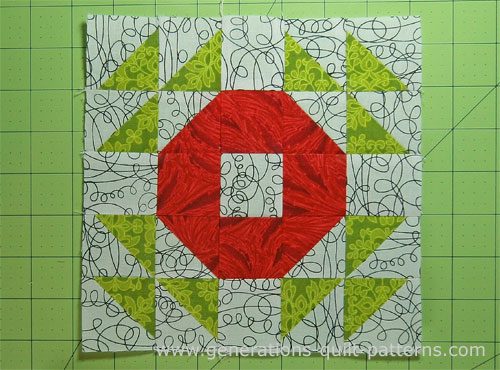
Variations on the Crown and Thorns design
There are two closely related designs based on the drawing of our Crown and Thorns quilt block.
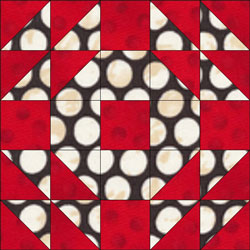
In this first block, one color is removed from the Crown and Thorns design. The background is now the darker fabric. It's known by the following names:
English Wedding Ring
Mill Wheel
Odd Scraps Patchwork
Old-Fashioned Wedding Ring
Vice President's Block
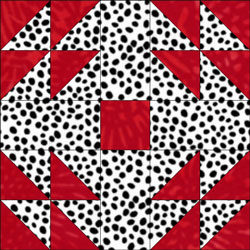
Here, the two-patch is replaced with a solid rectangle. This block is know as either Wedding Ring or Old English Wedding Ring.
...you can find more to make in my collection of Free Quilt Block Patterns. Click here to see them all.
Which will you make next?
What about a different quilt block?
For a list of all the 220+ quilt block patterns on this site, start here.
If you know the name of the block, shorten your search by using these links:
Click here if you're looking for blocks with at least some paper piecing.
Click here if you're looking for the basic building blocks of quilting, i.e., Flying Geese, half square triangles, quarter square triangles, etc., along with several techniques to make each.
And finally, use these links to find blocks in these finished sizes:
