- Home
- Free Quilt Block Patterns
- Crossword Puzzle Quilt Block
Crossword Puzzle Quilt Block
From our Free Quilt Block Patterns Library
This post contains affiliate links, for which I receive compensation.
Skill Level: Beginner
The Crossword Puzzle quilt block is a quick and easy to stitch which makes it an ideal block for a spur of the moment baby quilt.
A bit of strip piecing. The twirling of a few seam allowance.
 Pin It for later!
This asymmetrical block is as easy to set into a top as it is to put together.
Let's solve the riddle of assembling this Crossword Puzzle!
📋 General Instructions
Seam allowances (SA) are 1/4" and are pressed to the dark unless otherwise instructed.
I like to prewash and starch all of my fabrics before cutting. I think this makes my cutting and piecing more accurate with less effort.
The newest quilt fabrics to tickle your fancy...
Click the images below to see the full collection. We share any commercial and/or free patterns that showcase them, too. (For inspiration, of course!)
Step 1: Cut patches for a Crossword Puzzle
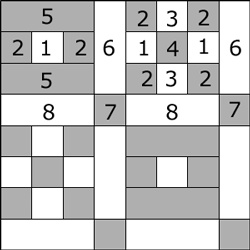 Crossword Puzzle design
Sample Size: 8" finished 8½" unfinished
Grid: 8x8
Attributed to: Farmers Journal
The cutting chart below is for a two fabric patchwork design.
Strips are cut an inch longer than needed so that you have room enough to straighten an edge before subcutting a stripset into units.
 |
Cutting Chart for a~ Traditional Piecing ~ | ||||
|---|---|---|---|---|---|
| Patch | Fabric | Qty | Finished Block Size | ||
| 8” | 12” | 16” | |||
| 1 | Background | 1 | 1-1/2” x 10” | 2” x 13” | 2-1/2” x 16” |
| 2 | A | 2 | 1-1/2” x 10” | 2” x 13” | 2-1/2” x 16” |
| 3 | Background | 2 | 1-1/2” x 4” | 2” x 5” | 2-1/2” x 6” |
| 4 | A | 1 | 1-1/2” x 4” | 2” x 5” | 2-1/2” x 6” |
| 5 | A | 4 | 1-1/2” x 3-1/2” | 2” x 5” | 2-1/2” x 6-1/2” |
| 6 | Background | 4 | 1-1/2” x 3-1/2” | 2” x 5” | 2-1/2” x 6-1/2” |
| 7 | A | 1 | 1-1/2” x 7” | 2” x 9” | 2-1/2” x 11” |
| 8 | Background | 1 | 3-1/2” x 7” | 5” x 9” | 6-1/2” x 11” |
| Unfinished Block Size | 8-1/2” | 12-1/2” | 16-1/2” | ||
| Grid Size | 1” | 1-1/2” | 2” | ||
Step 2: Assemble the units for a Crossword Puzzle
Our Crossword Puzzle block is made from three different units: a nine patch, an 'O', and sashing.
Nine Patches
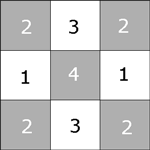
Make 2
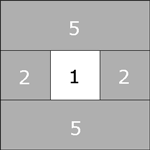
With right sides together (RST), stitch a #1 to a #2.
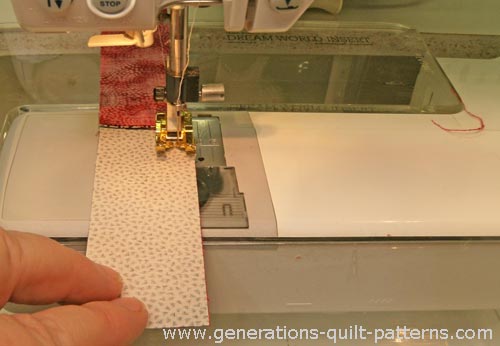 Starched fabric and a ¼" foot with a guide are the best way I know to get perfect strip sets.
Press.
Add the second #2 in the same manner, pressing afterwards.
Repeat for the #3/#4/#3 strips.
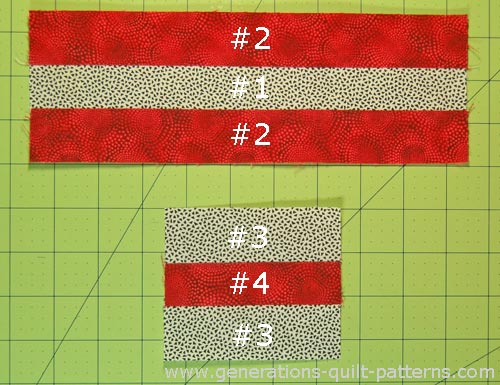 The stitched #2/#1/#2 and #3/#4/#3 stripsets.
Straighten a short side of both by aligning a line on your ruler with one of the seams (see arrow) and trim off just enough to straighten the edge.
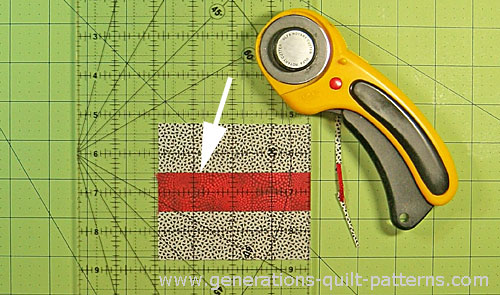 Straightening the edge of the #3/#4/#3,
Repeat for the #2/#1/#2 set.
Next subcut each #2/#1/#2 into 6 units; #3/#4/#3 into 2. Use the chart below to find the cut width.
| StripSet Subcutting Chart | ||
|---|---|---|
| Finished Block Size | Width of Sewn Stripsets | Subcut Width |
| 8” | 3-1/2” | 1-1/2” |
| 12” | 5” | 2” |
| 16” | 6-1/2” | 2-1/2” |
Arrange the cuts as shown below. (Two #2/#1/#2 are set aside for the O's that come next.)
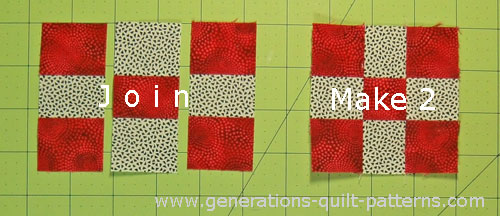 The SA are pressed out from the center.
'O' units
Make 2
Arrange two #5s and one #2/#1/#2 for each O as shown below.
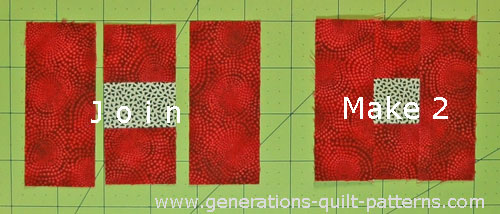
Did you catch it?
Yep! When I photographed the block during construction, I accidentally rotated the patches a quarter turn.
The longer #5 patches run across the top and bottom of the "O" units and not on the left and right sides. My bad!!!
Press, SA towards the #5 strips.
Sashing (SU)

Make 4
With RST, stitch #7 to #8 on the long edge.
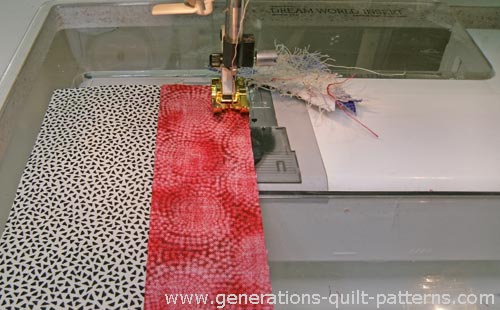
Press.
Cut #7/#8 into four SUs using the chart below to determine the width.
| Sashing Subcutting Chart | ||
|---|---|---|
| Finished Block Size | Width of Pieced Sashing | Subcut Width |
| 8” | 4-1/2” | 1-1/2” |
| 12” | 6-1/2” | 2” |
| 16” | 8-1/2” | 2-1/2” |
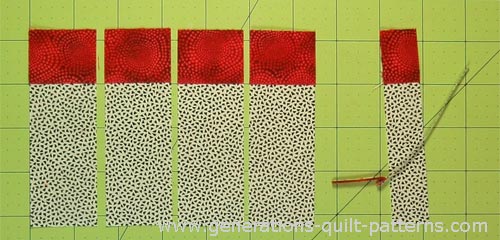
After cutting, this is what you've got.
Step 3: Add sashing
With RST, sew a #6 to the righthand side of all the 9 patches and O's. SA are pressed away from #6.
With RST, sew a SU to the bottom of each.
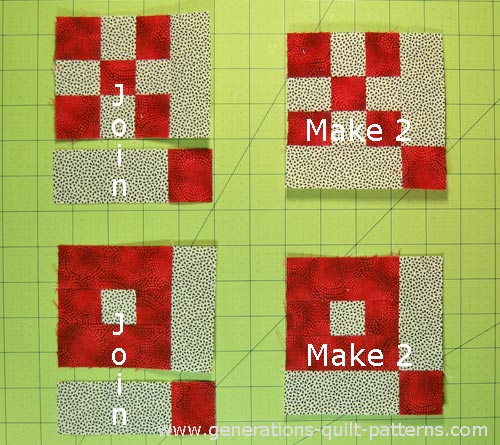
Typically these blocks are set edge-to-edge in a patchwork design. To make joining them as easy as possible, we're going to twirl the SA of this last seam.
You may need to loosen a few stitches to do so. This is what it looks like from the backside.
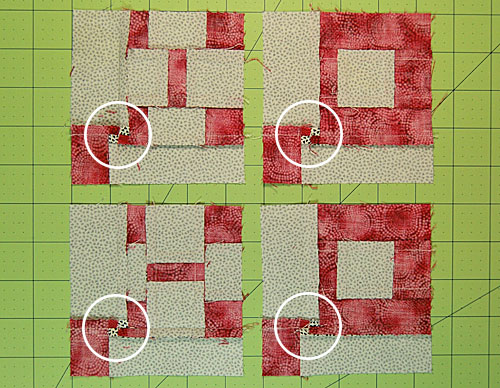 Our twirled seam allowance creates a miniature 4-patch on the back
It helps to fingerpress the SA before using the iron. As you look at the backs, the SA are pressed in a clockwise fashion.
Step 4: Assemble the Crossword Puzzle quilt block
Arrange the sashed patches into rows and stitch them the pairs in each row together. (An 'O' is in the upper lefthand corner of the block.)
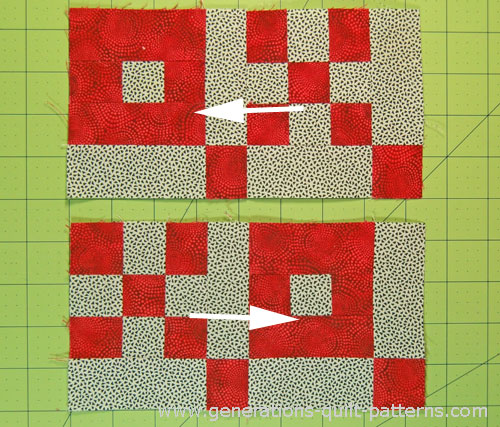 SA are pressed in the direction of the arrows.
With RST, sew the rows together. The only place you need to worry about matching is at the corners of the #7's.
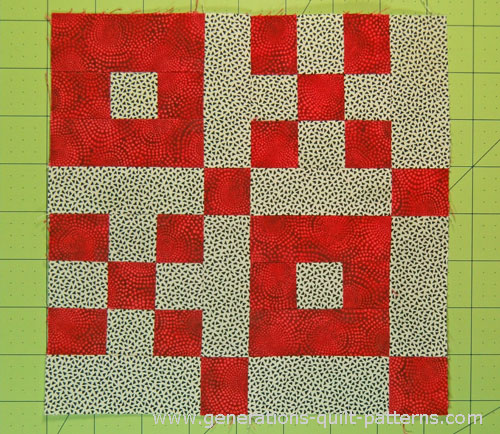 Our Crossword Puzzle is stitched, just one more step.
To complete the Crossword Puzzle, we'll again twirl the SA in the very center of our block.
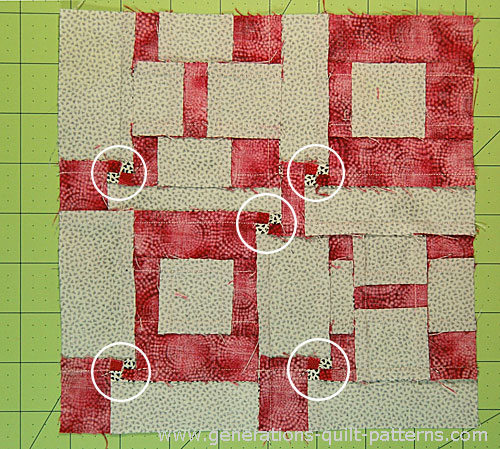 The center twirl is our last one.
The advantage of all this fiddling with SA is when you put blocks together edge-to-edge, those SA nest—making matching easier and reducing bulk all at the same time.
Now give it one last, good press and your Crossword Puzzle quilt block is finished.
A bit about constructing a Crossword Puzzle Quilt
As designed, the Crossword Puzzle quilt block is an asymmetrical block. To complete the design, you need to add additional SUs (sashing units) to the blocks on the left and top edges of your quilt.
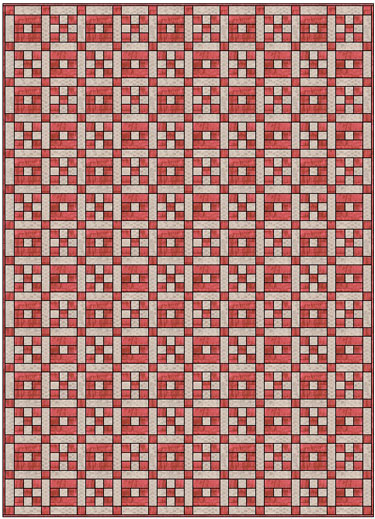
And don't forget the one last cornerstone square in the upper left corner (cut from your A fabric.)
What about a different quilt block?
For a list of all the 220+ quilt block patterns on this site, start here.
If you know the name of the block, shorten your search by using these links:
Click here if you're looking for blocks with at least some paper piecing.
Click here if you're looking for the basic building blocks of quilting, i.e., Flying Geese, half square triangles, quarter square triangles, etc., along with several techniques to make each.
And finally, use these links to find blocks in these finished sizes:
