- Home
- Free Quilt Block Patterns
- Cross and Crown Quilt Block
Cross and Crown Quilt Block:
👸
Reign Supreme with Your Seams!
Seam-ingly regal results await! 👑✂️
This post contains affiliate links, for which I receive compensation.
Welcome to our 👑 Cross and Crown quilt block tutorial! This elegant 2-color block is fantastic for Confident Beginners, thanks to paper piecing.
We've got free patterns 📄, a cutting chart 📊, and a color or fabric planning page 🎨 to simplify the process.
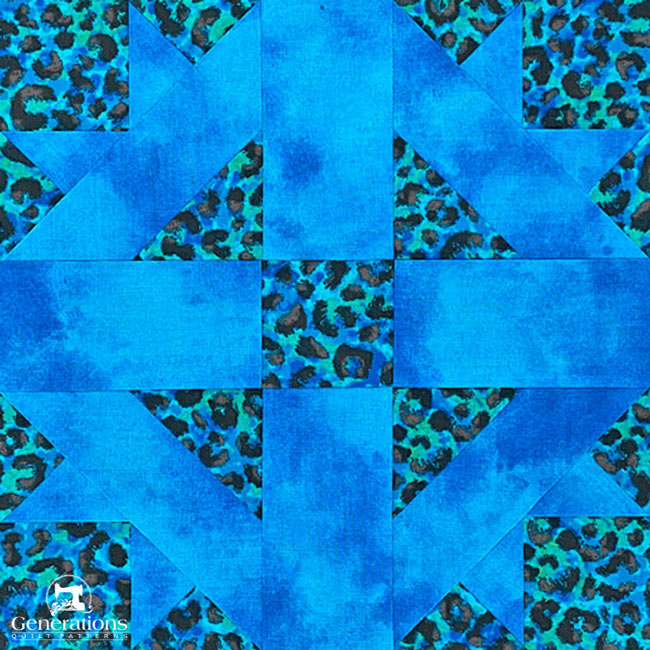
Paper piecing is as easy as a classic 9-patch. Our instructions have step-by-step illustrations to ensure smooth quilting.
This tutorial is more than instructions—it's an invitation to enjoy creating something beautiful. 💖
Gather your fabrics and let's quilt! 🥰 🧵✂️🪡
🧭Navigate your way through this royal quilting adventure!
Use these links to quickly find the treasure troves of information you seek. Your quilting quest starts here! 🗺️👑
- A cutting chart in four sizes, with downloads of the chart and block design
- Too busy quilting to quilt? Bookmark or Pin this for when you come up for air!
Cut. Sew. Press. Reign supreme with every seam!
📋 General Instructions
Several abbreviations are used on this page. They are:
- SA - seam allowance
- RST - right sides together
- GT - Goose Tracks variation unit
A 1/4" SA is used in this tutorial.
Pressing
Initial Pressing: After sewing, press your patches flat as they were sewn. This sets the seam, melding the fibers of the threads into the fibers of the fabric.
Pressing Seam Allowance (SA): Normally, press the SA towards the darker fabric unless otherwise instructed. For paper pieced seams, press towards the most recently added patch.
Piecing directions are highlighted in yellow to make them easy to find.
Starch
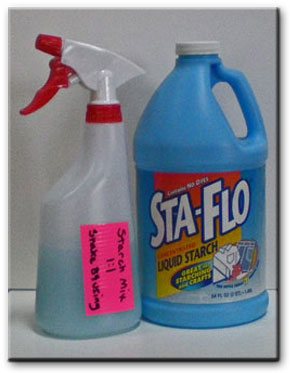
There's nothing like crisply starched fabric to make cutting, sewing and pressing more accurate. I like a 50/50 mix of a liquid starch concentrate to water.
Spray starch works too, but it's pricier—so I save it for when I'm quilting away from home when I'm willing to pay for the convenience.
Download and print paper piecing pattern
To download the pattern, use the most current version of Adobe.
For accurate results, on Adobe's Print Menu page, under 'Page Size and Handling' set 'Custom Scale' to 100%. Then print.
Click here to see what it looks like on the Print Menu page.
Find your finished block size from the chart below. Print the corresponding number of pages for a total of four Goose Tracks Variation (GT) units.
Print the Goose Tracks Variation Units | ||
|---|---|---|
| Finished Block Size | # of copies | Link to PDF Download GT Finished Size |
| 5" | 1 | 2" |
| 7½" | 1 | 3" |
| 10" | 2 | 4" |
| 15" | 4 | 6" |
After printing, use the 1" square graphic on the printed page(s) to double-check that your patterns printed at the correct size.
Then cut out the required number of patterns from your copies. A rough cut is good enough—an 1/8"-1/4"-ish away from the outside dashed square.

Not sure which paper to use?
Take a look at my review of several of the most popular brands available to us quilters on the market.
You want a super-easy paper to tear away—less stress on the stitches.
The newest quilt fabrics to tickle your fancy...
Click the images below to see the full collection. We share any commercial and/or free patterns that showcase them, too. (For inspiration, of course!)
✂️Cutting patches for a Cross and Crown block
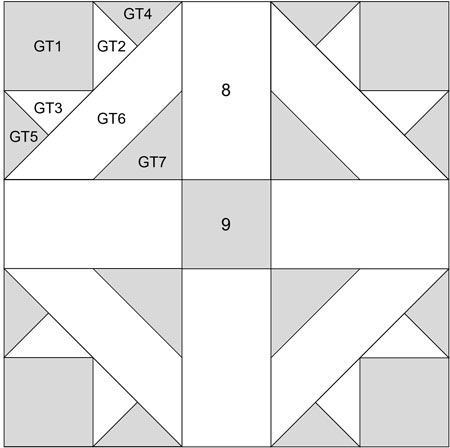 Cross and Crown design
Sample Block Size: 10" finished / 10½" unfinished
Grid: 5×5
Attribution: Kansas City Star
Design Type: Uneven 9-patch, small center | Paper piecing
Labeling your patches is crucial for a smooth quilting journey. Take a moment to number each piece—your future self will thank you!
Royal reality check! 👑🧐 Our blue fabric and green/blue leopard print turned out to be closer in value than expected, with the blue sometimes disappearing into the darker parts of the print. This proves why making a sample block is always a smart move—it confirms your cutting and assembly skills and gives you a sneak peek at how your fabric choices will look together. Consider it your "royal decree" to test before you invest. 📜✂️
Isn't it nice to learn from someone else's mistakes instead of making your own?
To print a copy of the block design and cutting chart to use at your cutting table, click here.
 | Cutting Chart for a~ Paper & Traditional Piecing ~ | ||||||
|---|---|---|---|---|---|---|---|
| Patch | Fabric | Qty | Finished Block Size | Sub Cut | |||
| 5'' | 7½'' | 10'' | 15'' | ||||
| GT1 | Dark | 4 | 1¾'' x 1¾'' | 2¼'' x 2¼'' | 2¾'' x 2¾'' | 3¾'' x 3¾'' | no |
| GT2, GT3 | Light | 2 | 2¾'' x 2¾'' | 3¼'' x 3¼'' | 3¾'' x 3¾'' | 4¾'' x 4¾'' | |
| GT4, GT5 | Dark | 2 | 2¾'' x 2¾'' | 3¼'' x 3¼'' | 3¾'' x 3¾'' | 4¾'' x 4¾'' | |
| GT6 | Light | 2 | 3⅜'' x 3⅜'' | 4⅜'' x 4⅜'' | 5⅜'' x 5⅜'' | 7⅜'' x 7⅜'' | |
| GT7 | Dark | 2 | 2⅜'' x 2⅜'' | 2⅞'' x 2⅞'' | 3⅜'' x 3⅜'' | 4⅜'' x 4⅜'' | |
| 8 | Light | 4 | 1½'' x 2½'' | 2'' x 3½'' | 2½'' x 4½'' | 3½'' x 6½'' | no |
| 9 | Dark | 1 | 1½'' x 1½'' | 2'' x 2'' | 2½'' x 2½'' | 3½'' x 3½'' | no |
| Unfinished Block Size | 5½'' | 8'' | 10½'' | 15½'' | na | ||
| Grid Size | 1'' | 1½'' | 2'' | 3'' | na | ||
Subcutting
GT2, GT3, GT4, are GT5 cut twice on the diagonal like quarter square triangles.
GT6 and GT7 are cut once on the diagonal like half square triangles.
With this subcutting we'll end up with all straight of grain outside edges, just like traditional piecing.
🪡Assemble the Goose Tracks Variation units (GT)
Make 4
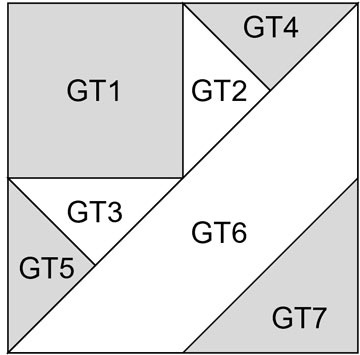 This variation differs from the original Goose Tracks unit with the addition of the GT7 patch.
Why in the world is this called a Goose Tracks unit?
I first came across this unit (without the GT7) when stitching up the Goose Tracks quilt block. Since there was no name officially given to it, I took the liberty of christening it.
Use a small dot of Elmer's Washable Glue Stick to hold #GT1 in place on the unprinted side of the pattern. Just a dab'll do ya'!
Glue stick doesn't distort the pattern like a pin does. But if you're happy with pins, use them.
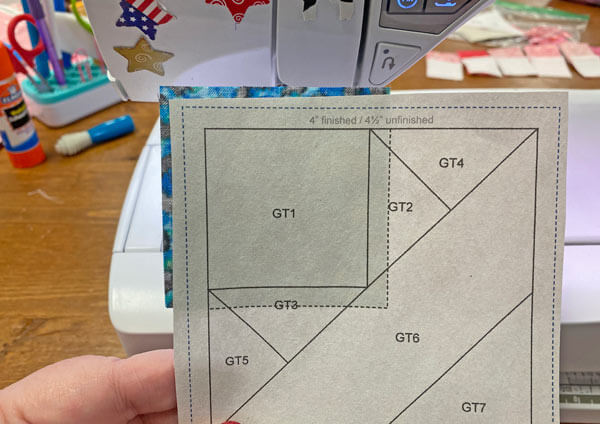 Use the dashed guidelines for quick placement
If you haven't already, get your sewing machine ready for the technique.
General Sewing Machine Setup for Paperpiecing
- Reduce your stitch length to 16–20 stitches per inch (1.3-1.6 mm). This perforates the paper and stabilizes the seam when you remove the pattern. [Learn more about stitch length here.]
- Reduce your machine's speed or just plain slow down. Sew only as fast as you can stay on the stitching lines.
- Install an open toe appliqué foot (sometimes called an 'embroidery' or 'satin stitch' foot) if you have one (it's easier to see where you're stitching with one installed).
- Use a larger needle (90/14) if you have problems removing the pattern.
- If your machine has a needle stop up, use it. The stitching goes faster when you don't have to lift the presser foot with every seam.
- As you stitch each seam, start and stop a generous 1/4” before and after the solid stitching lines. ALWAYS. Future lines of stitching secure the ends.
After adding each patch, press the unit as it was sewn to set the seam and then open. The SA is automatically pressed towards the last patch added.
Before adding the next patch, take a look to make sure the one you just added covers the space plus seam allowance that it is supposed to.
Steam is optional and usually curls the pattern.
If that bothers you, don't use steam. Sometimes I do. Sometimes I don't.
It truly depends on my mood.
Remember, as you follow this paper piecing tutorial, the printed and the fabric sides of this block are mirror-images of each other.
At last!
Let's sew!
With RST, align the long edge of a #GT2 with the edge of #GT1.
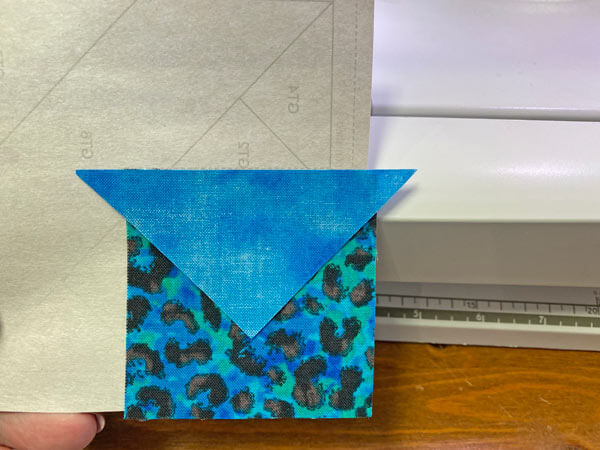
For this, and all the other paper pieced seams in this tutorial, stitch starting and ending a good 1/4" past the solid line between the two patches. Subsequent lines of stitching secure the ends of these seams, just like in traditional piecing.
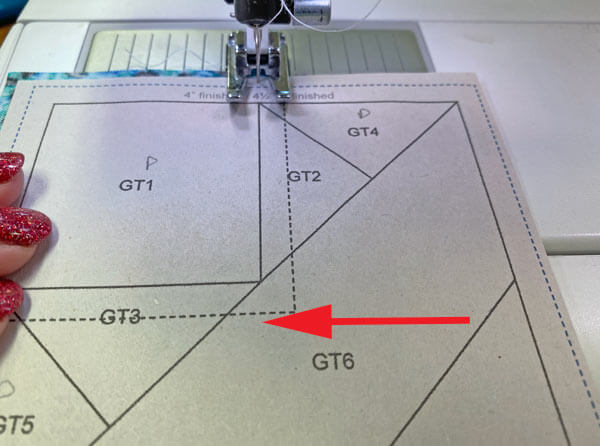 Start sewing outside the dashed line, then onto the solid line and end at about the red arrow
Press.
Repeat for #GT3, the triangle on the other side of #GT1.
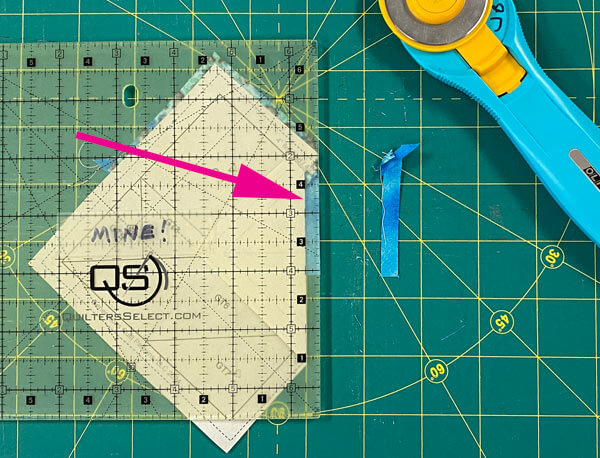
After pressing, at your cutting mat, paper side up, fold the pattern back on itself on the solid line between GT2 and GT4.
NOTE: An Add-A-Quarter-Plus ruler is a helpful tool for this job if you have trouble creating the fold with your everyday rotary ruler. It also idiot proofs the trimming of the 1/4" seam...which I've been known to whack away. <hangs head in shame! 😳 >
Position the 1/4" mark on your ruler with the folded edge (pink arrow) and trim away the excess.
Repeat for the seam line between GT3 and GT5.
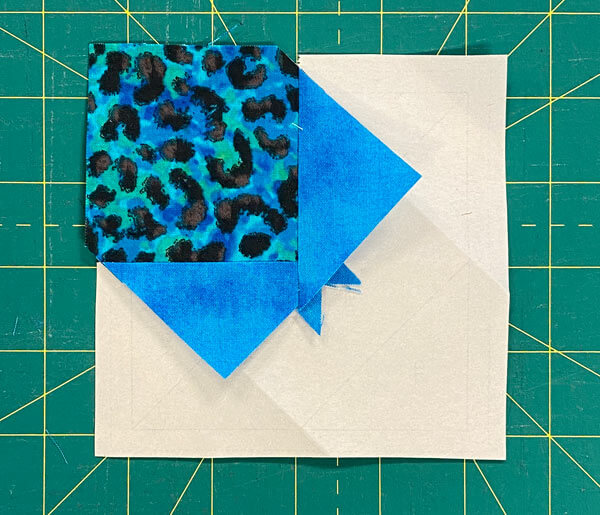
This is what the trimmed GT2 & GT3 look like. We've created the exact placement lines for the next two patches, GT4 and GT5.
There's no need to trim the edges at the center where those little dog ears are sticking out. We'll get them after adding the next two patches.
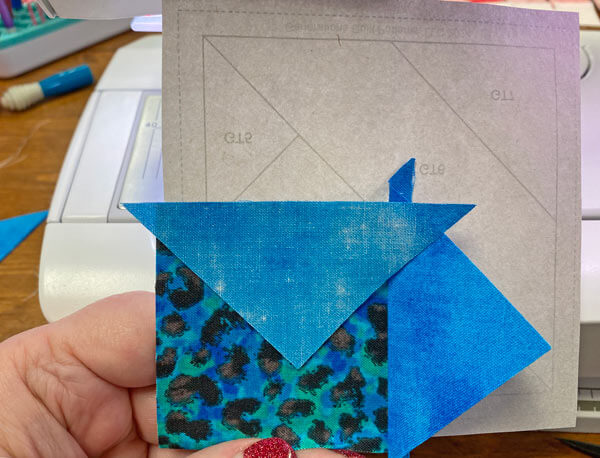
With RST, layer a short edge GT4 with the trimmed edge of GT2.
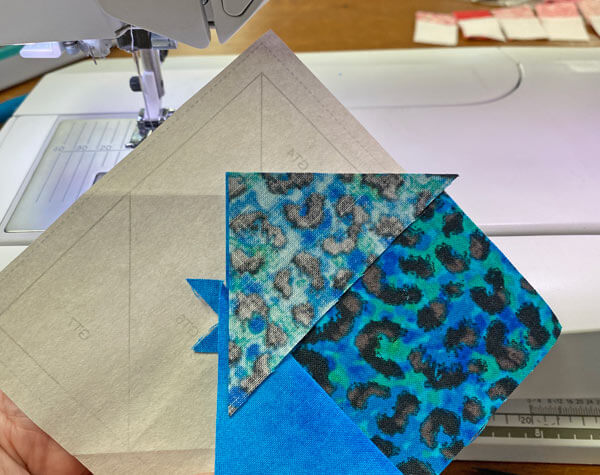
Sew and press.
If you're new to this patch shape, it can seem tricky to position correctly. If so, then simply position it as if it were 'open', like the blue/green leopard print GT5 below.
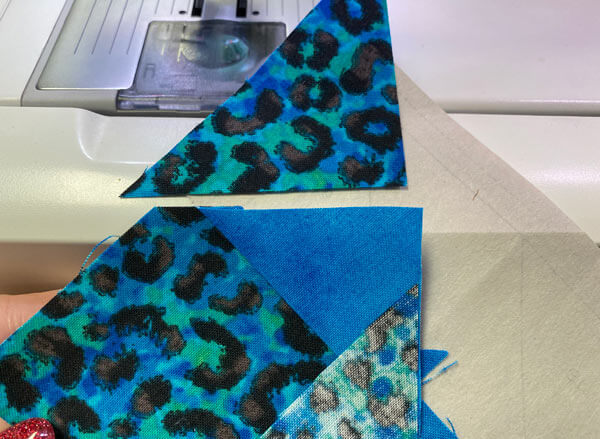
Once you're satisfied you've got it right, then close it and align the edges.
It's a lot faster to take a quick check than it is to rip out the seam of a mis-sewn patch.
Sew and press.
Back at the cutting mat, fold the pattern back on itself on the seam line between GT2-5 and GT6. The paper's going to tear a bit as you pull it away from the stitches. This is normal.
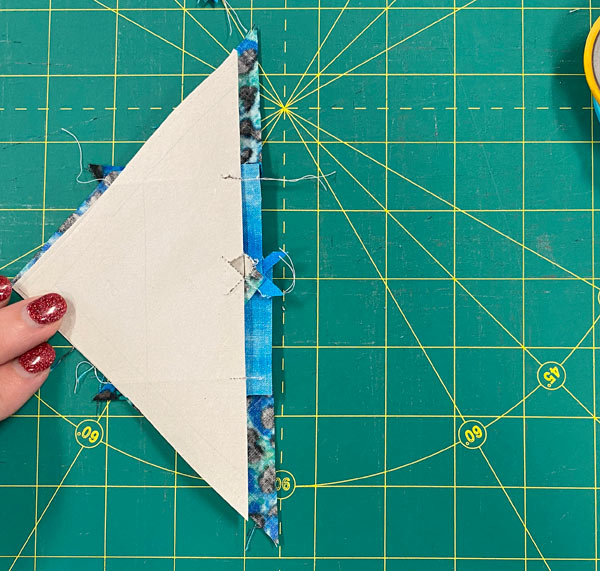
If it tears too much, use some Scotch Brand Magic Tape® on the paper side to fix it.
Don't iron directly on the tape. It'll melt and yuck up your iron. 😱🙅♀️👎
Line up the 1/4" line on the ruler with the folded edge (sounds familiar, right?) and trim away the excess.
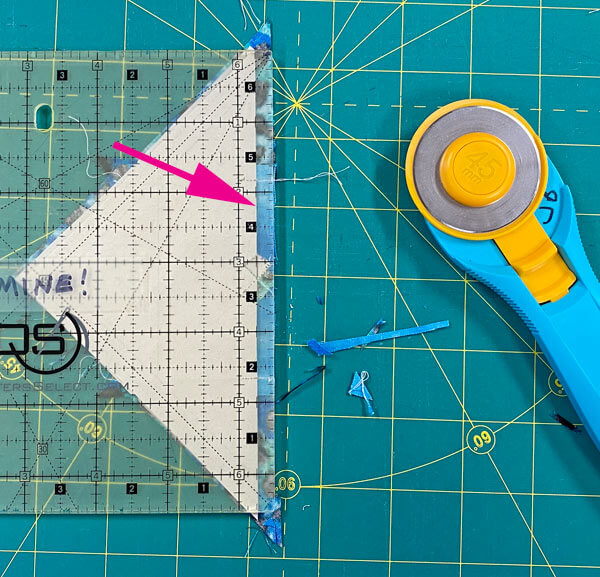
Position the long edge of GT6 with the fresh cut.
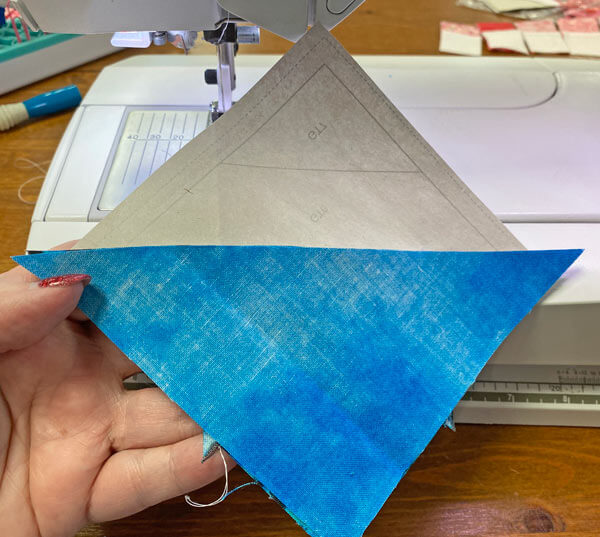
This seam runs from edge to edge and can be chain pieced if you are making all four GT units at the same time.
Press.
Trim away the excess GT6 just like you did for the first side.
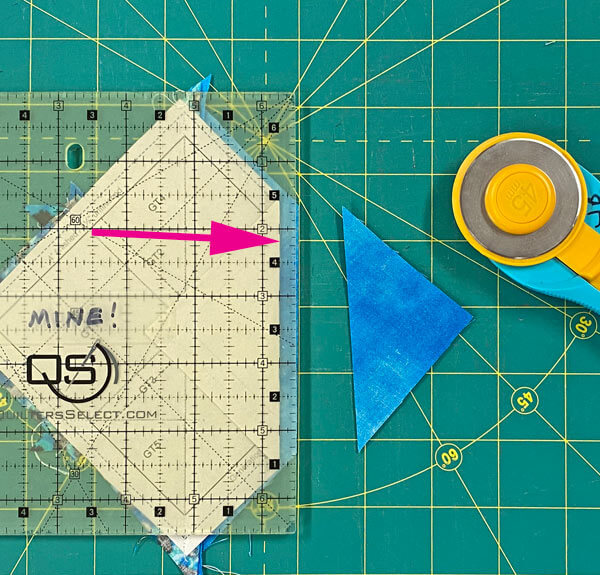 Trim away the excess from the second side of the GT6
With RST, align the long edge of GT7 with the freshly trimmed one of GT6.
Sew the seam and press.
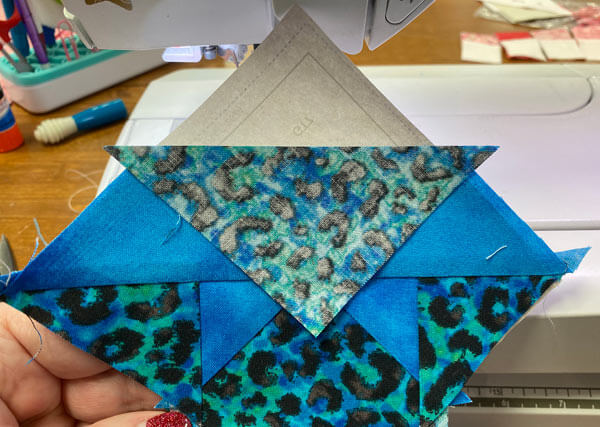
Now to turn this mass of piecing into the little beauty it's destined to be.
At your cutting mat, position the 1/4" line of your ruler directly over one of the solid lines that surround the GT. Trim away the excess with your rotary cutter.
Turn the unit a quarter turn, position the 1/4" line again and trim. Repeat for all four sides of all four GTs.
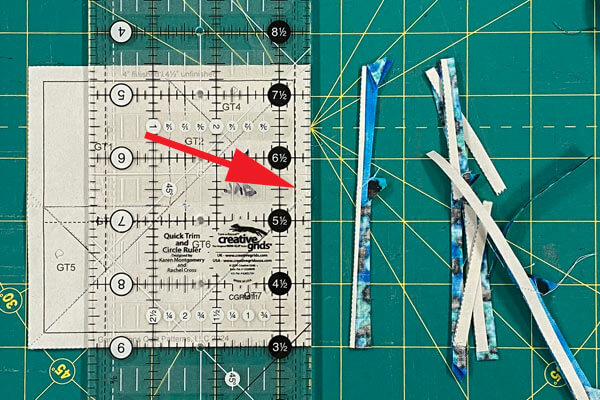 Trimming to perfection
Below is a Goose Tracks Variation in it's untrimmed state (left) and after trimming (right).
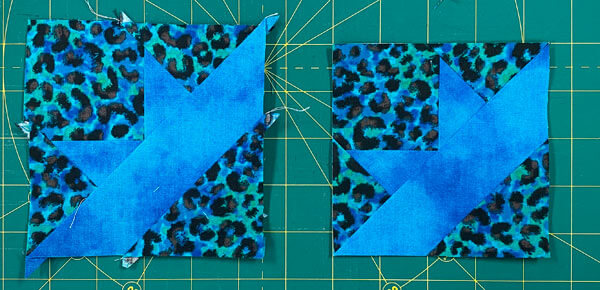 From hot mess to an accurate unit
If you've diligently sewn on the line, those little points are exactly 1/4" away from the edge and the upper right and lower left corners are bisected exactly in half by the seam.
These units are a dream to stitch into our block.
Remove the paper pattern. It's easiest to start with the last patch sewn—the GT7—and work your way backwards through the numbering.
All our outside edges are on the straight of grain and are as stable as any traditionally pieced block.

The paper piecing is complete. From this point forward, return your stitch length to the one you regularly use for piecing and install your favorite 1/4" presser foot.
🧩Assemble your Cross and Crown quilt block
Arrange your patches to form the Cross and Crown design—GTs in the four corners, separated by a rectangle and small square in the center.
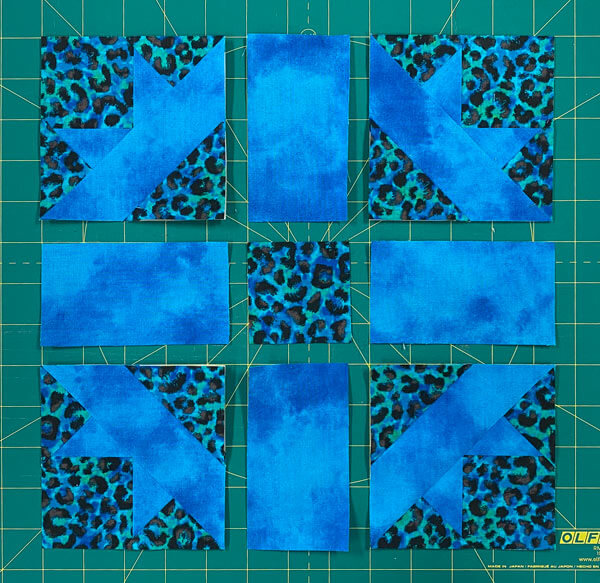
With RST, stitch the units in each row together. The beauty of this design is that there's nothing to match mid-seam. Simply line up the edges of the units. Pin as needed to keep things aligned while sewing.
SA are pressed away from the GTs.
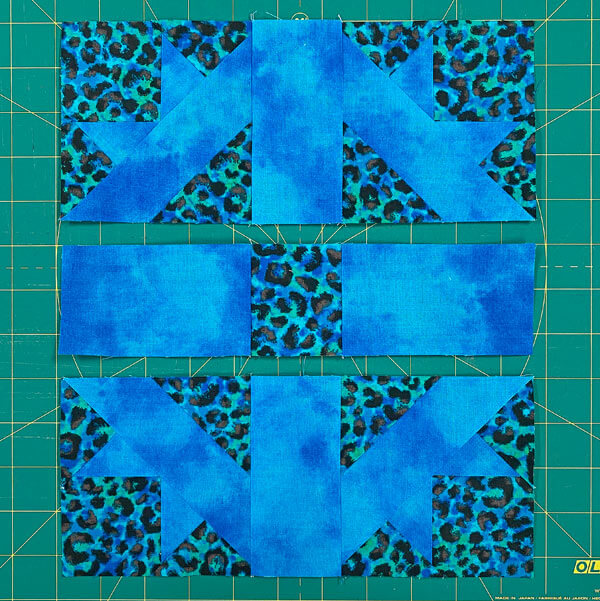
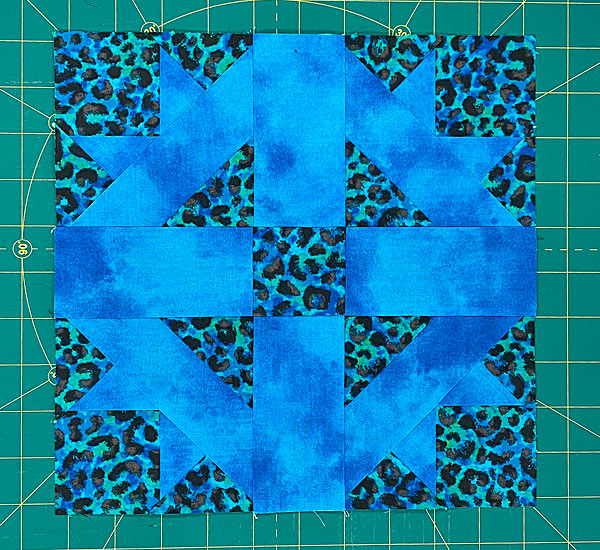
With RST, sew the rows together to complete your Cross and Crown quilt block.
These final two seams are pressed towards the center.
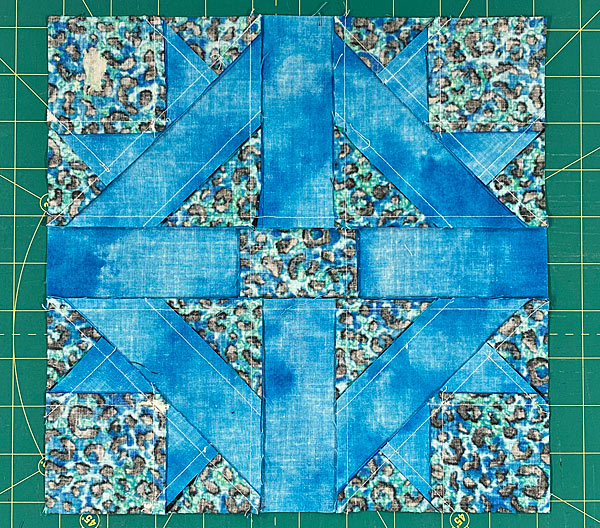
From the back, you can see that all I've got left to do is remove a bit of paper in the upper left where someone (who shall go unnamed…😳) glued with a bit too much gusto.
It happens. Nothing a quick pick with the thin edge of my seam ripper won't fix.
Bravo, quilting royalty! 👑🎉
You've mastered the Cross and Crown block and claimed your throne in the quilting realm.
Your journey from fabric peasant to piecing sovereign is complete, but the adventure's just beginning! 🏰🧵 Remember, with great quilting power comes great responsibility... to make more quilts!
So reign on, oh noble stitcher, and may your quilting kingdom forever flourish! 👸🤴✨
📌Pin now, rule later!
This tutorial is your ticket to quilting royalty!👑
What about a different quilt block?
For a list of all the 220+ quilt block patterns on this site, start here.
If you know the name of the block, shorten your search by using these links:
Click here if you're looking for blocks with at least some paper piecing.
Click here if you're looking for the basic building blocks of quilting, i.e., Flying Geese, half square triangles, quarter square triangles, etc., along with several techniques to make each.
And finally, use these links to find blocks in these finished sizes:
- Home
- Free Quilt Block Patterns
- Cross and Crown Quilt Block
