- Home
- Free Quilt Block Patterns
- City Streets Quilt Block
City Streets Quilt Block Tutorial
7", 10½", and 14" finished
From our Free Quilt Block Patterns Library
This post contains affiliate links, for which I receive compensation.
I love it when the unexpected happens, like it did with this simple City Streets quilt block. It's only half square triangles and a bit of strip piecing.
And yet, when I started playing with the design possibilities, this simple patchwork design reached out and grabbed my attention by the short hairs.
You'll find beginner-friendly, step-by-step illustrated instructions as expected. There are several other resources for you to download and add to your reference library. They are:
- A coloring page to download and print to use for a kid's coloring activity or to plan your fabrics
It's time to cut up and sew!
General Instructions
Several abbreviations are used on this page. They are:
- SA—seam allowance
- RST—right sides together
- HST—half square triangles
1/4" SA are used through this tutorial.
Pressing instructions are highlighted in yellow throughout this tutorial to make them easy to spot.
When instructed to press, first press the patches in the closed position just as they came off your sewing machine. This sets the seam, melding the fibers of the threads into the fibers of the fabric.
Then press the SA to the dark unless otherwise noted. If we don't use nested seams for a particular match point, you'll have the option to press that SA open if you choose.
The newest quilt fabrics to tickle your fancy...
Click the images below to see the full collection. We share any commercial and/or free patterns that showcase them, too. (For inspiration, of course!)
Step 1: Cutting for a City Streets quilt block
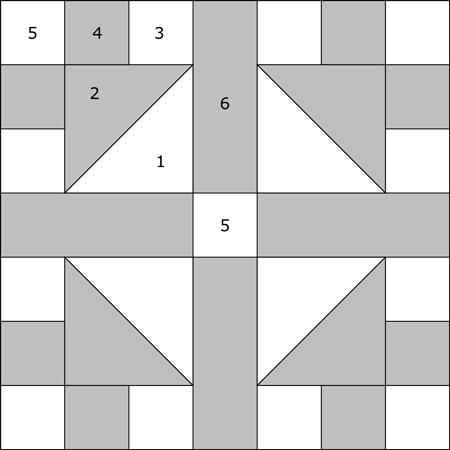 City Streets quilt block design
Sample Block Size: 7" finished / 7½" unfinished
Grid: 7x7
Attribution: Nancy Page
AKA: Stonemason's Puzzle (Ladies Art Company)
Design Type: Uneven 9-patch
Please label all your patches. We refer to their numbers throughout this tutorial.
To print a copy of the block design and cutting chart to use at your cutting table, click here.
 | Cutting Chart for a~ Traditional Piecing ~ | ||||
|---|---|---|---|---|---|
| Patch | Fabric | Qty | Finished Block Size | ||
| 7'' | 10½'' | 14'' | |||
| 1 | Light | 2 | 3¼'' x 3¼'' | 4¼'' x 4¼'' | 5¼'' x 5¼'' |
| 2 | Dark | 2 | 3¼'' x 3¼'' | 4¼'' x 4¼'' | 5¼'' x 5¼'' |
| 3 | Light | 1 | 1½'' x 13'' | 2'' x 17'' | 2½'' x 21'' |
| 4 | Dark | 1 | 1½'' x 13'' | 2'' x 17'' | 2½'' x 21'' |
| 5 | Light | 5 | 1½'' x 1½'' | 2'' x 2'' | 2½'' x 2½'' |
| 6 | Dark | 4 | 1½'' x 3½'' | 2'' x 5'' | 2½'' x 6½'' |
| Unfinished Block Size | 7½'' | 11'' | 14½'' | ||
| Grid Size | 1" | 1½" | 2" | ||
Step 2: Assemble the units for a City Streets block
HST Unit
Make 4
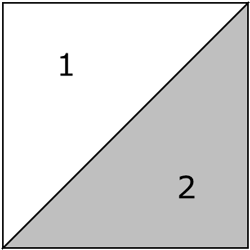 HSTs
HSTsWe'll use the quick-pieced method to make these HSTs.
On the backside of the light #1 square, draw a diagonal line from corner to corner.
In the photo below, you'll see I used an ink pen so that the lines are dark enough for you to see. For your own work, use a pencil or chalk marker. The line needs to be only as dark as YOU need to see it when you're sewing.
With RST, layer a #1 and #2.
With your favorite 1/4" foot installed, stitch 1/4" away from both sides of the line.
Repeat for the second pair of #1/#2 patches.
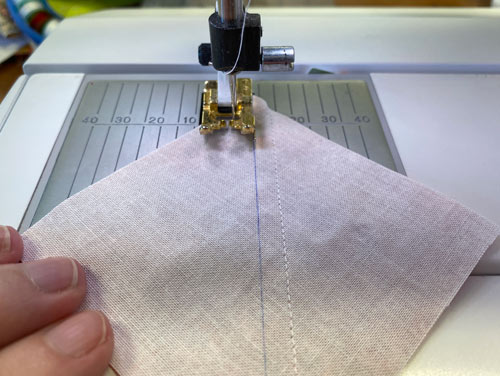 I even use my favorite 1/4" foot with its right-hand side flange for this.
Press flat to set the seams.
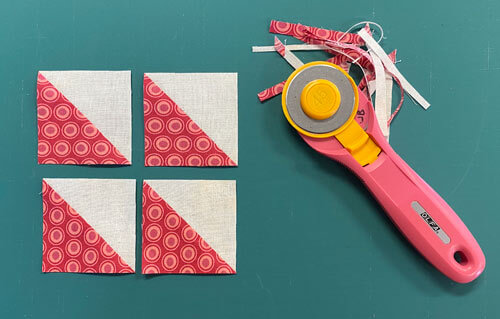
Cut these two sewn pairs in half on the marked line. Press the resulting 4 HSTs with SAs toward the darker #2 or open.
Because we started with oversized patches, use the chart below and trim your HSTs to the perfect size.
HST Dimensions | |
|---|---|
| Finished Block Size | Trim HST to… |
| 7" | 2½" x 2½" |
| 10½'' | 3½" x 3½" |
| 14" | 4½" x 4½" |
For our 7" finished example, I trim my HSTs to 2½" square.
Strip Pieced Units
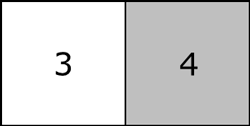 Sides
SidesMake 8
With RST, sew the #3 and #4 strips together along one long edge.
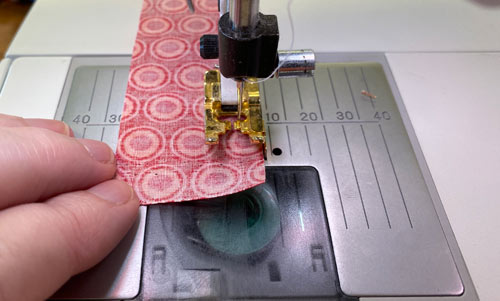
Press. Use the chart below to check the accuracy of your stitching. Make any adjustments now.
StripSet Widths | ||
|---|---|---|
| Finished Block Size | Stripset Width after stitching | SubCut Width |
| 7" | 2½" | 1½" |
| 10½'' | 3½" | 2" |
| 14" | 4½" | 2½" |
Straighten one short side of the strip set.
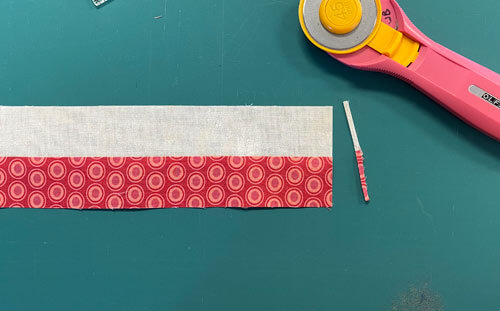
Then return to the chart, find your finished block size and cut 8 units the Subcut Width.
For our 7" sample, our subcuts are 1-1/2" wide.
Below you can see them along with the leftovers on the right side.

Corner Units
Make 4
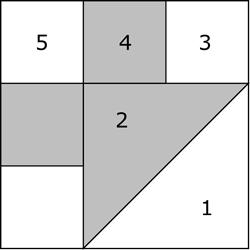 Corners
Arrange the #5s, the strip pieced units and HSTs as shown below (left), stitching the units into rows.
SAs are pressed away from the HSTs.
Sew the rows together, the seams nest to help you make a good match.
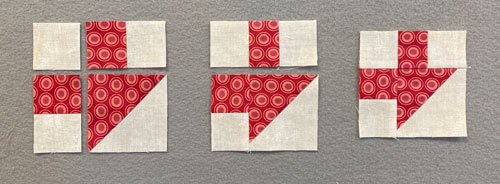 Arrange the units (left), sew into rows (center), and stitch together (right)
Back to the ironing board, again pressing the SAs away from the HST.
Take a minute to check the accuracy of your stitches using the chart below.
Corner Unit Dimensions | |
|---|---|
| Finished Block Size | Corners should measure... |
| 7" | 3½" x 3½" |
| 10½'' | 5" x 5" |
| 14" | 6½" x 6½" |
Step 3: Assemble your City Streets quilt block
Arrange your own City Streets patches so the light sides of your HSTs are towards the center.
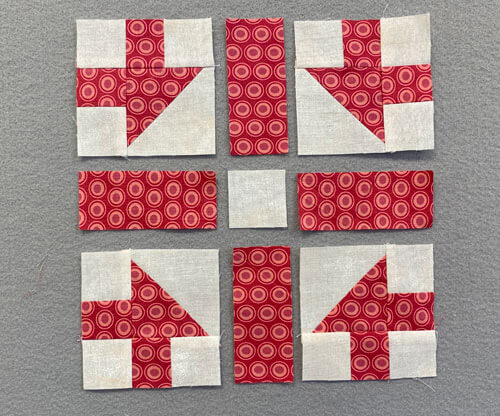
Rut-roh! Do you see the problem below?
The bottom row, while sewn correctly, needs to be flipped top to bottom. Luckily, I caught the error and corrected it before having a hot date with my seam ripper.
It's so helpful to lay out your blocks before sewing to avoid these types of issues.
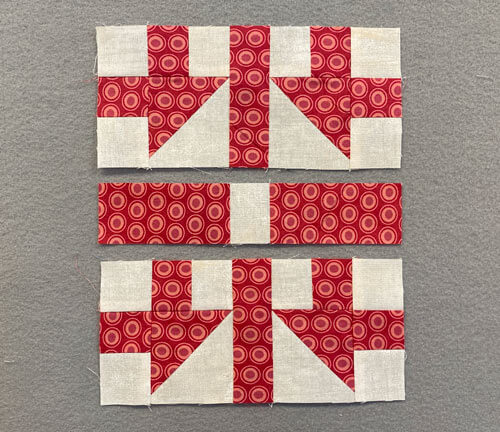
After stitching the rows together, correctly ;), this is our completed City Streets quilt block.
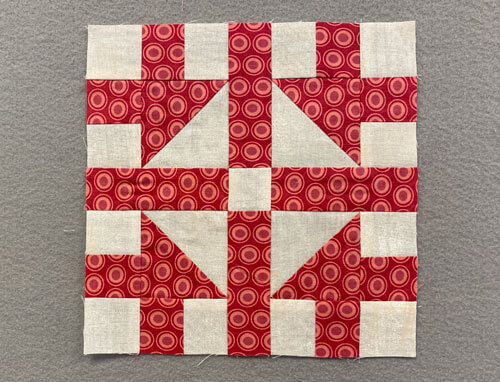
And finally, from the backside, to see how all our pressing works together to create a flat block.
If you haven't already, try my SECRET pressing technique for the ultimate in flat blocks without any specialty tools.
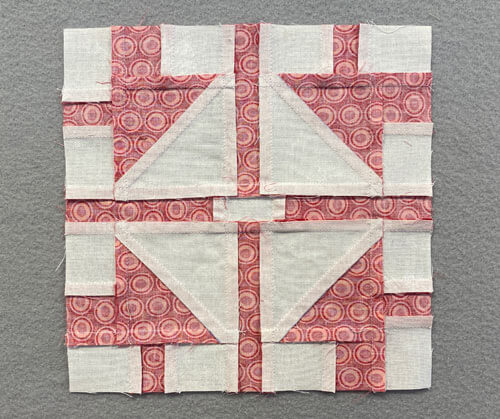
Let's see what surprises the City Streets quilt block has...
I really didn't expect a lot when I started playing with quilt pattern designs for this beginner quilt block...
...but boy-o-boy was I surprised.
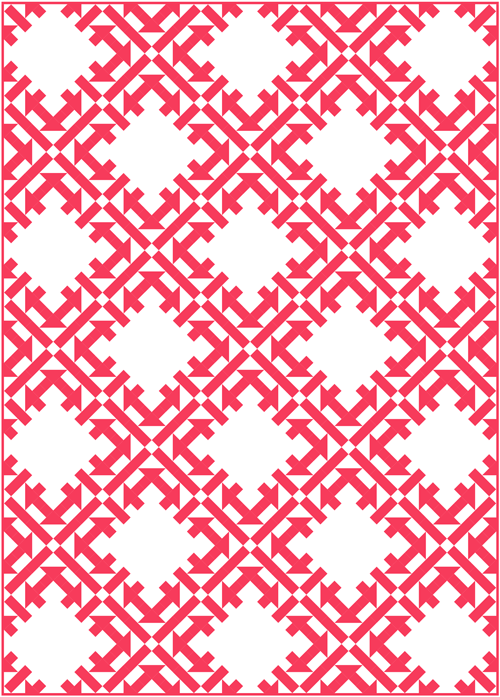
There are 16 unique design ideas for you to ponder. Click here to see them.
You'll also find coloring pages for two of the designs to download and play with yourself.
Enjoy!
What about a different quilt block?
For a list of all the 220+ quilt block patterns on this site, start here.
If you know the name of the block, shorten your search by using these links:
Click here if you're looking for blocks with at least some paper piecing.
Click here if you're looking for the basic building blocks of quilting, i.e., Flying Geese, half square triangles, quarter square triangles, etc., along with several techniques to make each.
And finally, use these links to find blocks in these finished sizes:

