- Home
- Free Quilt Block Patterns
- Buzzard's Roost Quilt Block
🦅 No
Fowl Play Here: Conquer the Buzzard's Roost Quilt Block 🏆
This post contains affiliate links, for which I receive compensation.
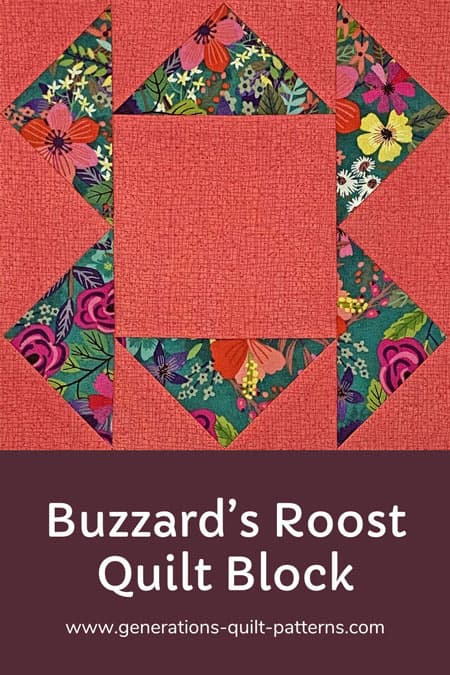
The Buzzard's Roost quilt block may have a name that raises eyebrows 🤨, but don't let that scare you off 🙅♀️.
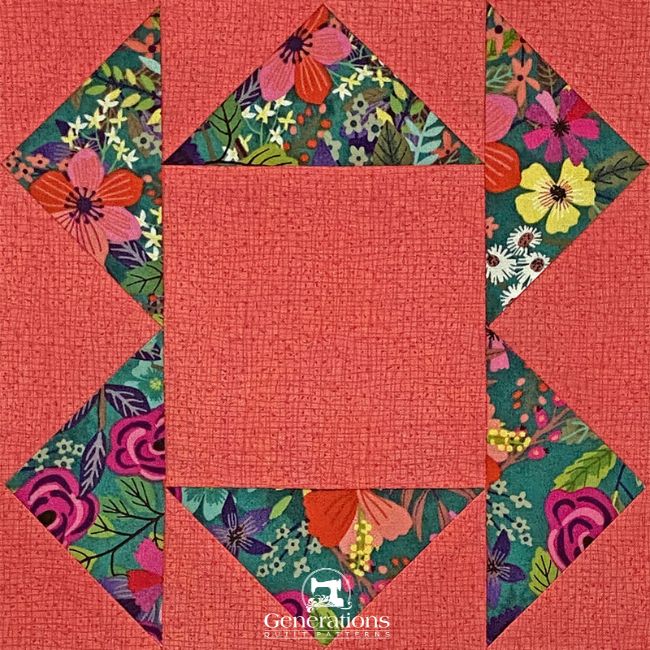
This quirky design is a perfect opportunity to spread your quilting wings 🦅 and try something new ✨.
Whether you're a paper piecing pro or prefer to keep your feet on solid ground with traditional methods, this block offers a flight path for every skill level 🛫🛬.
The Buzzard's Roost quilt block is circling overhead 🦅💨, and it's time to sink your talons into this feather-ruffling design!
🧭 Quick Navigation 🔍
Find what you need:
Cut. Sew. Press. Transform your fabric from chicken scratch to a roosting masterpiece! 🐔➡️🦅
🏠 Homing In On Tried-and-True Methods?
Yearning for familiar territory? Migrate to our traditional piecing tutorial and watch your Buzzard's Roost come together with classic craftsmanship!
General Instructions
Several abbreviations are used on this page. They are:
- SA - seam allowance
- RST - right sides together
- HST - Half Square Triangle
- QST - Quarter Square Triangle
- FG - Flying Geese
A 1/4" SA is used in this tutorial.
Highlighted in yellow, pressing instructions are easy to spot.
To press, first press the patches in the closed position as they came off your sewing machine. This sets the seam, melding the fibers of the threads into the fibers of the fabric.
Then press the SA to the dark unless otherwise noted.
Download and print the paper piecing pattern
To download the pattern, use the most current version of Adobe.
For accurate results, on Adobe's Print Menu page, under 'Page Size and Handling' set 'Custom Scale' to 100%. Then print.
Click here to see what it looks like on the Print Menu page.
Find your finished block size from the chart below. For each block you plan to make, print the following units:
- 2 Side units
- 2 FG units
Download and print paper piecing patterns | ||
|---|---|---|
| Finished Block Size | Pattern Download Links | |
| Side Units | FG | |
| 4" | 1" x 4" | 1" x 2" |
| 5" | 1¼" x 5" | 1¼" x 2½" |
| 6" | 1½" x 6" | 1½" x 3" |
| 8" | 2" x 8" | 2" x 4" |
| 10" | 2½" x 10" | 2½" x 5" |
After printing, use the 1" square graphic on the printed page(s) to double check that your patterns printed at the correct size.
Then cut out the required number of patterns from your copies. A rough cut is good enough—an 1/8"-1/4"-ish away from the outside dashed square.

Not sure which paper to use?
Take a look at my review of several of the most popular brands available to us quilters on the market.
You want a super-easy paper to tear away—less stress on the stitches.
✂️Cutting patches for a Buzzard's Roost quilt block
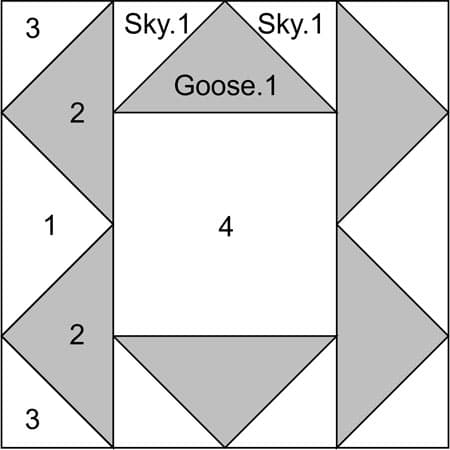 Buzzard's Roost quilt block design
Sample Block Size: 8" finished / 8½" unfinished
Grid: 4×4
Attribution: Yvonne Khan
Design Type: Paper piecing
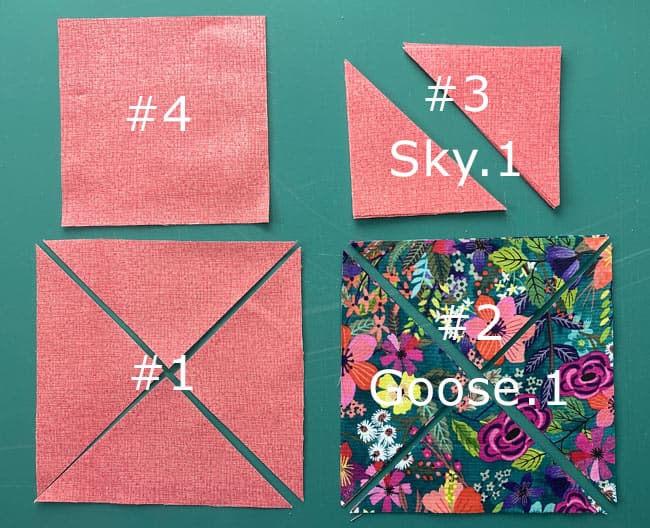
Label your patches. 🏷️ We'll reference these throughout.
 | Cutting Chart for a~ Paper Piecing ~ | |||||||
|---|---|---|---|---|---|---|---|---|
| Patch | Fabric | Qty | Finished Block Size | Sub Cut | ||||
| 4'' | 5 '' | 6'' | 8 '' | 10'' | ||||
| 1 | Bac | 1 | 3⅝'' x 3⅝'' | 4⅛'' x 4⅛'' | 4⅝'' x 4⅝'' | 5⅝'' x 5⅝'' | 6⅝'' x 6⅝'' | |
| 2, Goose.1 | A | 2 | 3⅝'' x 3⅝'' | 4⅛'' x 4⅛'' | 4⅝'' x 4⅝'' | 5⅝'' x 5⅝'' | 6⅝'' x 6⅝'' | |
| 3, Sky.1 | Bac | 4 | 2⅜'' x 2⅜'' | 2⅝'' x 2⅝'' | 2⅞'' x 2⅞'' | 3⅜'' x 3⅜'' | 3⅞'' x 3⅞'' | |
| 4 | Bac | 1 | 2½'' x 2½'' | 3" x 3" | 3½'' x 3½'' | 4½'' x 4½'' | 5½'' x 5½'' | --- |
| Unfinished Block Size | 4½'' | 5½'' | 6½'' | 8½'' | 10½'' | na | ||
| Grid Size | 1 '' | 1¼'' | 1½'' | 2 '' | 2½'' | na | ||
Subcutting
The #1, #2, and Goose.1 squares are subcut twice on the diagonal to create QSTs.
#3 and Sky.1 squares are subcut just once on the diagonal to make HSTs.
After the block is finished, you'll have two each of the #1, #2, and Goose.1 QSTs.
🧵Creating the FG and Side units
Use a dab of Elmer's Washable Gluestick to hold the Goose.1 and #1 QSTs in position between the dashed guidelines.
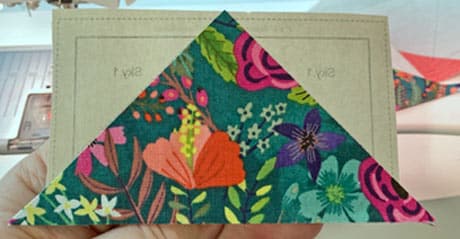 Flying Geese
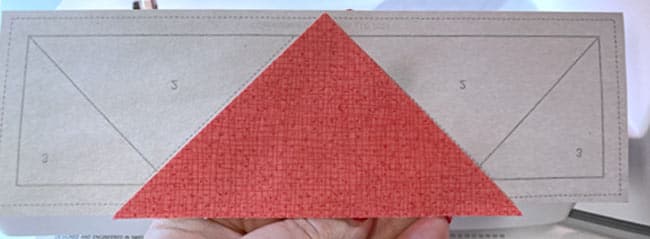 Side Units
We need to make a few adjustments to our sewing machine settings to paper piece.
- Reduce your stitch length to 16–20 stitches per inch (1.3-1.6 mm). This perforates the paper and stabilizes the seam when you remove the pattern. [Learn more about stitch length here.]
- Reduce your machine's speed or just plain slow down. Sew only as fast as you can AND stay on the solid stitching line.
- Install an open toe appliqué foot (sometimes called an 'embroidery' or 'satin stitch' foot) if you have one (it makes it easier to see where you're stitching).
- Use a larger needle (90/14) IF you have problems removing the pattern. Personally, I use an 80/12 Microtex Sharp for paper piecing without any issues.
Flying Geese (FG)
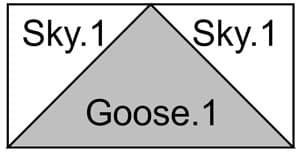
Make 2
With RST, match Sky.1's long bias edge to one side of Goose.1.
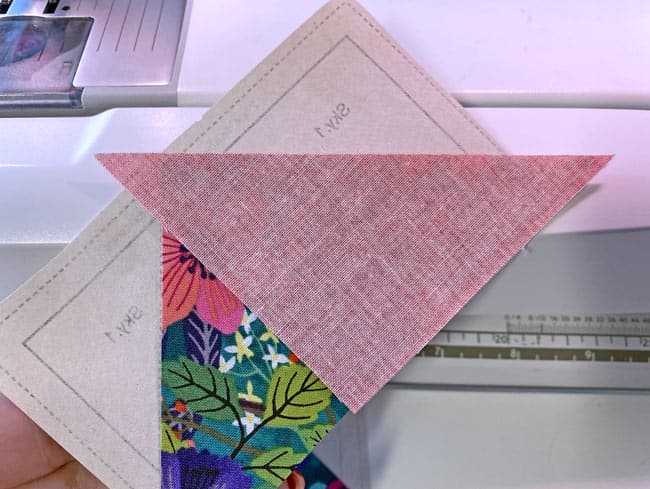
From the paper side, sew the seam starting and ending past the dashed outside lines of the FG. If you experience any problem sewing on the solid line, slow down, especially when you get to the outside corner.
Press.
Position the second Sky.1.
Helpful Hint
While stitching these FGs, my sewing machine was having quite the hissy fit. At the start of each seam, it simply didn't want to make a stitch.
My remedy? Hold both thread tails between my thumb and finger and out to the left behind the presser foot, and then sew the seam. That bit of tension resolved the problem.
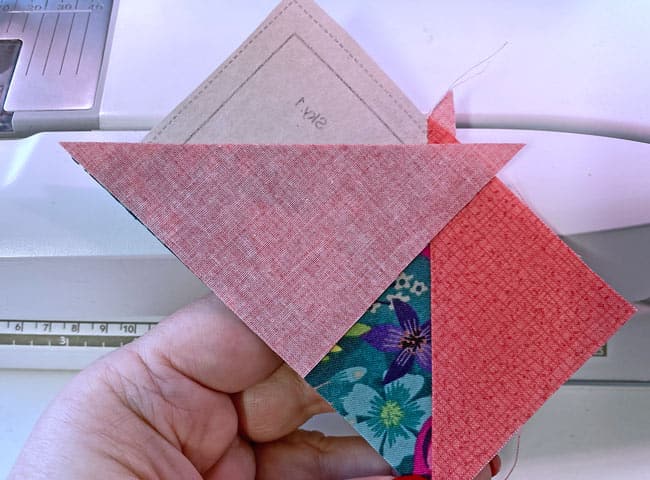
Sew the second seam just like the first, pressing after you've finished.
To trim these FGs to perfection. At your cutting mat, pattern side up, line up the 1/4" mark on your ruler with one of the solid lines surrounding the block.
Cut away the excess fabric and any pattern with your rotary cutter.
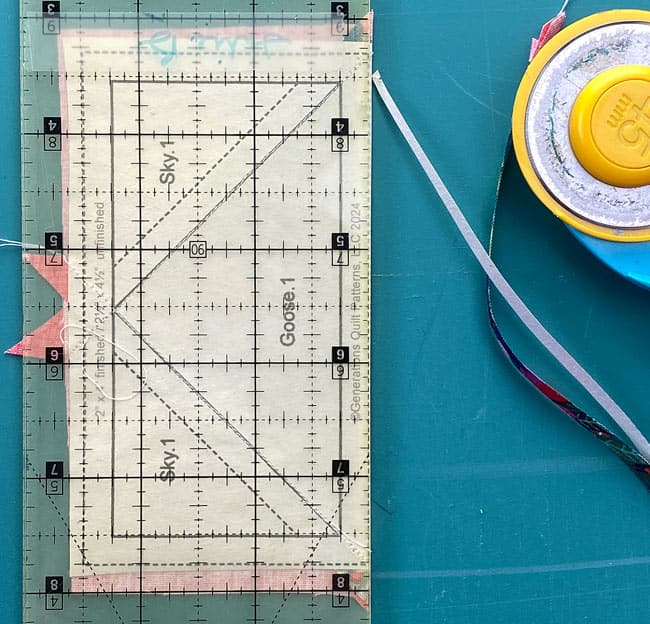
Rotate the FG a quarter turn and trim again. Continue until all four sides of both FGs are trimmed.
Here you can see the untrimmed versus the trimmed FG.
How easy was that?!!
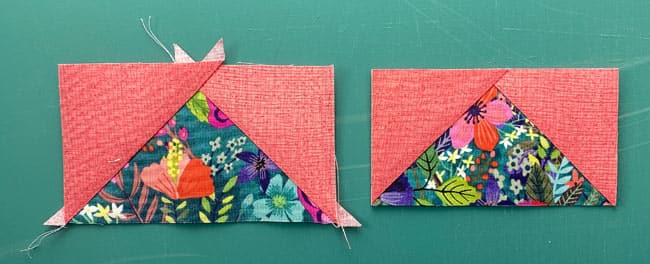 An untrimmed FG (left) versus a trimmed one (right)
Side Units

Make 2
Position the first #2 with #1.
Match the edges with the point of the QST right at the solid line on the pattern (blue arrow).
This simple use of a 'landmark' will save you from having to trim away excess seam allowance before adding the #3s.
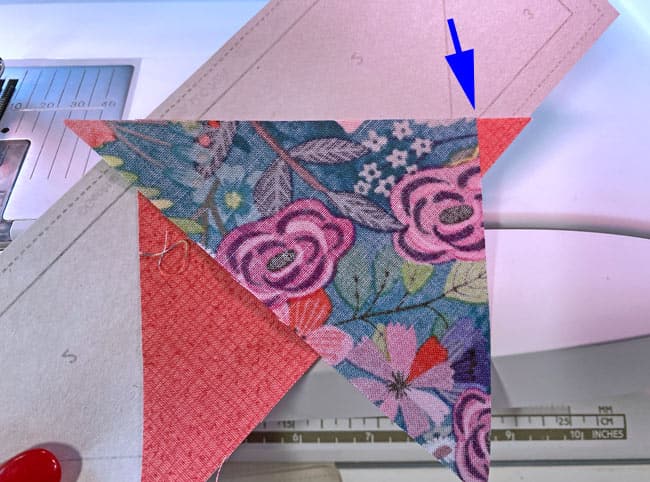
Sew the seam, starting and ending past the outside dashed lines, pressing before adding the second #2.
Use the same landmark (blue arrow) to position the second #2.
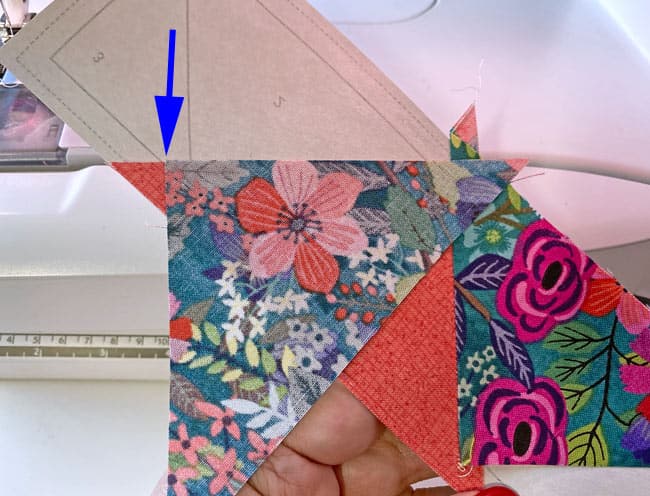
Stitch the seam and press.
After adding the second #2, your Side should look something like this..
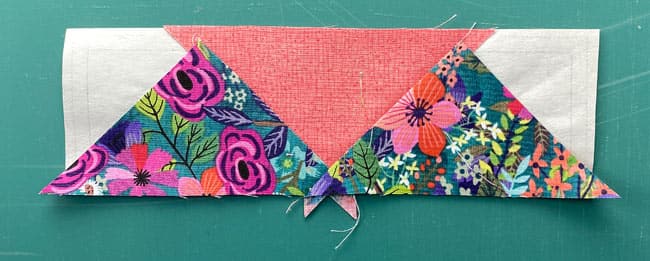
Position the first #3 by lining up its long bias edge with a #2.
Sew the seam.
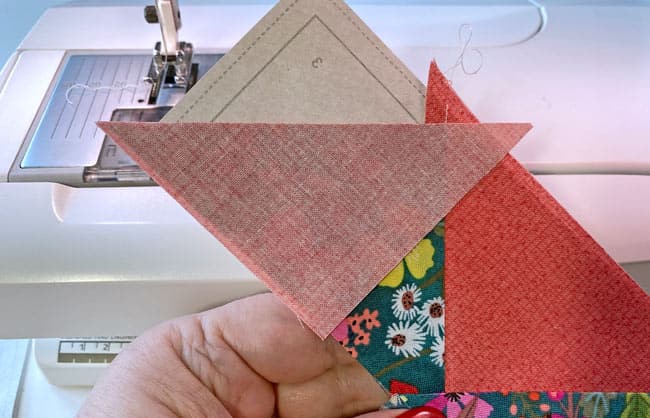
Helpful Hint
The unsewn edge of #2 can get a bit 'floppy' for the bigger block sizes. Don't hesitate to bring out the gluestick and use a tiny dot of glue to hold the #2 in place on the pattern.
The operant word is 'tiny dot'.
Repeat for the final #3.
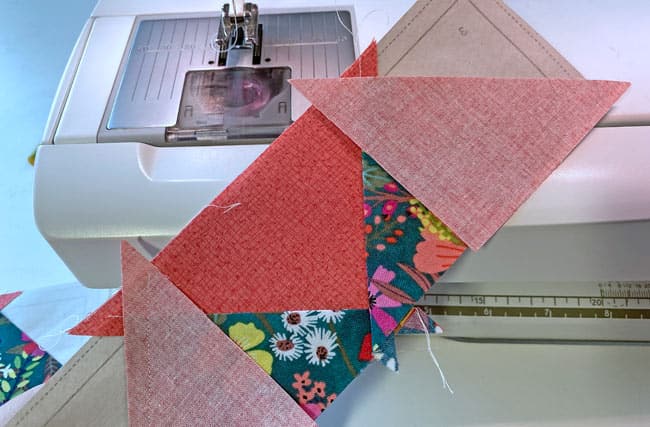
After pressing one final time, trim all four sides of both units, just like we did for the FGs.
 A trimmed Side unit
The paper piecing is complete. From this point forward, return your stitch length to the one you regularly use for piecing and install your favorite 1/4" presser foot.
Go ahead and remove all the paper now. Since we took care cutting our patches, all those outside edges are on the straight of grain and in no danger of stretching out of shape.
Similar to any block we'd pieced using traditional methods!
🧩 Final Assembly: Watch your Buzzard's Roost take shape!
Paper pieced or traditional? No worries—their assembly is identical.
Arrange your patches into the Buzzard's Roost design, the Background fabric forms the "sky" on all outer edges.
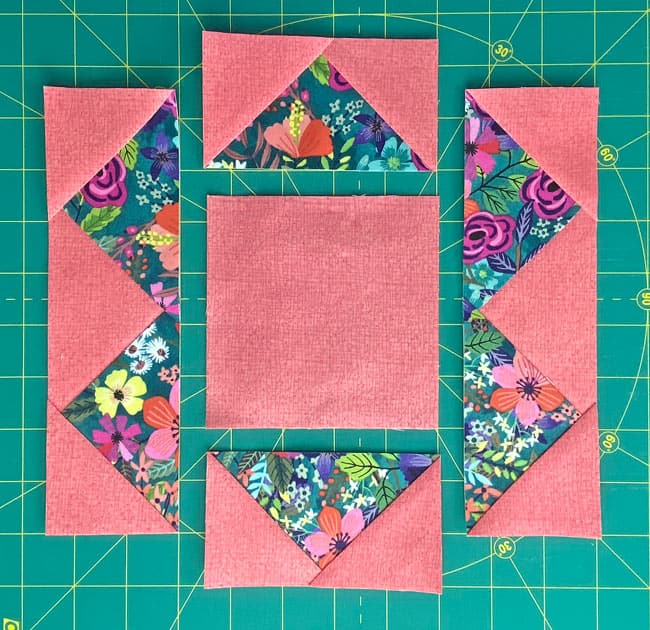 Units from our paper pieced tutorial
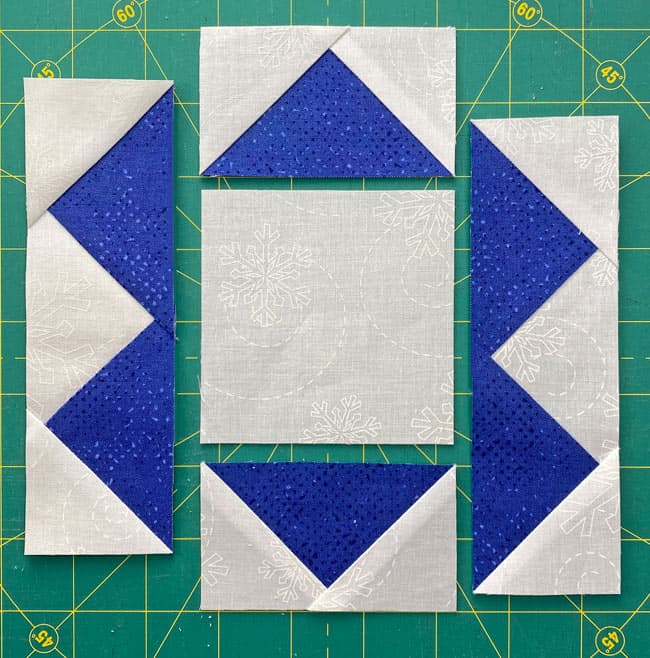 Units from the traditionally pieced tutorial
NOTE: From this point forward, regardless of which technique you used, the assembly instructions are the same.
We're flipping the script from our usual block construction in rows. This time we work with columns.
Think "spine before wings" as you assemble your Buzzard! 🦅
Use pins as needed to keep those edges lined up. For our 8" finished sample, both sides can be pinned and stitched. The SAs are pressed away from the FGs.
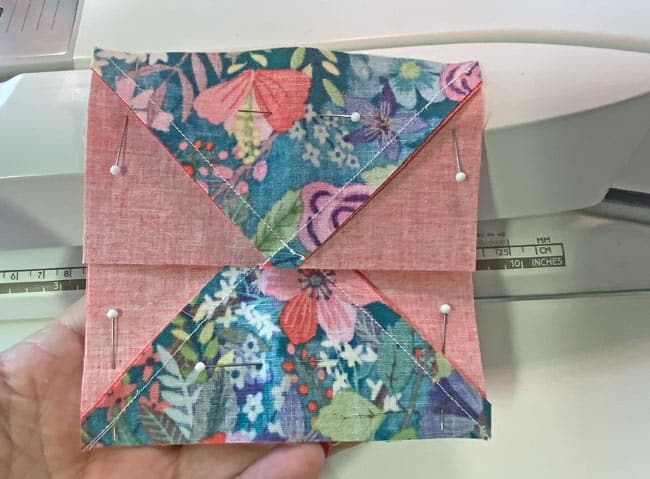
We're in the final stretch. Time to unite the columns.
All those points should be exactly 1/4" away from the cut edge. Pinning will help you keep all those edges even.
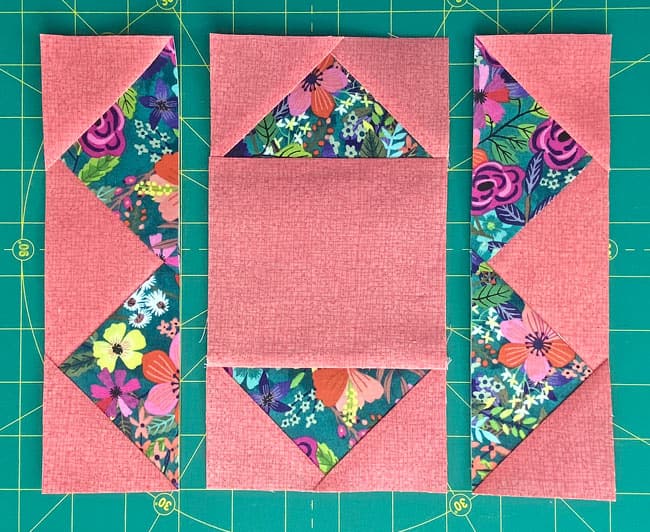
It's the big reveal.
Wasn't that a lot easier to make than what you thought?
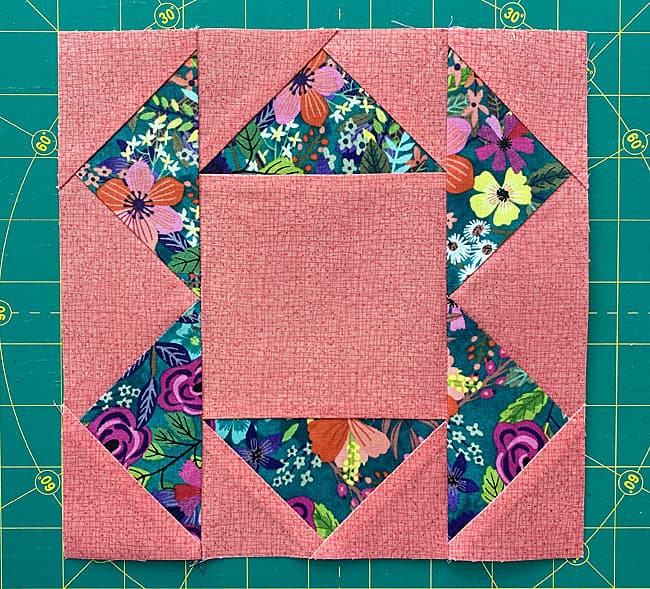
Drumroll, please! 🥁 Let's flip this block over and peek at its underside:
- Notice how the final two seams are pressed away from the center? That's our secret weapon against bulk!
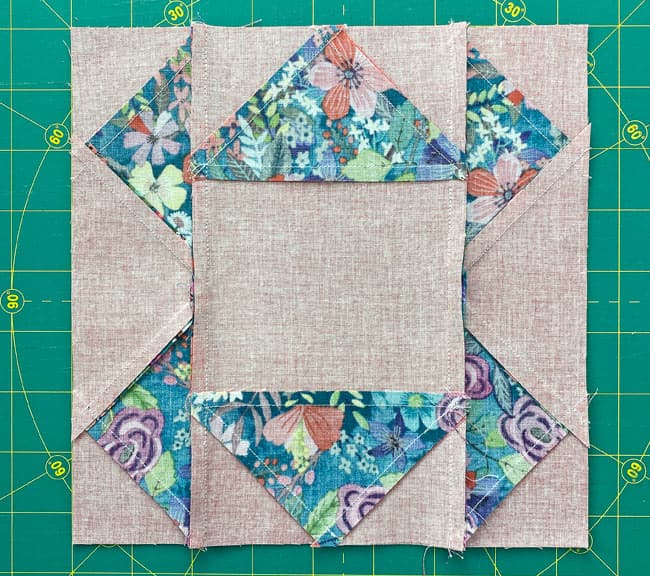
- Time to unleash our 'secret' pressing technique! Use it to bulldoze any remaining bulk in the center side seams.
- These little tricks ensure your Buzzard's Roost lies flatter than a buzzard sunbathing on a warm rock.
Remember, a smooth backside means your block will soar high and proud in your finished quilt. Now that's something to crow about! 🎉
Too many quilting projects circling overhead? 🦅🌀🔄
Pin this Buzzard's Roost tutorial and swoop in on it later when you're ready to elevate your patchwork game!💨💨💨
For even MORE blocks to make… 🧩🎨

...visit our Free Quilt Block Pattern Library, with over 260+ blocks to choose from in multiple sizes.
Free downloads are included in all sizes for any blocks require paper piecing patterns or templates.
- Home
- Free Quilt Block Patterns
- Buzzard's Roost Quilt Block
