- Home
- Free Quilt Block Patterns
- Buzzard's Roost Quilt Block ~ Part 2
Make a Buzzard's Roost Quilt Block with Traditional Techniques
This post contains affiliate links, for which I receive compensation.
Ready to piece together a Buzzard's Roost quilt block the old-school way? You're in for a treat! This traditional method is perfect for quilters who prefer to keep their feet on solid ground.
⚠️ Precision Alert: Your trusty 1/4" seam allowance is your best friend here. It's the secret sauce that'll make your Buzzard soar!
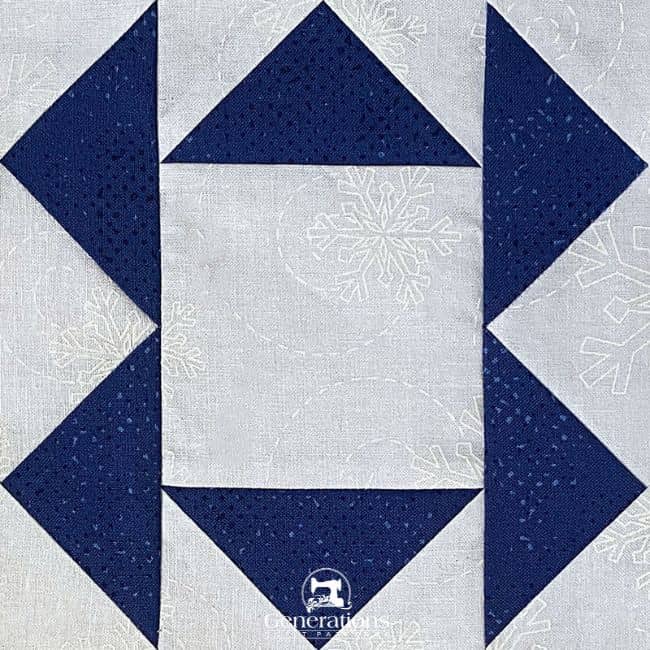
In this tutorial, we'll guide you through each step, from cutting your patches to assembling your block. No paper piecing required—just good old-fashioned quilting skills and a keen eye for accuracy.
Let's ruffle some feathers and create a stunning Buzzard's Roost block! 🦅
🧭Quick Navigation🔍
Soar straight to the info you need - use these links to glide through our tutorial! :
- A cutting chart in five sizes, with downloads of the chart and block design
Cut. Sew. Press. Soar to new piecing heights with raptor-like skill!
📄 Paper Piecing Calling Your Name?
No worries! Swoop over to our paper pieced Buzzard's Roost and let those precise points take flight!
General Instructions
Several abbreviations are used on this page. They are:
- SA - seam allowance
- RST - right sides together
- HST - Half Square Triangle
- QST - Quarter Square Triangle
- FC - Folded Corners
A 1/4" SA is used in this tutorial.
Highlighted in yellow, pressing instructions are easy to spot.
To press, first press the patches in the closed position as they came off your sewing machine. This sets the seam, melding the fibers of the threads into the fibers of the fabric.
Then press the SA to the dark unless otherwise noted.
✂️
Cutting patches for a traditional Buzzard's Roost
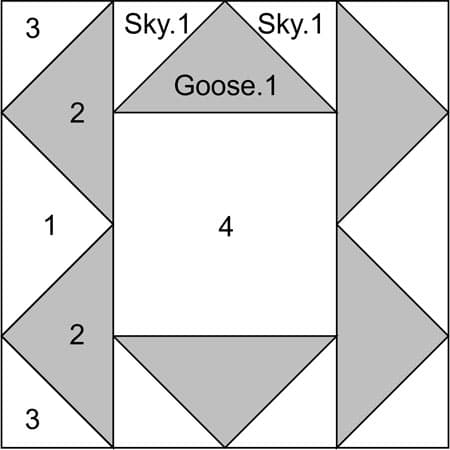 Buzzard's Roost design
Sample Block Size: 6" finished / 6½" unfinished
Grid: 4×4
Attribution: Yvonne Khan
These patches are cut exactly to size, so take care with the cutting, subcutting, and marking.
⚠️ Precision Alert: Your 1/4" seam is crucial here
This unique HST-shape assembly leaves no room for error. Boost your accuracy with a quick Sewing Test using leftovers from cutting your patches.
 | Cutting Chart for a~ Traditional Piecing ~ | |||||||
|---|---|---|---|---|---|---|---|---|
| Patch | Fabric | Qty | Finished Block Size | Sub Cut | ||||
| 4'' | 6'' | 8'' | 10'' | 12'' | ||||
| 1 | Bac | 1 | 3¼'' x 3¼'' | 4¼'' x 4¼'' | 5¼'' x 5¼'' | 6¼'' x 6¼'' | 7¼'' x 7¼'' | |
| 2 | A | 1 | 3¼'' x 3¼'' | 4¼'' x 4¼'' | 5¼'' x 5¼'' | 6¼'' x 6¼'' | 7¼'' x 7¼'' | |
| 3 | Bac | 2 | 1⅞'' x 1⅞'' | 2⅜'' x 2⅜'' | 2⅞'' x 2⅞'' | 3⅜'' x 3⅜'' | 3⅞'' x 3⅞'' | |
| 4 | Bac | 1 | 2½'' x 2½'' | 3½'' x 3½'' | 4½'' x 4½'' | 5½'' x 5½'' | 6½'' x 6½'' | --- |
| Goose.1 | A | 2 | 1½'' x 2½'' | 2'' x 3½'' | 2½'' x 4½'' | 3'' x 5½'' | 3½'' x 6½'' | '--- |
| Sky.1 | Bac | 4 | 1½'' x 1½'' | 2'' x 2'' | 2½'' x 2½'' | 3'' x 3'' | 3½'' x 3½'' | '--- |
| Unfinished Block Size | 4½'' | 6½'' | 8½'' | 10½'' | 12½'' | na | ||
| Grid Size | 1'' | 1½'' | 2'' | 2½'' | 3'' | na | ||
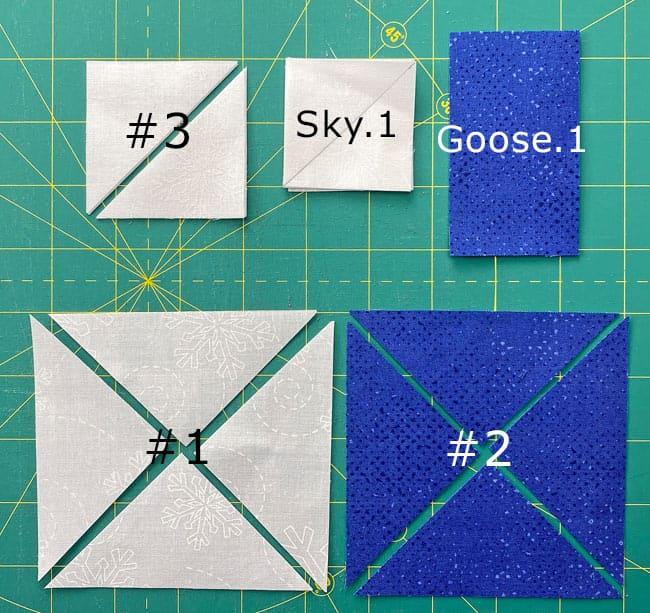
Subcutting and patch prep for traditional piecing
- #1 & #2: Cut twice diagonally to make QSTs
- #3: Cut once diagonally to create HSTs
- Sky.1: Draw a diagonal line on the back
When we finish piecing the block, there'll be two #1 QSTs leftover.
🪡Piecing the units for your Buzzard's Roost
Folded Corner FG
Make 2
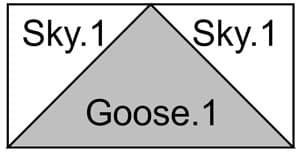
With RST, layer a Sky.1 and Goose.1 as shown below.
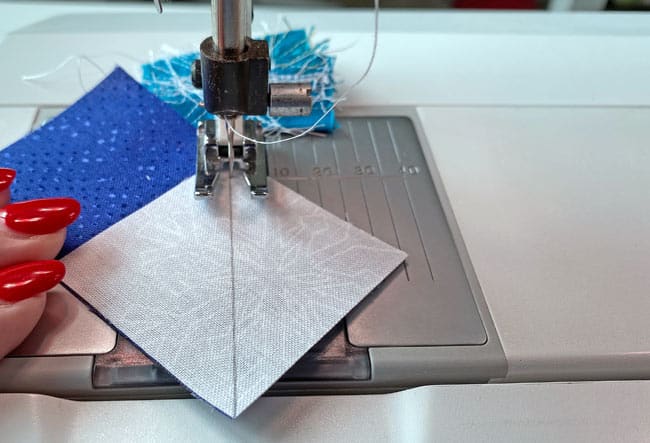 That little scrap of fabric behind the needle gets a lot of use in my workflow
If you're encountering any problems with your sewing machine mangling the start of your stitches, try stitching first onto a scrap of fabric (sometimes called a 'leader' or an 'ender'). Without cutting the threads, continue on to the patches.
For the best results, stitch on the side of the line closest to the corner. This accounts for the 'turn of the cloth' in the SA.
Press. Check the accuracy of your seams. All the edges should meet.
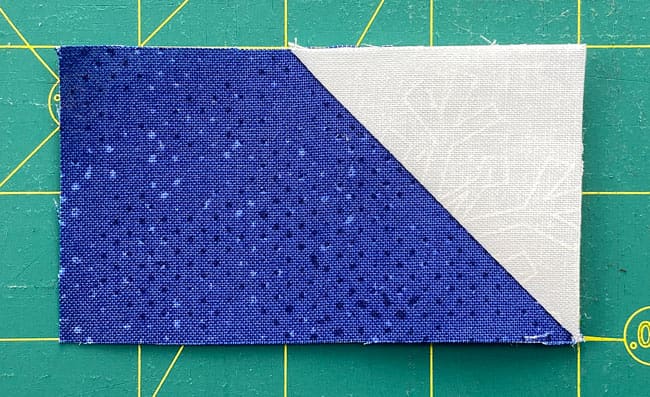
If they don't, consider redoing the patch before moving forward.
When they're even, as in the photo, at your cutting mat, lineup the 1/4" marking on your ruler with the seam (blue arrow) and trim away the excess fabric leaving behind a 1/4" SA.
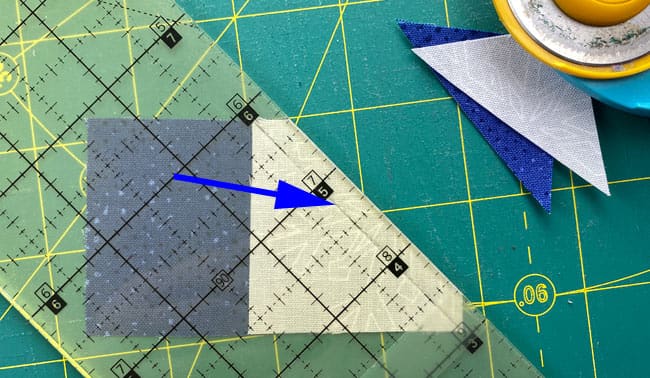
Repeat for the second Sky.1 patch.
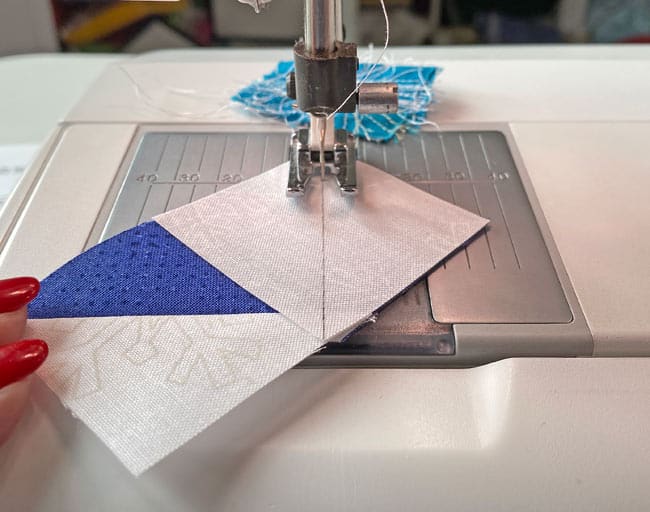
Side Units
Make 2

If stitching these HST-shapes together along one of the short edges (instead of the long bias edge) is new to you, lay them out first.
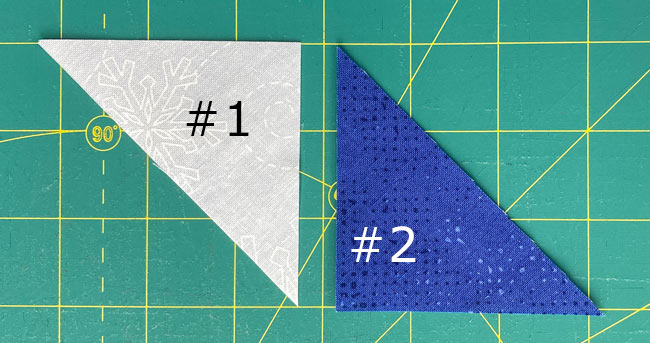
Then layer them RST.
This is the important part.
Position them so that your 1/4" seam will hit exactly where the lighter #1 crosses the edge of #2...in the 'valley' of the patches ON BOTH SIDE. (blue arrows)
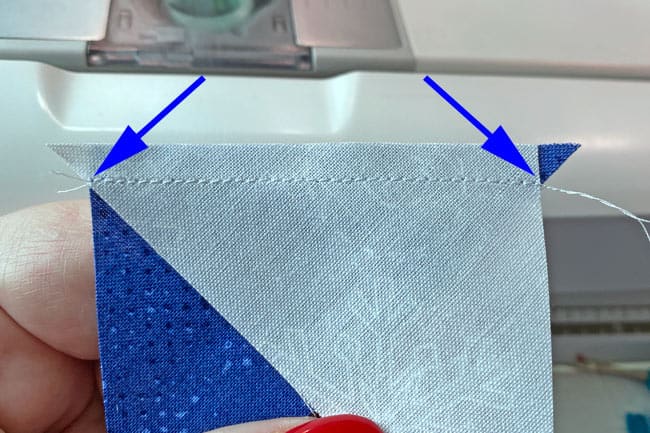 Notice that the little triangle shapes that stick out past the blue arrows are a close to the same size as possible.
Press.
On this sample, I started with pressing the seam open, but didn't do it again.
'Seams open' actually created some weird bulk at the point that I didn't anticipate, so I pressed the remaining SAs to one side.

Repeat for the second #2, adding it to the other short side of #1.
Press.
#3 is simply adding a HST-shape to square off the ends of our side unit.
With RST, match the long bias edges, the exposed points on #2 and #3, and the straight of grain edges. Use the photo below for reference.
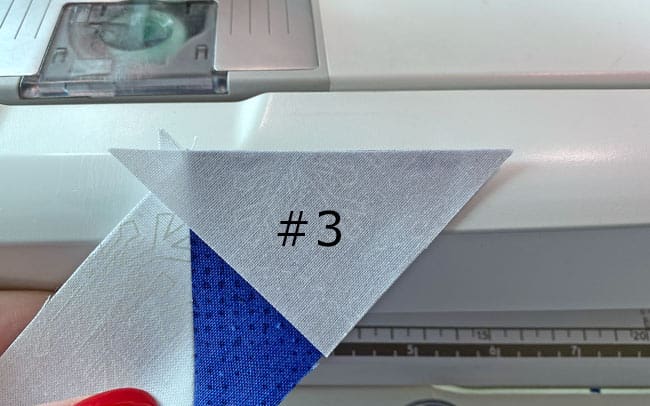
Repeat for the other side.
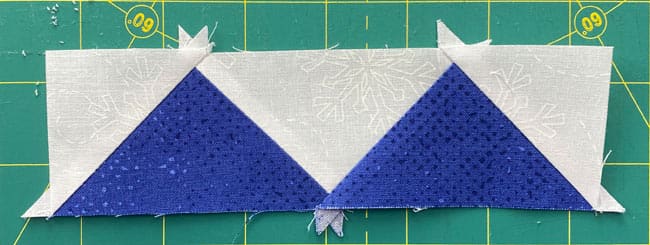
Here's the Side before a final turn at the ironing board and a quick trim of those dog ears.
📏 Size Check
Are your Buzzard's Side units the right size? Let's find out! 🔍
After sewing, the Side units measure... | |
|---|---|
| Finished Block Size | Edge-to-edge Measurement |
| 4" | 1½" x 4½" |
| 6" | 2" x 6½" |
| 8" | 2½" x 8½" |
| 10" | 3" x 10½" |
| 12" | 3½" x 12½" |
🎉 Congratulations! Your Buzzard's Roost pieces are ready for their grand debut.
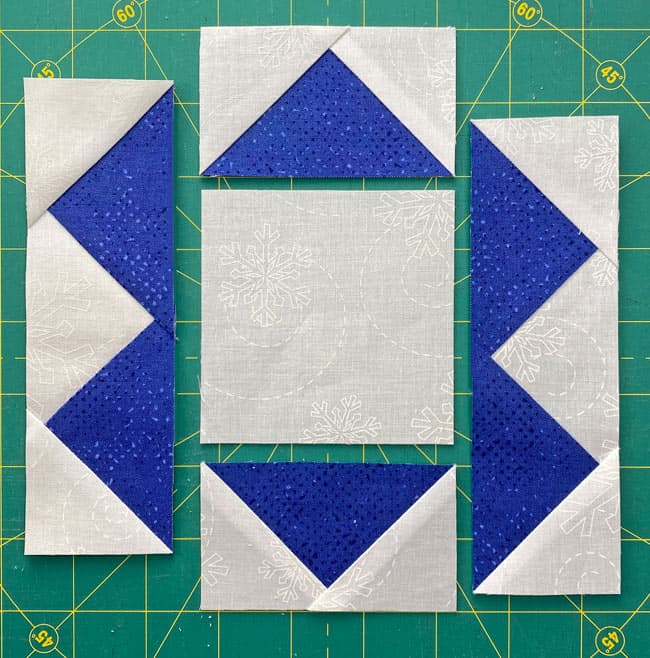
🦅 Ready to see your Buzzard take flight? Click here to soar into final assembly!
Worried about forgetting this quirky quilt block? 😨
Don't let it fly the coop! 🦅
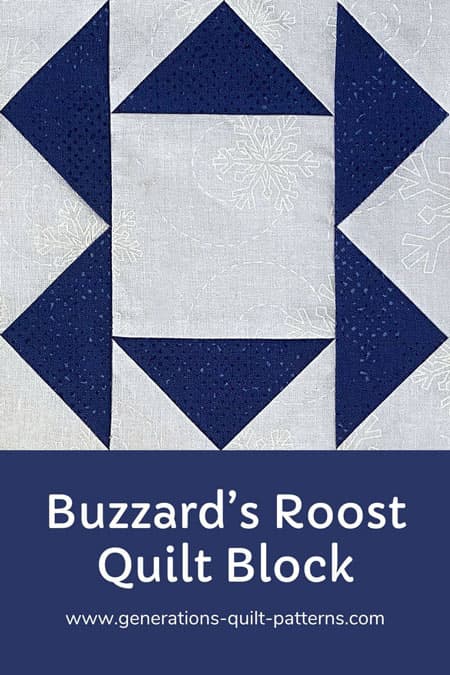
Pin the Buzzard's Roost tutorial now 📌 and nest it in your quilting plans for later. 🧵🪡
For even MORE blocks to make… 🧩🎨

...visit our Free Quilt Block Pattern Library, with over 260+ blocks to choose from in multiple sizes.
Free downloads are included in all sizes for any blocks require paper piecing patterns or templates.
- Home
- Free Quilt Block Patterns
- Buzzard's Roost Quilt Block ~ Part 2


