- Home
- Free Quilt Block Patterns
- Broken Wheel Quilt Block
Broken Wheel Quilt Block
From our Free Quilt Block Patterns Library
This post contains affiliate links, for which I receive compensation.
Skill Level: Confident Beginner
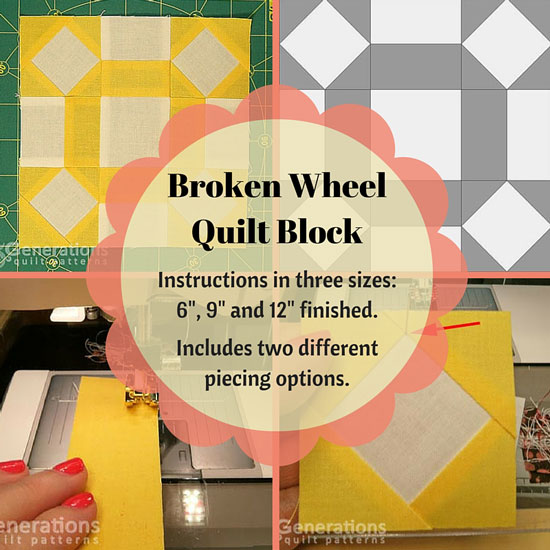
The Broken Wheel quilt block (also known as Mrs. Miller's Favorite) is made from basic Square in a Square units with a bit of strip piecing thrown in for good measure.
Choose your favorite technique.
Cutting charts and instructions are included for both paper pieced and Connector Corner patches.
If you're a machine embroidery enthusiast, check out the 12" version. The center patch is 4" finished—the perfect spot to try out a new embroidery collection.
For inspiration, several kissin' cousins of the Broken Wheel are shared at the bottom of the page.
Or try your hand at coloring your own blocks with the coloring page for the design.
Let's get started!
📋 General Instructions
We use several abbreviations on this page:
- SA - seam allowance
- RST - right sides together
- SiaS - Square in a Square unit
Seam allowances (SA) are all 1/4".
Cutting directions and instructions are included for both paperpiecing or using Connecting Corners to complete the corner units. You'll need to choose one method.
Starched quilt fabrics are easier to work with in my humble opinion. Yours cuts are more accurate. Your seams easier to fingerpress. Try it to see if you agree.
The newest quilt fabrics to tickle your fancy...
Click the images below to see the full collection. We share any commercial and/or free patterns that showcase them, too. (For inspiration, of course!)
Step 1: Printing the paper piecing pattern
Skip this Step if you choose Connector Corners.
You'll need the most current version of Adobe installed on your computer to download the pattern.
On the Adobe Print Menu page, under 'Page Size and Handling' set 'Custom Scale' to 100% before printing for accurate results. Click here to see what it looks like on the Print Menu page.
After printing, use the 1" square graphic on the printed pages to confirm they are printed accurately.
Choose your finished block size below, note the number of copies you'll need and click the corresponding unit size.
| PRINT the Paper Piecing Patterns | ||
|---|---|---|
| Finished Block Size | # of copies to print | Link to PDF Pattern |
| 6" | 1 | 2” |
| 9" | 1 | 3” |
| 12" | 2 | 4” |
Step 2: Cutting patches for a Broken Wheel block
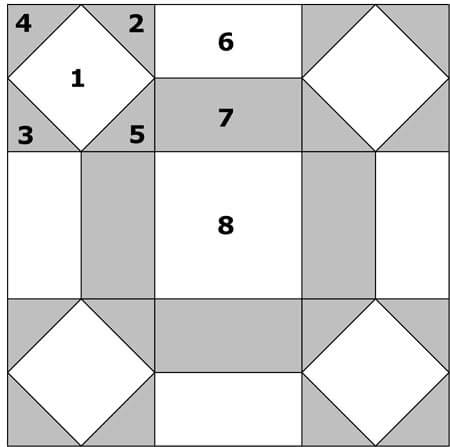 The Broken Wheel design
Sample Size: 6" finished / 6½" unfinished
Grid: 6x6
Attributed to: Clara Stone
AKA: Mrs. Miller's Favorite (Needlecraft Supply), Peek-a-Boo (Joseph Doyle)
Design Type: Even 9-patch
Choose fabrics with good contrast. That way all your piecing shows.
In the cutting charts below, the yellow one includes some paperpiecing; the blue one uses Connector Corners instead.
To make the tables below easier to read, when you see a single number for a patch it means cut a square that size.
For example, the Center.1 patch for a 6" block reads 1 7/8". That means cut a 1 7/8"x1 7/8" square.
Includes some paper pieced units (Patches 1-5)
 |
Cutting Chart for a~ Paper Piecing ~ | |||||
|---|---|---|---|---|---|---|
| Patch | Fabric | Qty | Finished Block Size | Sub Cut | ||
| 6" | 9" | 12" | ||||
| Center.1 | L | 4 | 1 7/8” | 2 5/8” | 3 3/8” | na |
| Corner.2-.5* | D | 8 | 2 3/8” | 2 7/8” | 3 3/8”** | |
| 6 | L | 1 | 1 1/2” x 11” | 2” x 15” | 2 1/2” x 19” | na |
| 7 | D | 1 | 1 1/2” x 11” | 2” x 15” | 2 1/2” x 19” | na |
| 8 | L | 1 | 2 1/2” | 3 1/2” | 4 1/2” | na |
| Unfinished Block Size | 6 1/2" | 9 1/2" | 12 1/2" | --- | ||
| Grid Size | 1" | 1 1/2" | 2" | --- | ||
*Remember to subcut these patches
**No, this is not a typo.
Includes Connector Corner units (Patches 1-5)
There is no subcutting in this second cutting chart.
 |
Cutting Chart for a~ Traditional Piecing w/Connector Corners ~ | ||||||
|---|---|---|---|---|---|---|---|
| Patch | Fabric | Qty | Finished Block Size | ||||
| 6" | 9" | 12" | |||||
| 1 | L | 4 | 2 1/2” | 3 1/2” | 4 1/2” | ||
| 2 – 5 | D | 16 | 1 1/2” | 2”sq | 2 1/2” | ||
| 6 | L | 1 | 1 1/2” x 11” | 2” x 15” | 2 1/2” x 19” | ||
| 7 | D | 1 | 1 1/2” x 11” | 2” x 15” | 2 1/2” x 19” | ||
| 8 | L | 1 | 2 1/2” | 3 1/2” | 4 1/2” | ||
| Unfinished Block Size | 6 1/2” | 9 1/2” | 12 1/2” | ||||
| Grid Size | 1” | 1 1/2” | 2” | ||||
Step 3: Sewing the units
Square in a Square (SaiS) Corners
Make 4

For each technique:
- The #2 thru#5 shapes are exactly the same
- The numbers refer to both the patch and order of piecing
For both techniques, I prefer an open toe applique foot for stitching on the printed or drawn lines.
If you used the yellow chart, click here for instructions.
If you used the blue chart, click here for instructions.
Sides
Make 4

Install your favorite quarter inch foot.
If you paperpieced, return to your normal stitch length for piecing.
With RST, stitch the #6 and #7 strips together on the long edge.
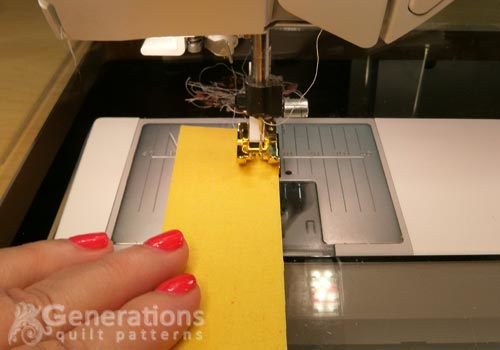 My favorite 1/4" foot has a guide on the right-hand side - perfect for sewing with starched fabrics.
Press toward the darker #7 strip.
At your cutting mat, straighten a short edge by aligning a straight line on your ruler with the seam line (red arrow) and trim.
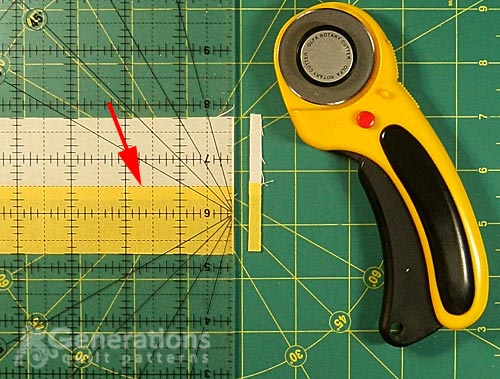 Trim only as much as you need to get a nice straight edge.
Subcut this strip set into four equal-sized units. Choose the subcut width from the table below.
| Finished Block Size | Width of strip set after stitching | Subcut Width |
|---|---|---|
| 6" | 2 1/2” | 2 1/2” |
| 9" | 3 1/2” | 3 1/2” |
| 12" | 4 1/2” | 4 1/2” |
After cutting, you have this.
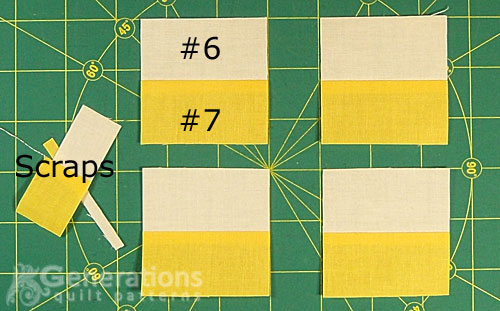 The #6 and #7 patches are identified in the upper left unit
Step 4: Assemble the Broken Wheel quilt block
Arrange the units into rows. Remember that light #6 patches are on the outside edges.
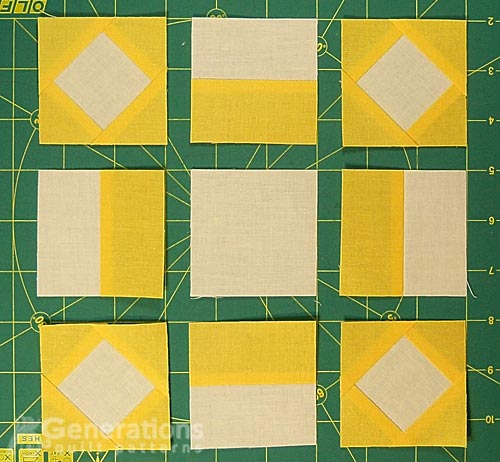
Sew the units in each row together. To get good match points between the corner and side patches, I insert a pin from the backside through the point of the square on the front (red arrow).
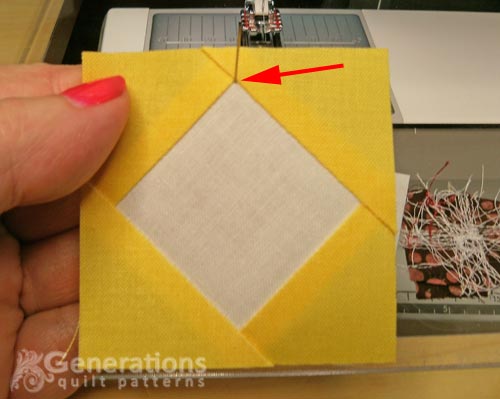 For the best match, insert the pin perpendicuarly into the patch.
Insert the pin at the seam, a 1/4" away from the edge in a side patch. Stitch.
Complete two sets of patches like this.
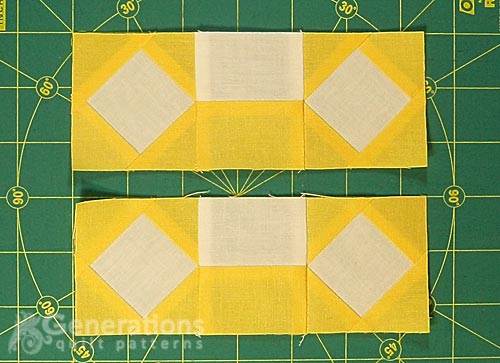 Seams are pressed to the center
Stitch the patches in the center row together. Press.
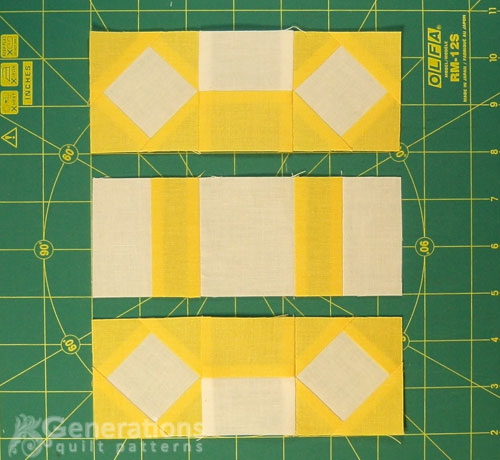 Press the seams in the center row that join the patches away from the center.
Pin and stitch the rows together. Press these SA toward the outside edges of the block.
Your Broken Wheel quilt block is finished.
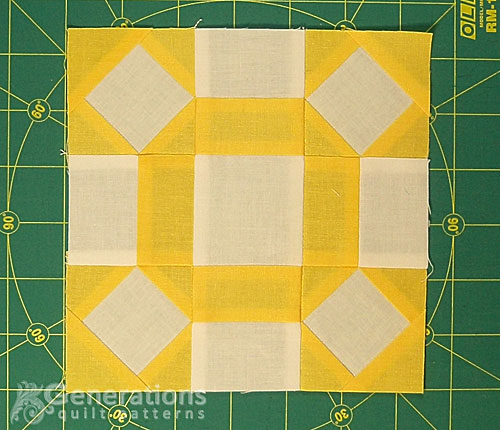 Perfect Pointy Perfection!
Here's our Broken Wheel from the backside so you can see the pressing.
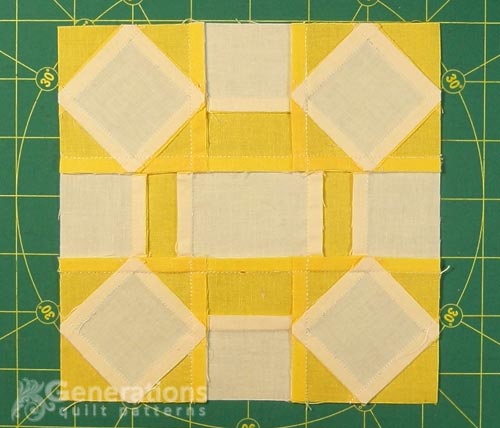 Seams are pressed away from the corner units to minimize bulk.
Variations on a Theme
There's a whole gaggle of blocks that use the same basic Broken Wheel design.
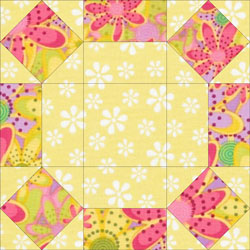
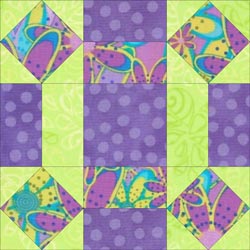
Broken Wheel
Yep! Same name, even though all the lights/darks are swapped.
AKA: Block Circle, Johnnie Round the Corner, Single Wedding Ring, Squirrel in a Cage and Wheel
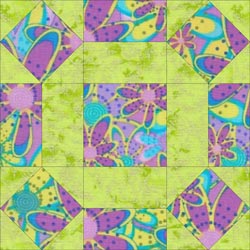
Squirrel in a Cage
Darks/lights are again reversed.
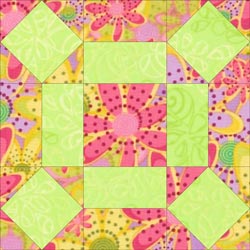
Rolling Stone
AKA: Letter O, Wedding Ring
Fabrics are swapped in the side and center units.
Click here for instructions to make it.
New Hampshire Granite
A third fabric is added to the design
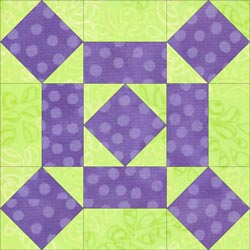
Friendship Quilt
A fifth Square in a Square is added to the center along with fabric placement changes.
In these last two blocks, the grid the block is drawn on is modified.
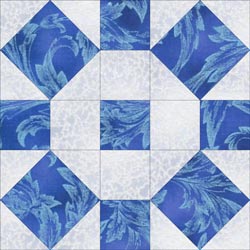
Rolling Square
Fabric placement exactly like the Squirrel in a Cage. However, this block is drawn on a 5x5 grid.
Click here for instructions to make it.
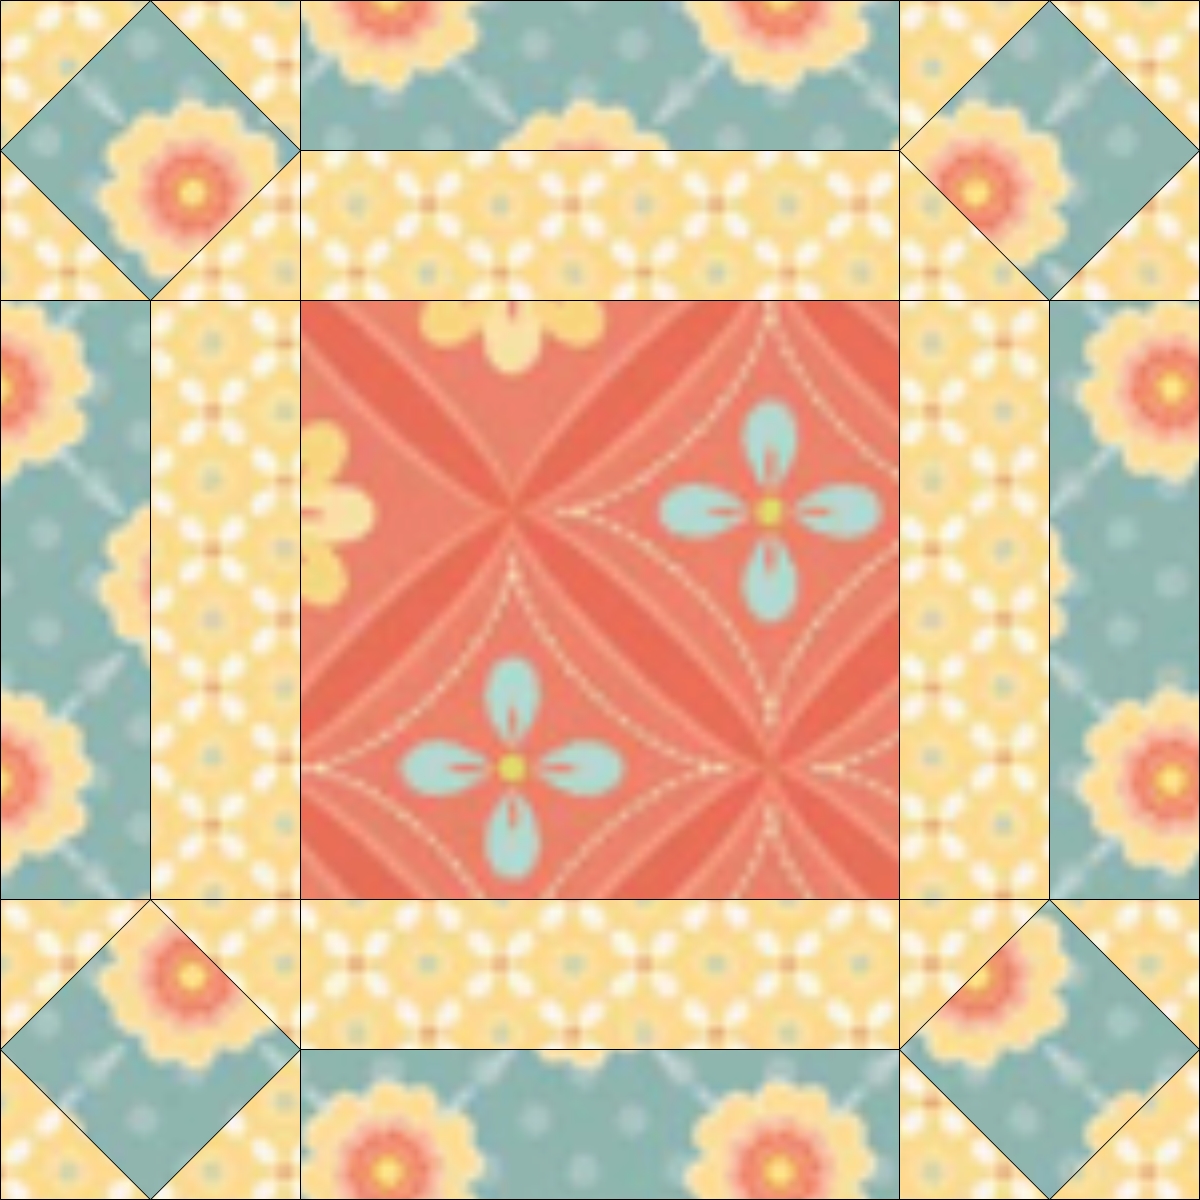
The Broken Wheel
This version by The Kansas City Star is drawn on a 8x8 grid.
The word 'The' is actually part of its name.
Did you know?
The common Pinwheel block ALSO goes by the name 'Broken Wheel'.
How will you color yours?
Click here to download and print a coloring page for this block to try your hand at.
Print as many as you'd like for your own personal use!
What about a different quilt block?
For a list of all the 220+ quilt block patterns on this site, start here.
If you know the name of the block, shorten your search by using these links:
Click here if you're looking for blocks with at least some paper piecing.
Click here if you're looking for the basic building blocks of quilting, i.e., Flying Geese, half square triangles, quarter square triangles, etc., along with several techniques to make each.
And finally, use these links to find blocks in these finished sizes:
