- Home
- Free Quilt Block Patterns
- Bright Hopes Quilt Block
Bright Hopes Quilt Block
A Simple Lesson in Partial Seams
This post contains affiliate links, for which I receive compensation.
Skill Level: Beginner
The Bright Hopes quilt block is pretty easy, but 'partial seams' can seem a bit scary if you're new to quilting.
Honestly, the trickiest part of this block is remembering to add the rectangles in the same order.
If you were making a whole bunch of them, it'd be easy to start with the first batch going clockwise around the center, and at your second sitting add them counter-clockwise.
But that's as hard as it gets.
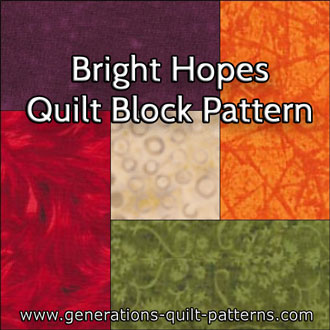
Now, this block might seem too simple to bother with, but it's got some hidden values.
- It adds complexity to the design without complexity to the piecing.
- What a scrap-buster! Just cut all the #2s from different fabrics.
- It's a great equalizer for uneven blocks. If you've ever participated in a block exchange, you know that blocks from the same pattern but by different quilters can come out radically different sizes.
- There are no extra seams to match. A quilt made of just these blocks is as easy to put together as one made of cut squares. Can you say 'quick baby quilt'???
I've got Bright Hopes for YOUR quilting future and I hope you do, too. Let's get busy!
📋 General Instructions
All seam allowances (SA) are 1/4".
Press every SA away from the center square.
The newest quilt fabrics to tickle your fancy...
Click the images below to see the full collection. We share any commercial and/or free patterns that showcase them, too. (For inspiration, of course!)
Step 1: Cutting for a Bright Hopes quilt block
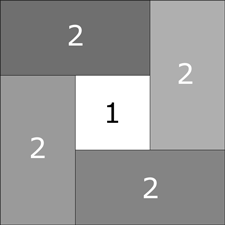 Bright Hopes quilt block design
Sample Size: 6" finished / 6½" unfinished
Grid: 3x3
Attributed to: Farm Journal
Design Type: Puzzle pieced/partial seams
In the sample block, I use four different fabrics for #2 to make it easier to see and understand the construction.
You use 2 or 4 or even just 1.
Try to balance the values of the fabrics, placing the two darkest #2s diagonal from each other.
Cut your patches using the dimensions in the cutting chart below.
 |
Cutting Chart for a~ Traditional Piecing ~ | ||||||
|---|---|---|---|---|---|---|---|
| Patch | Fabric | Qty | Finished Block Size | ||||
| 3" | 4½" | 6" | 9" | 12" | |||
| 1 | Background | 1 | 1-1/2” x 1-1/2” | 2”x2” | 2-1/2” x 2-1/2” | 3-1/2” x 3-1/2” | 4-1/2” x 4-1/2” |
| 2 | Assorted | 4 | 1-1/2” x 2-1/2” | 2” x 3-1/2” | 2-1/2” x 4-1/2” | 3-1/2” x 6-1/2” | 4-1/2” x 8-1/2” |
| Unfinished Block Size | 3-1/2” | 5” | 6-1/2” | 9-1/2” | 12-1/2” | ||
| Grid Size | 1” | 1-1/2” | 2” | 3” | 4” | ||
After cutting it's helpful to layout your patches as they'll be sewn. Remember this block is constructed by adding patches in a clockwise fashion.
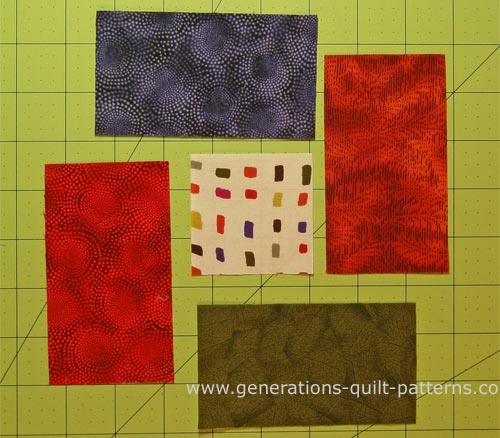
Step 2: The first partial seam
With right sides together (RST), align #1 with the end of the first #2.
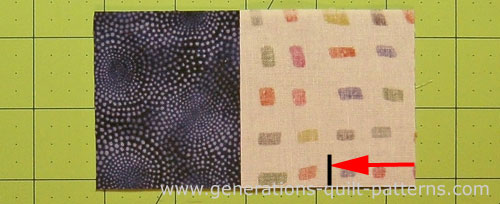 You'll stitch from the edge to the solid black line—a partial seam—on the bottom edge as shown.
I like to start my stitching on a 'spider'—that's the hairy scrap of fabric behind my needle—my machine makes a much better first stitch with it. 'Saves thread, too!
Stitch up to the pin, about halfway to the other edge of the #1 patch. I don't backstitch since I'll sew over these same stitches at the end, securing them. (You may want to backstitch. It's a personal choice.)
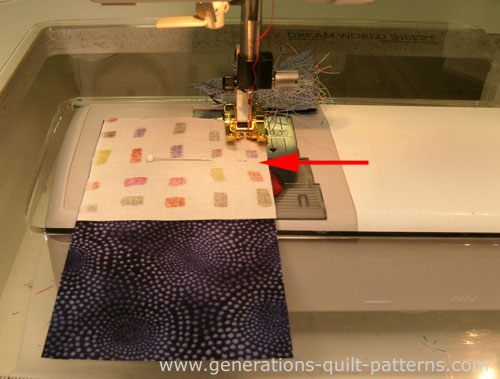 I've stitched this partial seam in red. It's easier to see that way.
Step 3: Add remaining #2's to your Bright Hopes
With RST, add the next #2. The black arrow points to the first seam for reference; the red arrow to my friendly spider.
Press.
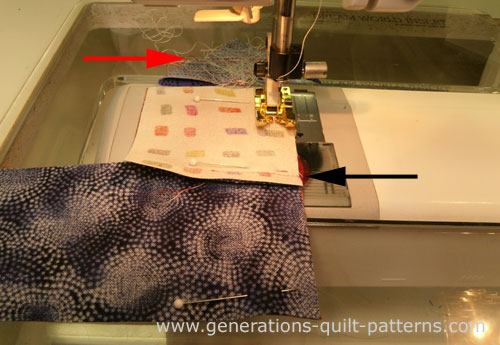
With RST, add the third #2, pressing after it's stitched.
Add the fourth #2. This is the last full seam.
 Sewing the last #4 to the block.
After pressing, your Bright Hopes quilt block looks like this. Almost done, but not quite.
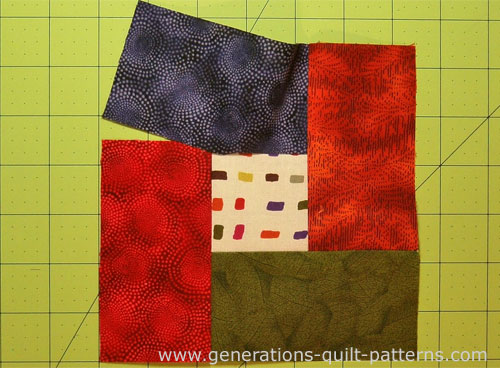
Step 4: The second half of your first seam
All that's left to stitch is the remaining half of our first purple #2 to the block. I use pins for control—it's lumpy, but quite manageable.
Stitch (overlapping a 1/4" of the previously sewn stitches to lock them in place) to the edge.
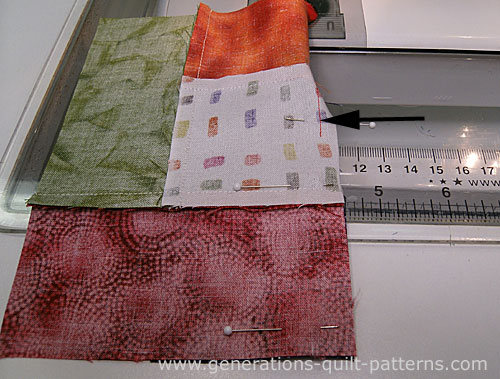 I start sewing this half seam at the black arrow to secure my stitching.
One final trip to the ironing board and your Bright Hopes quilt block is finished!
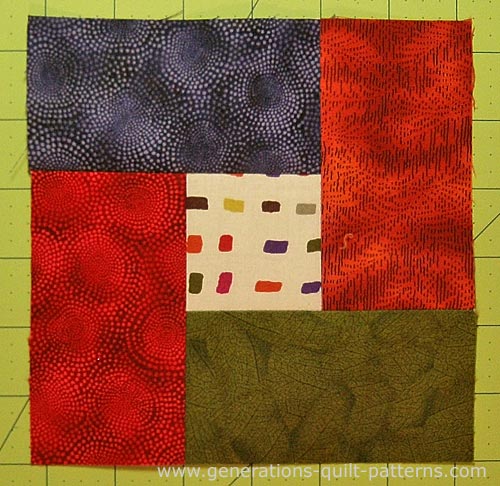
Bright Hopes Quilt Block—The Great Equalizer!
If you've been quilting long, you've probably participated in a block exchange or two. It's not uncommon to get back blocks that are quite a range of sizes. Sometimes as much as a 1/2" different.
What's a quilter to do?
Bright Hopes to the rescue!
Take the idea of this block and substitute your exchange blocks for the #1 patch. Then choose a rectangle width wide enough to disguise the discrepancies.
For example, if you had 12" finished blocks that varied as much as a 1/2", a rectangle finishing only 1" wide would drawn attention to the difference...it's just too narrow. If you used, say 3" finished strips, it'd be easier to camouflage the disparity.
Just figure out the dimensions for the rectangles...
The steps are simple:
- The exchange block becomes your #1 patch.
- Choose a finished width of the rectangle. Add a 1/2" for seam allowances and cut strips that width.
- The #2 rectangles are cut in lengths equal to:
Actual Finished Block Size + Finished Rectangle Width + 1/2"
Yes, you will need to measure each and every rectangle. However, all the rectangles are cut the same length for a single block. Each block may require different lengths (because it is a different size), but you'll be cutting four of each per block.
Now join the rectangles to the big block in the same way as shown in the tutorial.
After all the blocks are stitched, measure them. Find the largest size you can trim to, and trim all the blocks, centering the #1 as best you can.
The
beauty of the Bright Hopes quilt block is there are no seams to
match within the edges of the block. Saaaa-WEET!!!
Wouldn't adding strips log cabin style work just as well?
If you used a log cabin technique to add the strips, not only would you have to compute and cut 4 different strip lengths for each block, but you may end up with all sorts of seam allowances that should, but don't, match.
That's a headache I don't need. Do you?
A simple example...
To see how this would look in a quilt, below is a traditional maple leaf quilt made from just 2 differently colored blocks, 9 inches finished with 3" wide #2 rectangles.
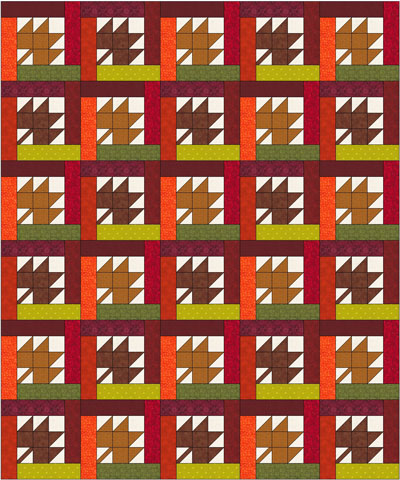
No matter how you rotate them, the only place you need to concern yourself about matching seam allowances is at the corners.
Just think how stunning this would be done in all scraps!
What about a different quilt block?
For a list of all the 220+ quilt block patterns on this site, start here.
If you know the name of the block, shorten your search by using these links:
Click here if you're looking for blocks with at least some paper piecing.
Click here if you're looking for the basic building blocks of quilting, i.e., Flying Geese, half square triangles, quarter square triangles, etc., along with several techniques to make each.
And finally, use these links to find blocks in these finished sizes:
