- Home
- Free Quilt Block Patterns
- Brickwork Quilt Block
Brickwork Quilt Block
From our Free Quilt Block Patterns Library
This post contains affiliate links, for which I receive compensation.
Skill Level: Confident Beginner
Blocks like the Brickwork quilt block look they'd be more trouble than they're worth to make with all those on-point squares and rectangles.
At least that's how I felt until I found the On-Point Ruler. I'm loving it. Simple to use. Reliable results. All you need is a good quarter inch seam.
Not a gadget-gal?
Don't worry.
I've drafted templates for you to print from your home computer. No need to shoot the lock off your wallet (old Iowa saying if you haven't heard it before) for a block you haven't even made yet.
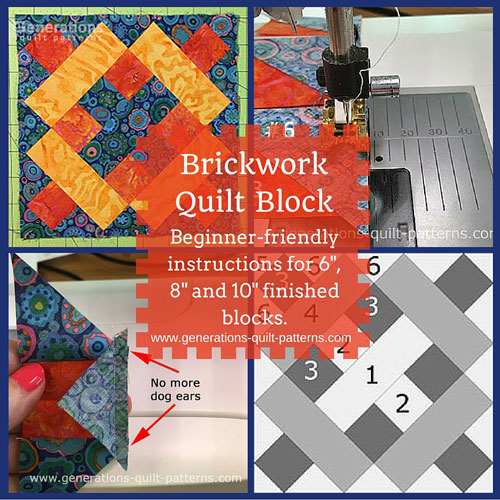
There's a Brickwork coloring page to download, too.
Cutting instructions for both the ruler and templates is included, followed by step-by-step instructions for stitching.
At the very bottom of the page are links to some of the tools I used during construction.
Let's get started!
📋 General Instructions
Quarter inch seam allowances (SA) are pressed toward the darker fabric unless otherwise indicated.
Test your stitching accuracy by taking a Sewing Test before starting to fine-tune your 1/4" seam.
There are a lot of bias edges in this block. If you have trouble with them stretching, starch your quilt fabric before cutting to minimize the stretch. [Learn more here...]
The newest quilt fabrics to tickle your fancy...
Click the images below to see the full collection. We share any commercial and/or free patterns that showcase them, too. (For inspiration, of course!)
Step 1: Cutting patches for your Brickwork block
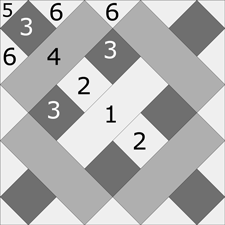 Brickwork design
Sample Size: 8" finished / 8½" unfinished
Grid: 4x4
Design Type: On-point
Two options are offered for cutting your patches. The stitching is the same regardless of how you cut.
You'll notice a dark background fabric is used in the sample block. If you'd like to try your hand at your own coloration before cutting, click here to download the coloring page before you start.
Option #1
The On-Point ruler is used for cutting patches #1-#4 (highlighted in yellow in the cutting chart below.) Your standard everyday ruler is used for #5-#6.
Don't forget to cut and subcut #5 and #6 with your regular rotary ruler.
 | Cutting Chart for a~ Traditional Piecing ~ | ||||||
|---|---|---|---|---|---|---|---|
| Patch | Fabric | Qty | Finished Block Size | Sub Cut | |||
| 6'' | 8'' | 10'' | 12'' | ||||
| 1** | Bac | 1 | 1½'' x 4½'' | 2'' x 6'' | 2½'' x 7½'' | 3'' x 9'' | --- |
| 2** | Bac | 2 | 1½'' x 1½'' | 2'' x 2'' | 2½'' x 2½'' | 3'' x 3'' | --- |
| 3** | Medium | 8 | 1½'' x 1½'' | 2'' x 2'' | 2½'' x 2½'' | 3'' x 3'' | --- |
| 4** | Light | 4 | 1½'' x 4½'' | 2'' x 6'' | 2½'' x 7½'' | 3'' x 9'' | --- |
| 5 | Bac | 2 | 1⅝'' x 1⅝'' | 1⅞'' x 1⅞'' | 2⅛'' x 2⅛'' | 2⅜'' x 2⅜'' | |
| 6 | Bac | 3 | 2¾'' x 2¾'' | 3¼'' x 3¼'' | 3¾'' x 3¾'' | 4¼'' x 4¼'' | |
| Unfinished Block Size | 6½'' | 8½'' | 10½'' | 12½'' | --- | ||
**Remember to cut Patches 1-4 with ONLY the On-Point ruler, a regular ruler will not work—the patches will be the wrong size.
Option #2
If you don't have this specialty quilting ruler, don't want to purchase one, and STILL want to make the block, you can download templates to cut your patches. Click your chosen finished block size below to download them.
You must use the free Adobe program to print the templates, setting Custom Scale to 100% under the heading, Page Sizing and Handling, to insure they print at the correct size. Adobe is the one program that prints these templates reliably.
Click here for more detailed instructions for printing and using these templates.
For stable block edges on the straight of grain, Patches 5 and 6 must be cut with the printed arrow parallel to the selvedge of your fabric though it is preferable if ALL your patches are cut with the arrow lining up with the straight of grain.
Step 2: Assemble the units for a Brickwork block
Center
Make 1
With right sides together (RST), stitch #3 square to opposite sides of a #2 square. Repeat for a total of two units.
Press.
Arrange the patches to form the center of the block as shown below.
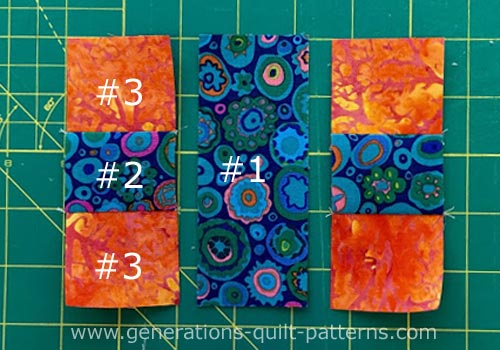
Stitch the units together to form the center patch.
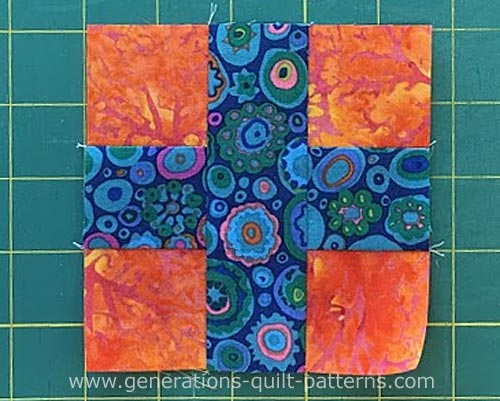 Press the SA toward #1
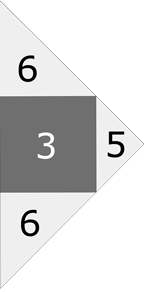
Corners
Make 4
Stitch a #6 triangle to opposite sides of four #3 patches.
It's easiest to feed these patches through the machine straight edge first as shown below.
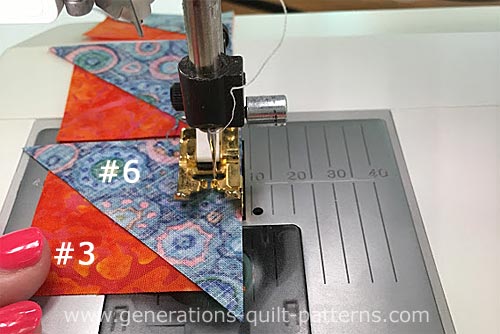
After stitching, you'll notice that the #6 triangles are a bit longer than the square. This is correct.
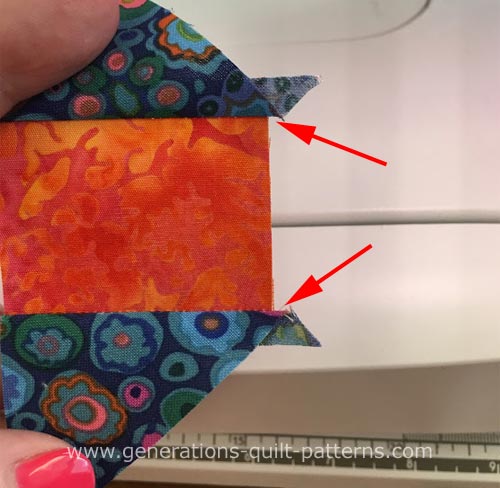
Fold this unit in half and finger-press a crease to mark the center. Repeat this procedure for the long side of the #5 corner triangles.
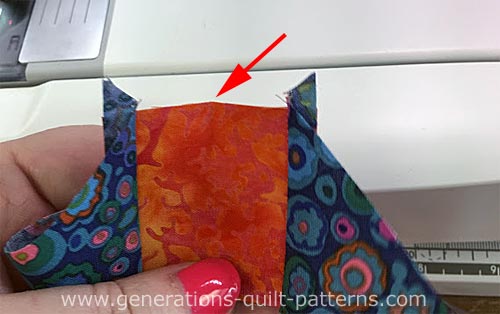
With RST, match the creases of the sewn unit and #5. Pin to hold things in place.
Stitch.
This time your stitching line goes directly through the valley created by the patches (see red arrow).
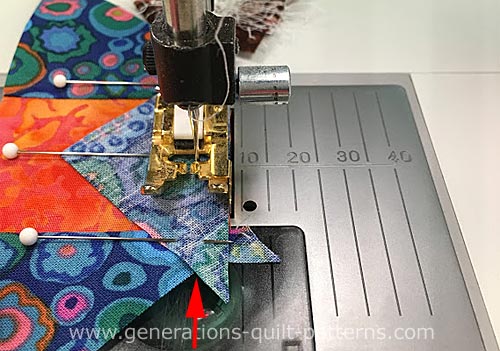
Trim away the dog ears with scissors.
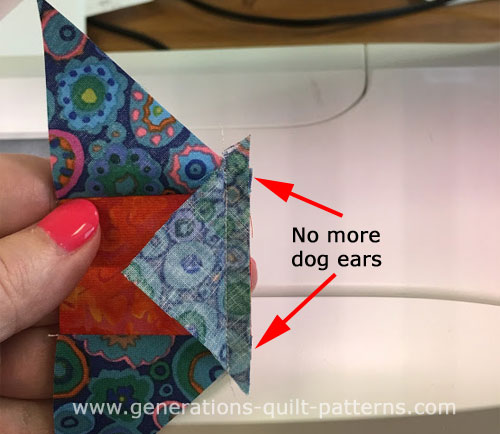
Repeat for a total of four and put them aside for a moment.
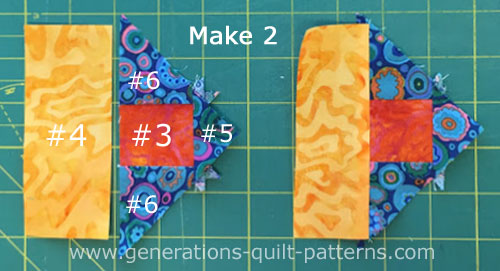
Press toward #4s.
Make a total of two.
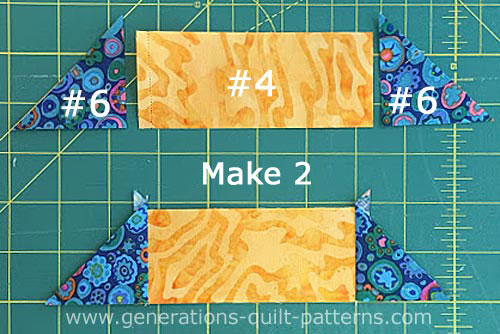
Add these to the long side of two of the previously sewn corners.
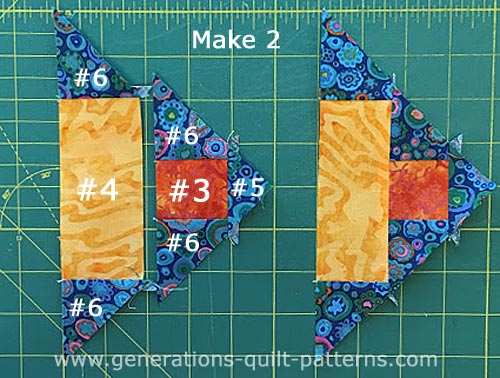
To make the final units, add a #4 to each of the two remaining corner units as shown below.
Press SA towards the #4 rectangle.
It seems like lots of fiddly piecing, but we're ready to...
Step 3: Assemble the Brickwork quilt block
Arrange the sewn patches as shown below.
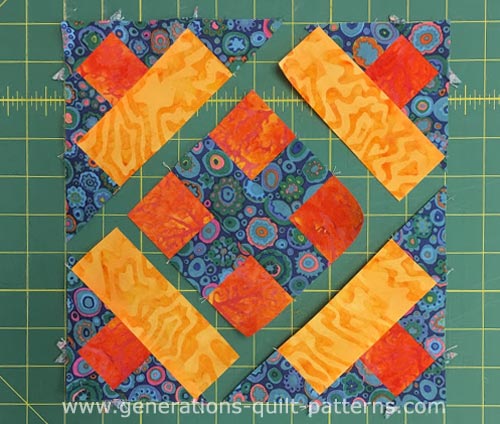
Stitch the units in the middle diagonal row together.
Press the SA toward the center nine-patch.
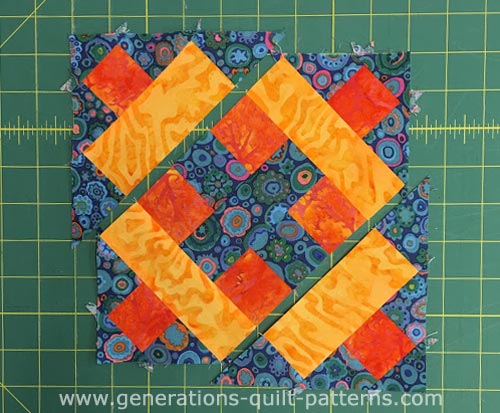
Now stitch the rows together. I do pin to help match the seam lines. Your seams will nest to make matching easier.
This is your finished Brickwork quilt block.
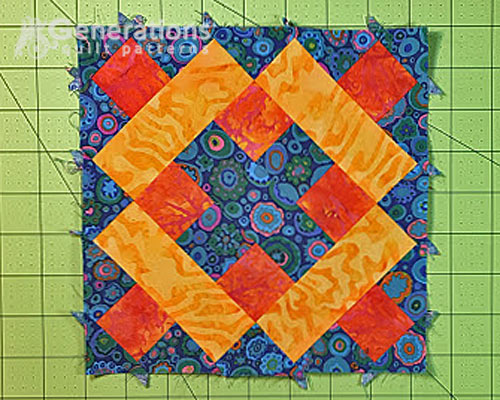 All those little straggly points are dog ears that need to be trimmed before we can call our Brickwork block complete!
All that's left to do it trim off the dog ears on the outside edges.
I've left them for the end on purpose.
If I found that the block wasn't stitching up the correct size, I'd be able to take apart the rows and re-stitch them.
If I'd already cut away the dog ears, it'd be a devil of a time trying to re-stitch if I needed to take a smaller seam allowance.
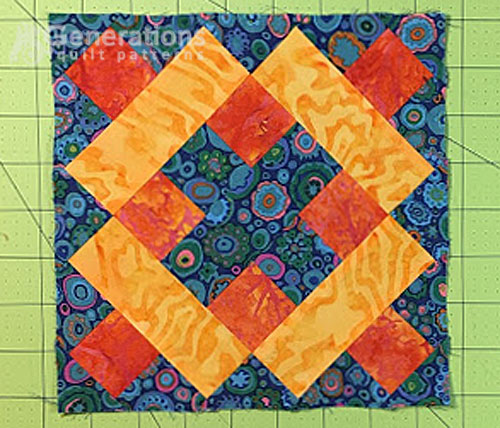
What about a different quilt block?
For a list of all the 220+ quilt block patterns on this site, start here.
If you know the name of the block, shorten your search by using these links:
Click here if you're looking for blocks with at least some paper piecing.
Click here if you're looking for the basic building blocks of quilting, i.e., Flying Geese, half square triangles, quarter square triangles, etc., along with several techniques to make each.
And finally, use these links to find blocks in these finished sizes:

