- Home
- Free Quilt Block Patterns
- Brave World Quilt Block
Brave World Quilt Block, Part 2
Our tutorial continues with traditional piecing
This post contains affiliate links, for which I receive compensation.
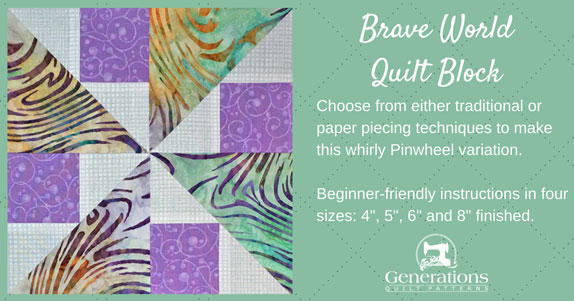
Learn how to make a Brave World quilt block—a common unit in many patchwork designs.
Choose your favorite technique—you'll find paperpiecing back in Part 1. Here we cover traditional piecing methods.
In this tutorial you'll find:
- No time to quilt? Pin this for later.
If you've enjoyed this tutorial, please remember to 'Like' it below to share with your friends.
It's time to cut up and sew!
If you would prefer to paper piece your Brave World, click here for those instructions.
General Instructions
Several abbreviations are used on this page. They are:
- SA - seam allowance
- RST - right sides together
- BW - Brave World
1/4" SA are used through this tutorial.
Pressing instructions are highlighted in yellow throughout this tutorial.
When instructed to press, first press the patches in the closed position just as they came off your sewing machine.
This sets the seam, melding the fibers of the threads into the fibers of the fabric.
Every SA is pressed away from the previous patch, i.e. sew #2 to #1, press towards #2.
The newest quilt fabrics to tickle your fancy...
Click the images below to see the full collection. We share any commercial and/or free patterns that showcase them, too. (For inspiration, of course!)
Step 1: Cutting for our Brave World block
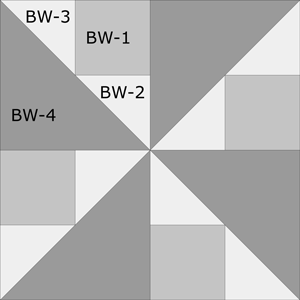 Brave World design
Sample Block Size: 8" finished / 8-1/2" unfinished
Grid: 4x4
Attribution: Farm Journal
AKA: Brown World (Nancy Cabot)
Design Type: Pinwheel, basic quilt block
Choose a background, a medium, and a dark for your Brave World.
The same numbering that we used for the paperpieced block is used here.
Please label all your patches, the numbers are used throughout this tutorial.
To print a copy of just the block design above and cutting chart below to use at your cutting table, click here. Use the teal green chart.
 | Cutting Chart for a~Traditional Piecing ~ | ||||||
|---|---|---|---|---|---|---|---|
| Patch | Fabric | Qty | Finished Block Size | Sub Cut | |||
| 4" | 5" | 6" | 8" | ||||
| 1 | Med | 4 | 1½" x 1½" | 1¾" x 1¾" | 2" x 2" | 2½" x 2½" | --- |
| 2, 3 | Light | 4 | 1⅞" x 1⅞" | 2⅛" x 2⅛" | 2⅜" x 2⅜" | 2⅞" x 2⅞" | |
| 4 | Dark | 2 | 2⅞" x 2⅞" | 3⅜" x 3⅜" | 3⅞" x 3⅞" | 4⅞" x 4⅞" | |
| Unfinished Block Size | 4½" | 5½" | 6½" | 8½" | --- | ||
| Grid Size | 1" | 1¼" | 1½" | 2" | --- | ||
Step 2: Assemble the Brave World units
Brave World Unit
Make 4

Fine-tune your SA by taking a Sewing Test using scraps from the fabrics you use in this block.
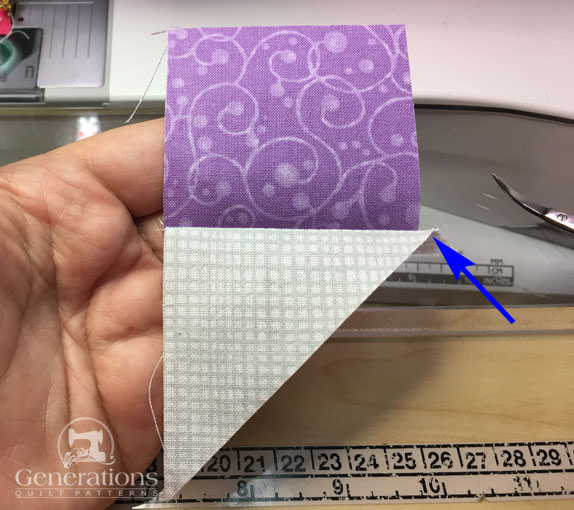
With RST, match the short edge of a BW-2 to one side of BW-1. Sew from the square edge instead of the pointed edge. Sewing machines have a tendency to want to eat points if they are fed in first.
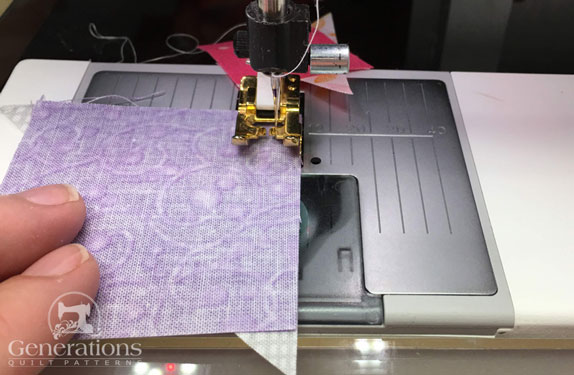 I like to start my stitching on a scrap of fabric (behind the presser foot) and then stitch onto my patches. The quality of that first stitch is so much better and there's less chance of chewing up the points, too!
Press with the SA toward #2.
Notice how BW-2 is a bit longer than BW-1 at the bottom edge? (blue arrow) That's exactly how it should be.
Now on the adjacent side of BW-1 add BW-3.
You'll want to flip open the patches to check to see that BW-2 and BW-3 form a long straight line and #1 is in the corner before stitching. (Yes, yours truly has stitched them together wrong many times because she didn't peek first.)
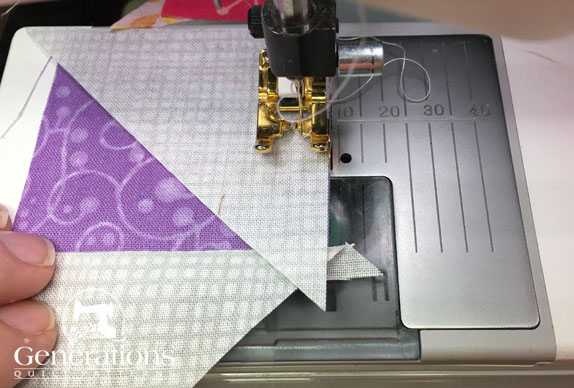 Your stitches should cut right through the middle of the 'V' formed by #2 and #3 at the end of the stitching line.
The SA is pressed, again, away from #1.
Check that BW-2 and BW-3 are nice and straight—no jags at the center. If there are jags, check your SA for accuracy and re-stitch as needed.
At some point, you'll want to trim away the dog ears (blue arrow).
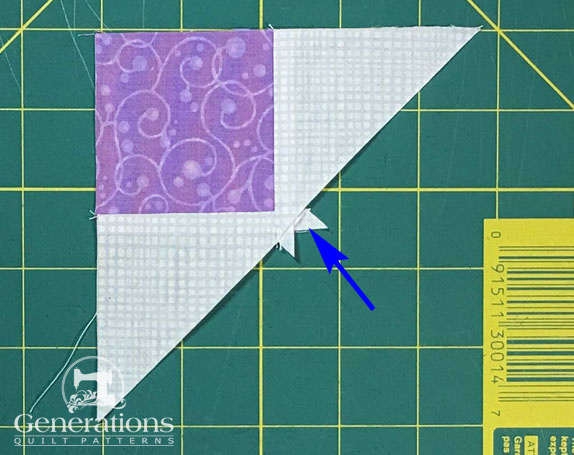 After pressing #2 and #3 should form a perfectly straight line. If not, double check your seam allowance.
The Brave World block has it's own 'auto-check'.
With RST, align the long bias edge of #4 with the long BW-2/3 edge. The BW-1/2/3 patches should be exactly the same size as BW-4.
Here it is from the BW-4 side...
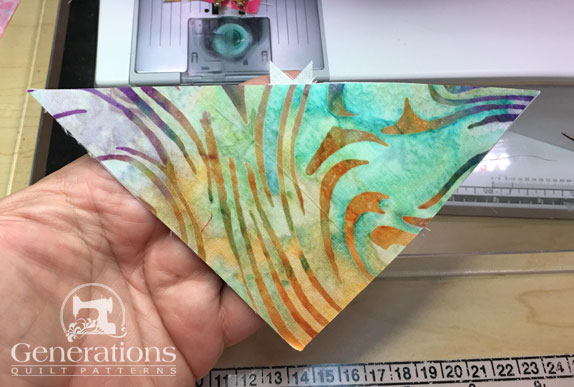 This matches up perfectly!
...and now from the BW-1/2/3 side.
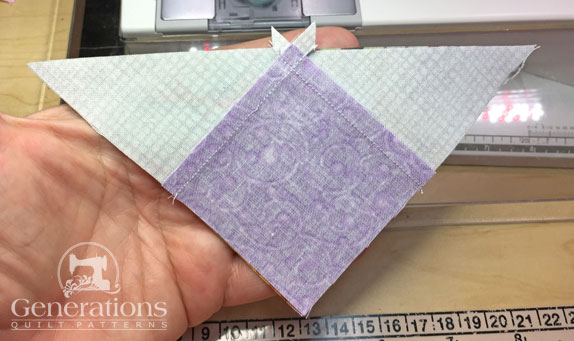 Good to go!
Pin as needed to hold the edges together in place. Stitch.
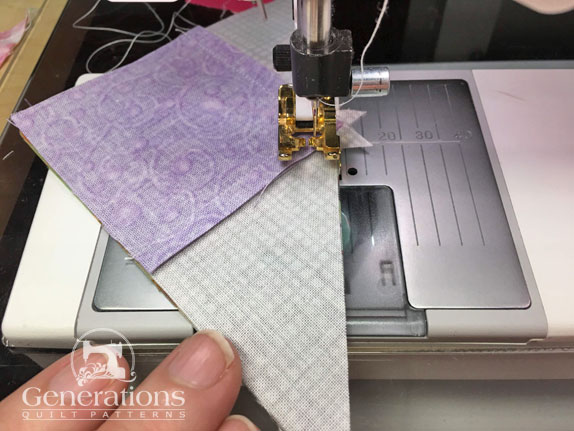
The SA is pressed toward #4, large HST.
Take a minute here to check that the edge-to-edge measurement is correct.
Brave World Dimensions | ||
|---|---|---|
| Finished Block Size | Unit Dimensions | Center of Unit |
| 4" | 2-1/2" x 2-1/2" | 1-1/4" |
| 5" | 3" x 3" | 1-1/2" |
| 6" | 3-1/2" x 3-1/2" | 1-3/4" |
| 8" | 4-1/2" x 4-1/2" | 2-1/4" |
For our 8" finished sample, I aligned the 2-1/4" marks on my ruler with the seams between #1 and #2 and #1 and #3 (the inside edges of the purple square) and trimmed.
Even if your cutting and 1/4" seam are accurate, you might need to shave off a tiny bit. This also takes care of those dogs ears.
Repeat for a total of four Brave World units.
Here's one from the front after a slight haircut...
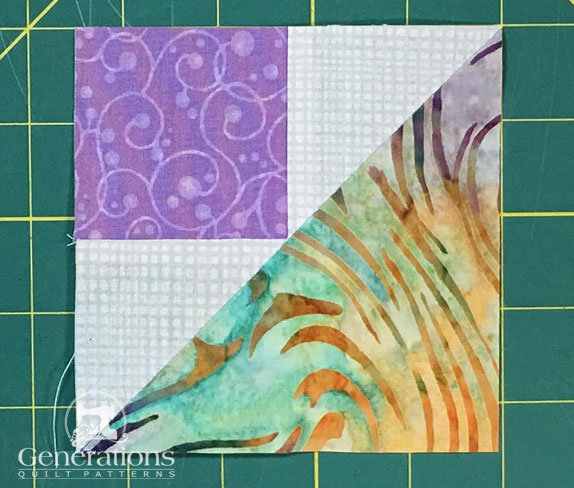
...and from the back. Note how all the SAs are pressed away from BW-1.
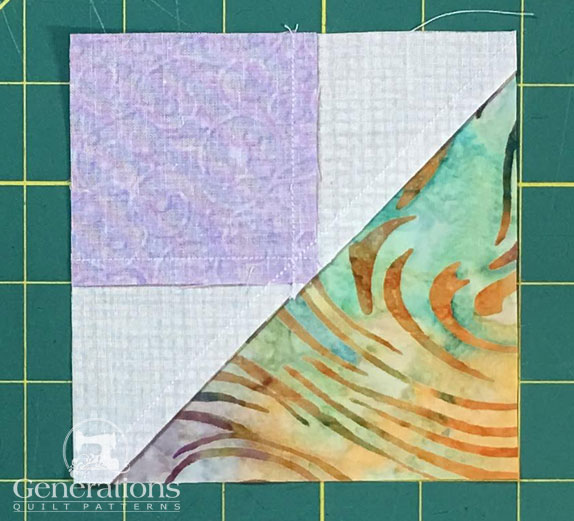
Step 3: Finish your Brave World block
Lay out the sewn units in a pinwheel fashion as shown below—the large HSTs form the pinwheel design.
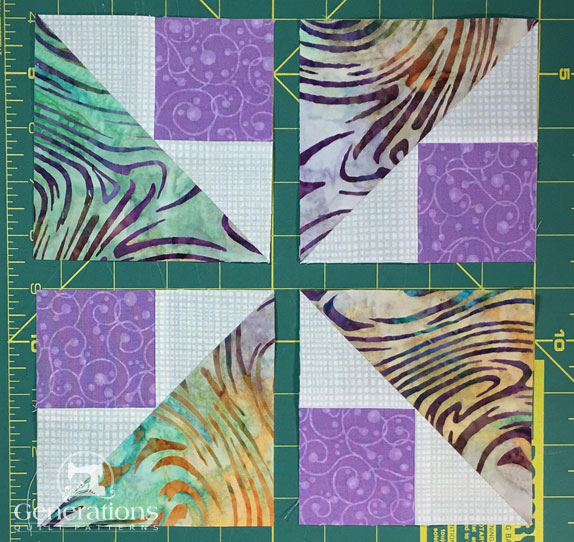
Sew them into rows. It's sweet. there's nothing to match but the outside edges. The SAs for the large HST nest to make this step of your Brave World construction pretty simple.
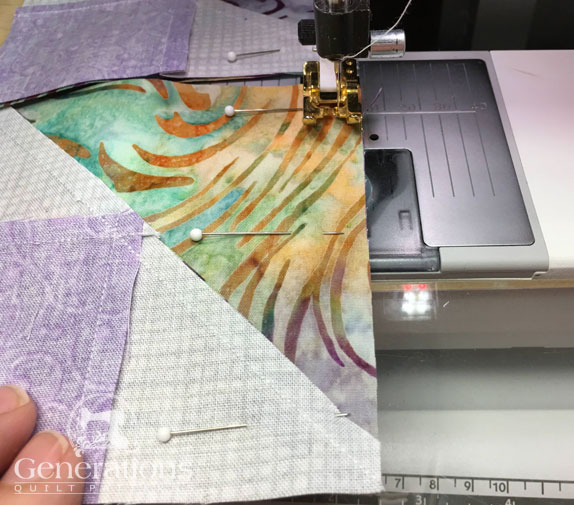
Take a second and check that the match of the HSTs at the center is spot-on.
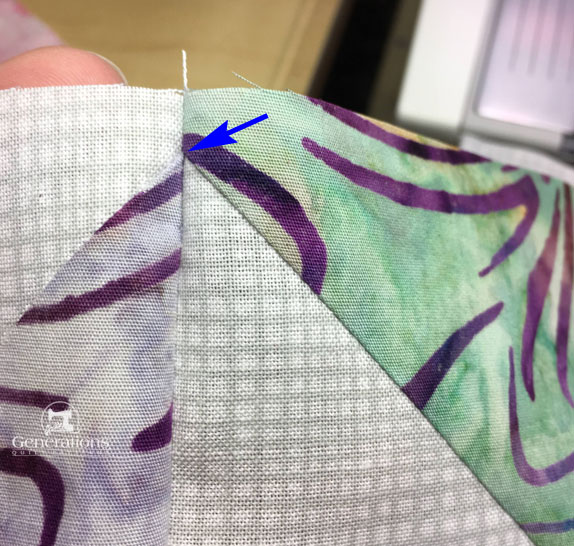 Yep. Pretty happy with this!
The SA is pressed toward the large HSTs.
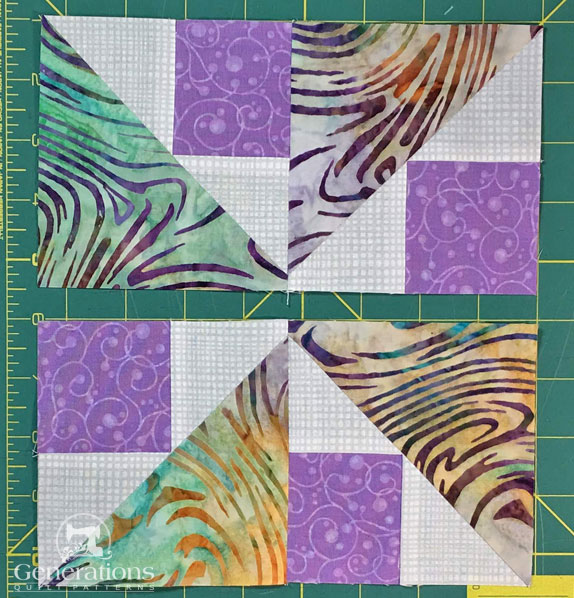 A quick observation...if you flipped the bottom pair 180° both units are exactly the same.
Pinning is essential to get a good match in the center.
Click here to brush up on your pinning for perfect points technique if you want it.
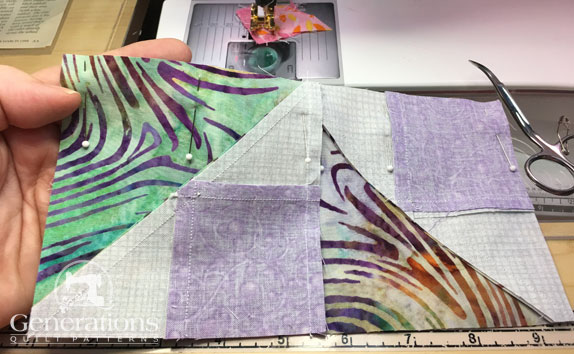 A pinner, I be!
And sew the rows together.
And after one last press, our Brave World is complete. Here it is from the front.
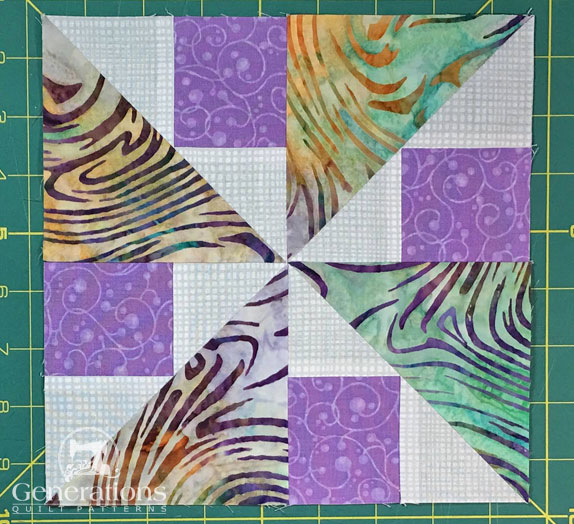
...and just as with the paper pieced version the SA are twirled or fanned around the center to reduce bulk.
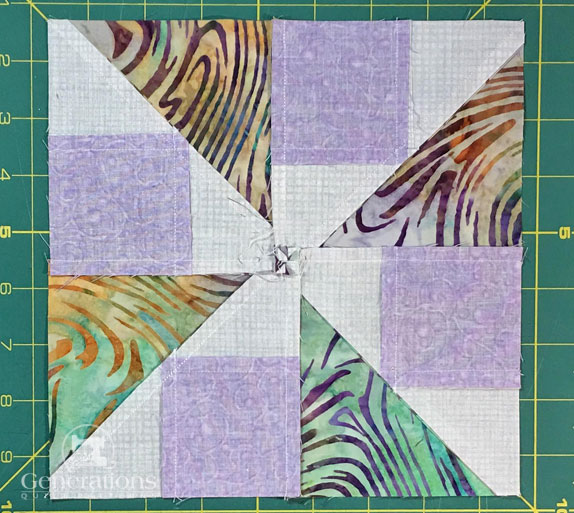
The added benefit of this 'twirling' is that the blocks can now be set edge-to-edge in a quilt and all the SA will nest. Assembling the quilt top is se-e-e-e-w much easier when that happens!
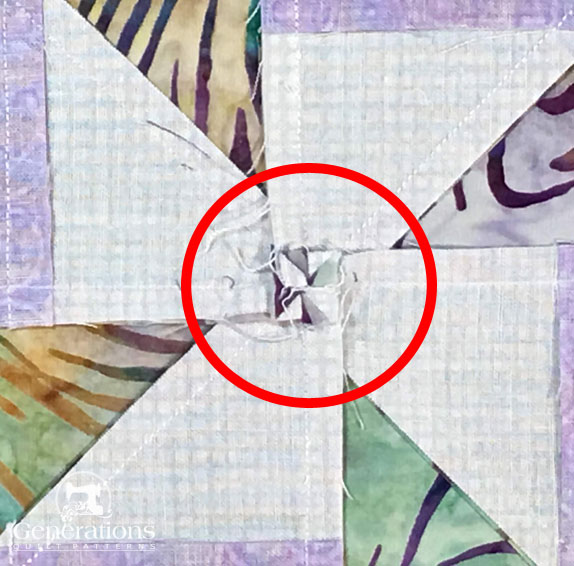
Here's a close-up of the twirled or fanned SAs where you can see that the stitches have been undone, but the thread tails left unclipped. DO NOT CLIP THEM!
If you'd prefer to paper piece your Brave World quilt block click here for those instructions.
🌀More playful pinwheel quilt blocks to stitch!
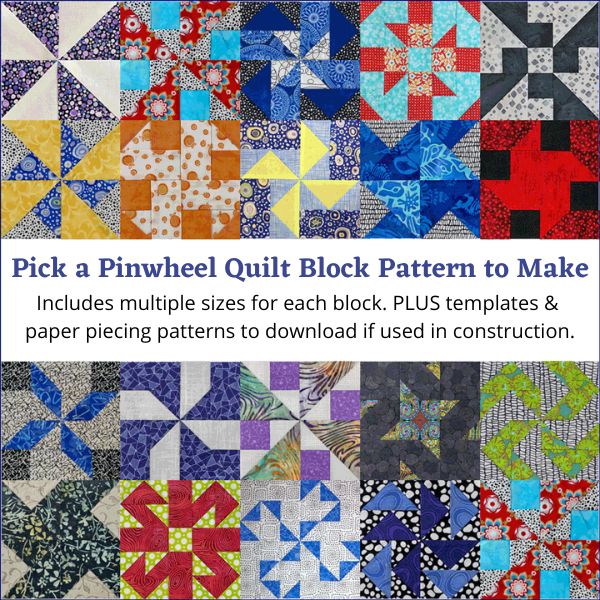
You've finished your pinwheel quilt block, and you're ready for more!
Our pinwheel quilt blocks are a delightful blend of playful interlocking patterns and vivid, eye-catching color. The interlocking patterns dazzle your eyes and inspire your creativity, while our step-by-step instruction ensures that you can create these stunning blocks with ease.
Click here to dive in and turn your fabric into MAGIC!
For even MORE blocks to make… 🧩🎨

...visit our Free Quilt Block Pattern Library, with over 260+ blocks to choose from in multiple sizes.
Free downloads are included in all sizes for any blocks require paper piecing patterns or templates.
- Home
- Free Quilt Block Patterns
- Brave World Quilt Block
