This post contains affiliate links for which I receive compensation
Beginning Free Motion Quilting
by Ann
(Scottsville NY)
I'm going to be machine quilting a 60 x 75 quilt, using the free motion - stippling technique. Your website has been so helpful!
One question though: should I begin in the middle and work outward?
How do I avoid too much of the "taking up" effect of stippling? And should I forget the bicycle clips entirely? The thing feels so bulky-and it's a small quilt!
Thanks for the moral support your site provides. This is a daunting task for a beginner!
Ann
Reply
Dear Ann,I apologize for how long it's taken to reply. My software program appears to have had dropped a whole slew of questions and yours was one. I hope, that though belated, this information will be of help to you on other quilts.
Stabilize the quilt sandwich...
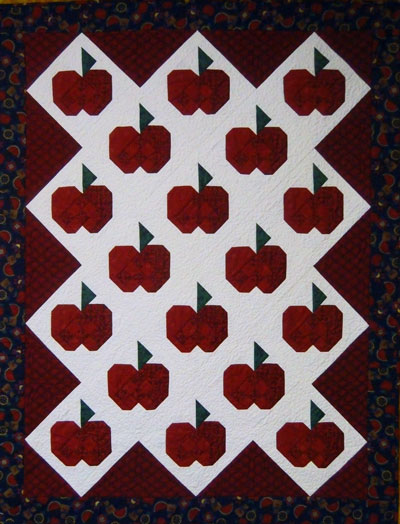
If you are new to free motion quilting and stippling, then (if it's possible) add some lines of ditch quilting along the block lines.The quilt picture below is one of my first 'for-real' free motion quilting experiences after graduating from practice quilt sandwiches.

You can see that this is an on-point layout.
I ditch quilted first with monofilament thread between the blocks as I've described previously on the page "How to Machine Quilt Your First Quilt". (You'll need to scroll down to 'How to Machine Quilt a Diagonal Set'.)
I also ditch quilted between the blocks and the red setting triangles and between the center and the border.
Once all the stabilizing stitching— that's what the ditch quilting does—is done, I could quilt each block individually. It didn't matter if I started in the middle or at the edges. Because I was new to free motion quilting, I started at the edges to build up my confidence.
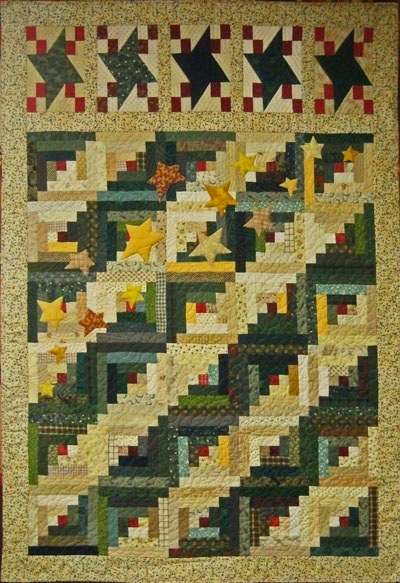
The blocks in this second quilt are laid out in straight rows and columns.

Terrific!
Should be easy to quilt...just ditch quilt between all the blocks to stabilize, right?
Well...not exactly.
To emphasize the colored diagonal rows of this log cabin design, I choose to quilt long undulating diagonal lines along those bands of color. (The trapunto'd stars are echoed three times before these long lines begin.) There is ditch quilting between the center of the quilt and the borders.
I was nervous that all this diagonal quilting would pull the quilt out of square.
My solution was to stabilize the quilt sandwich by quilting in the ditch between all the blocks...
...because when I was finished the quilting, the thread could be washed out.
Voila! Problem solved.
Now I have to admit that I didn't follow the manufacturer's directions completely and used the wrong temperature of water. It made a lot of the thread brittle and I had to pick out a lots of stitches...UGGHHHH!
Now when I use this type of thread I double-check the directions and have had no problems. Lesson learned.
The other thing I would recommend is to use the water soluble thread in both the needle and the bobbin. Some suggested using regular thread in the bobbin to economize, but my time is worth something. If I've got to pick out bobbin thread, well, that's just not something I'm interested in doing.
So to directly address your situation...
If you can ditch quilt between blocks, as a beginner I suggest you do it. Any extra quilt is confined to a single block and you won't keep pushing excess fabric through the quilt top. It also allows you to start stippling anywhere you want in the quilt. Remember, I started at the edges to practice and build up my confidence.If your quilt doesn't have seams to follow, try quilting some straight lines with water soluble thread to stabilize the quilt.
Yes, it's extra work and and extra step to remove at the end. (For instance, you'll want to pre-test for bleeding fabric.) With this extra stitching, you'll be able to remove a bunch of the basting pins (which always get in my way) and just stitch over the water soluble stitching. It'll wash out later.
If neither of these options appeal to you (and it is YOUR quilt!) then I would be sure to pin baste closer than the recommended 4" apart.
Sometimes a bit of a fabric bubble will form in the quilt top as you stitch along. The extra pins will help contain the bubble instead of letting it move across the top. If you see a bubble forming, then stop. Raise the presser foot to see if that helps tame it. You can also add extra straight pins as needed for a quick re-baste.
The quilting at the center of the quilt is what people will see first if it hangs on a wall, so I try to leave that until I'm really warmed up.
To reduce the amount of 'take-up' in the quilt, increase the size and distance between your lines of stipple quilting. The denser your stitches the more the quilt shrinks. Just remember the aim is to keep the size even.
As for bicycle clips, the only time I use them (and frankly that is very rarely now) is if I'm stitching lots and lots of long, straight lines with my walking foot. In general, a quilt rolled up and held that way is a pain in the you-know-what to handle.
I usually just 'smush-push-and-fold' the quilt sandwich under the arm of the sewing machine. It looks downright messy, but I'm most concerned with being able to move that part of the quilt that's between my hands. If the bicycle clips make it harder, they are so outta there!
I hope this has helped you for your future free motion quilting adventures. Again, I apologize for my tardiness.
Piecefully,
Julie Baird
Editor
Comments for Beginning Free Motion Quilting
|
||
|
||
|
||


