- Home
- Free Quilt Block Patterns
- Bear Tracks Quilt Block
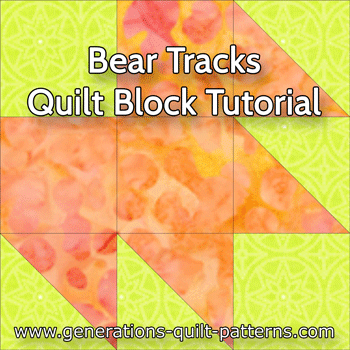
Bear Tracks Quilt Block
From our Free Quilt Block Patterns Library
This post contains affiliate links, for which I receive compensation.
Skill Level: Beginner
Momma Bear said, "The Bear Tracks quilt block is JUST RIGHT if you're a beginning quilter!"
She's one smart cookie!
With just half square triangles and cut squares, it's a nice little block to practice your new skills.
No special tools to buy either and no paper piecing.
Sweet!
You may have heard this block called by another name like: Duck's Foot in the Mud, Maple Leaf Quilt, Tea Leaf, or Tea Leaves. Quilting's like that!
Want help setting the blocks when you're finished? Check out the three quilt layouts at the end of this page.
Are you ready?
Let's get started.
📋 General Instructions
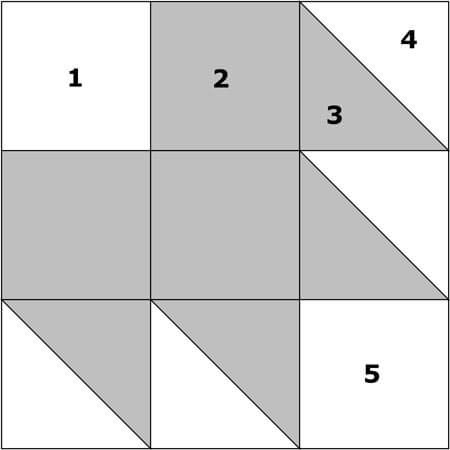 Bear Tracks design
Sample Size: 6" finished / 6½" unfinished
Grid: 3x3
Attribution: Nancy Cabot
AKA: Duck's foot in the Mud (Nancy Cabot), Leaf (Nimble Needle Treasures), Tea Leaf (Modern Priscilla), Tea Leaves (Nancy Cabot)
Design Type: Even 9-patch
Seam allowances (SA) are pressed toward the darker fabric unless otherwise stated.
When pressing, first press the sewn unit in the closed position to set the seam. This melds the thread into the fabric. Open the patches and press from the front.
Choose two fabrics with enough contrast so that the points show.
Pick a finished block size and cut your patches.
 |
Cutting Chart for a~ Traditional Piecing ~ | |||||
|---|---|---|---|---|---|---|
| Patch | Fabric | Qty | Finished Block Size | |||
| 3” | 4-1/2” | 6” | 12” | |||
| 1 | L | 1 | 1-1/2”x1-1/2” | 2”x2” | 2-1/2”x2-1/2” | 4-1/2”x4-1/2” |
| 2 | D | 3 | 1-1/2”x1-1/2” | 2”x2” | 2-1/2”x2-1/2” | 4-1/2”x4-1/2” |
| 3** | D | 2 | 1-7/8” x 1-7/8” | 2-3/8”x2-3/8” | 2-7/8”x2-7/8 | 4-7/8”x4-7/8” |
| 4** | L | 2 | 1-7/8” x 1-7/8” | 2-3/8”x2-3/8” | 2-7/8”x2-7/8 | 4-7/8”x4-7/8” |
| 5 | L | 1 | 1-1/2”x1-1/2” | 2”x2” | 2-1/2”x2-1/2” | 4-1/2”x4-1/2” |
| Unfinished Block Size | 3-1/2” | 4-1/2” | 6-1/2” | 12-1/2” | ||
| Trim HSTs to... | 1-1/2”x1-1/2” | 2”x2” | 2-1/2”x2-1/2” | 4-1/2”x4-1/2” | ||
| Grid Size | 1” | 1-1/2” | 2” | 4” | ||
**Try adding an additional 1/4" to the length and width of this patch when cutting and then trim the unit to size after stitching...makes for perfect HSTs...every time!
Step 2: Assemble the units for a Bear Tracks
With right sides together (RST), sew a light #1 to a dark #2.
With RST, sew a dark #2 to a dark #2. (Yeah, that sounds kind of silly...but that's how this block is made!)
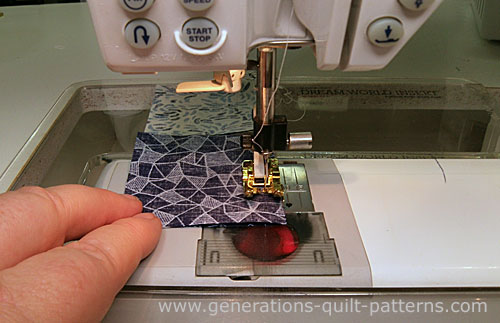
Press. These two 2-piece units are complete.
To make the half square triangles (HST), draw one diagonal line on the back of the two, lighter #4 patches. I've used a red pen here (black arrow below) so it's easier to see. In a for-real quilt, I'd use a mechanical pen because the line stays nice and fine the length of the line.
Stitch a quarter inch away from both sides of the line.
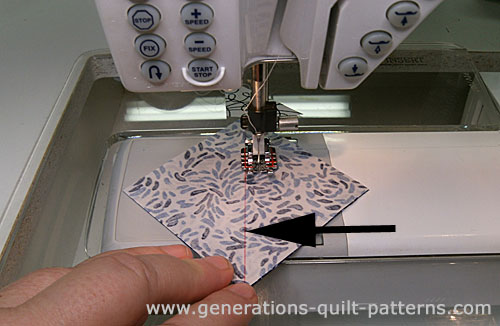
Cut the two sewn units apart on the diagonal line to create four HSTs. If you added a bit to the patch-size as suggested in the cutting instructions, cut these HST to size now.
That number is located at the intersection of the row labeled 'Trim HST to...' (highlighted in yellow) and the column for your finished block size. In this example the block is 6" finished, so the HSTs are trimmed to 2-1/2" square.
NOTE: If you plan on making lots of Bear Tracks, my choice would be to use the more efficient, 8-at-a-time method of making HSTs. Click here to learn how.
Step 3: Assemble your Bear Tracks quilt block
Lay out the cut squares, pairs of squares and HSTs for your Bear Tracks into rows and columns. Double check that the HST units are placed in the right direction. It's too easy to get them mixed up.
Press the SA of the two dark #2s towards the left, opposite of the light/dark pair. The seams then nest to make it easy to match them.
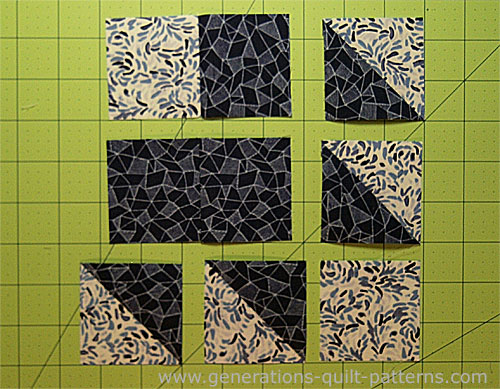
Stitch the units in each row together. I find that when I pin my SAs are more accurate, especially at the ends.
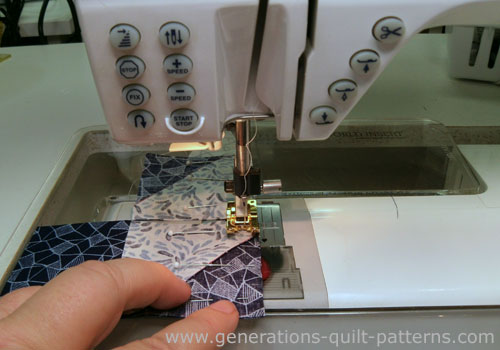
Press with the SAs in the direction of the arrows.
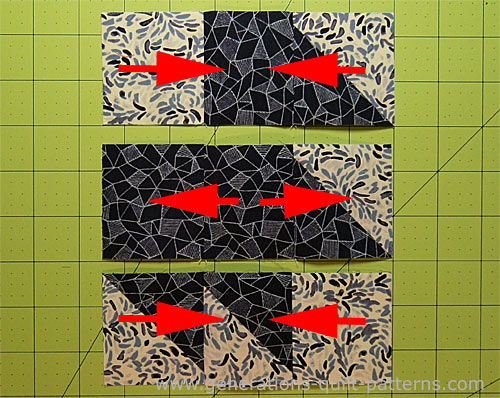
Stitch the rows together, again, using pins if you find them helpful. (I most certainly do!)
After a final press, (check out our Best Pressing Technique) your Bear Tracks quilt block is finished!
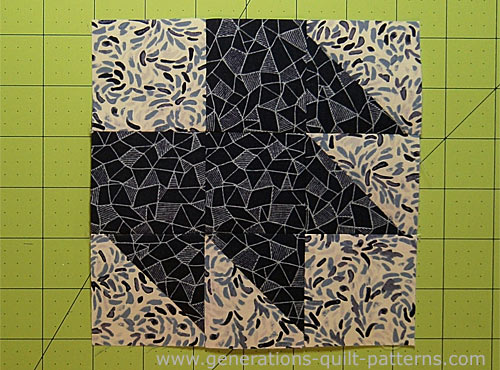 Bear Tracks
Ideas for your Bear Tracks quilt blocks
To keep things simple, we'll use the same background or 'L' fabric for all the blocks.
First let's set the blocks edge-to-edge in groups of four, rotating each one a quarter turn to form 'wreaths'. To maintain symmetry, use even numbers of blocks in the rows and columns.
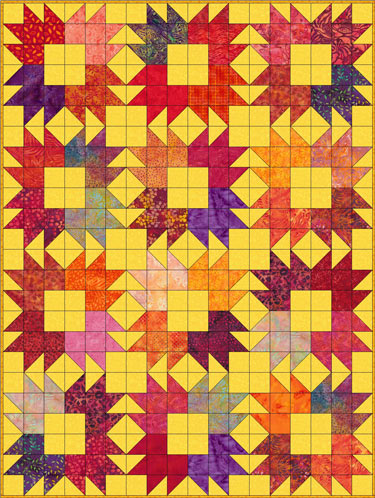
Same layout with the addition of sashing and cornerstones. This looks much like the traditional Bear's Paw quilt block.
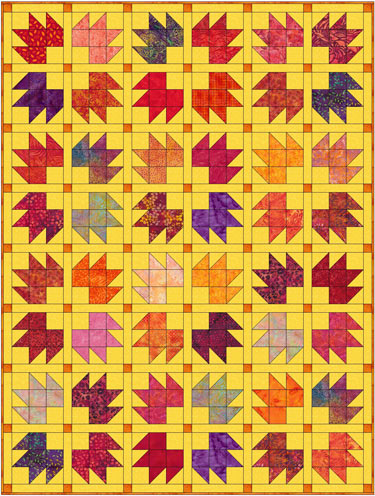
And finally, instead of sashing, a strip is added to two adjacent sides of the block, log cabin style so the the design appears to float. Each row contains two positions of the block.
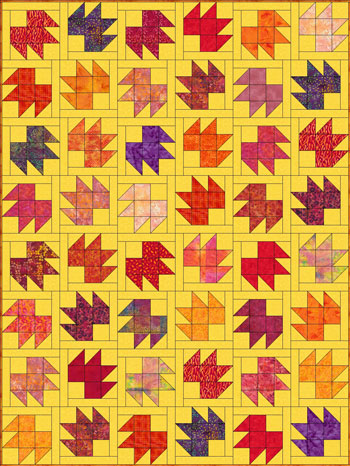
There's more blocks to sample...
To find them, just click here to go to our Free Quilt Block Patterns Library. You're sure to find one that's "JUST RIGHT"!
What about a different quilt block?
For a list of all the 220+ quilt block patterns on this site, start here.
If you know the name of the block, shorten your search by using these links:
Click here if you're looking for blocks with at least some paper piecing.
Click here if you're looking for the basic building blocks of quilting, i.e., Flying Geese, half square triangles, quarter square triangles, etc., along with several techniques to make each.
And finally, use these links to find blocks in these finished sizes:


