- Home
- Free Quilt Block Patterns
- Autumn Leaf Quilt Block
- Autumn Leaf, Pt 2
Autumn Leaf Quilt Block - Part 2
From our Free Quilt Block Patterns Library
This post contains affiliate links for which I receive compensation.
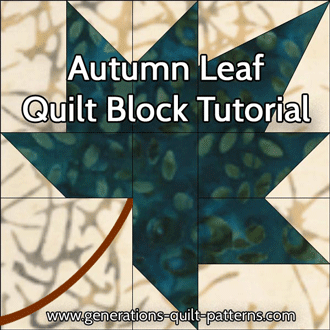
Our Autumn Leaf quilt block tutorial continues with piecing the point of our leaf, adding a stem and final block assembly.
On this page you'll find instructions to:
- Two methods to complete the stem: Embroidery or connector corners
- Download a coloring page for the block with a stem and without a stem
Leaf all your worries behind, let's get this block finished!
The newest quilt fabrics to tickle your fancy...
Click the images below to see the full collection. We share any commercial and/or free patterns that showcase them, too. (For inspiration, of course!)
Paper Pieced Tippecanoe (Corner Unit/Leaf Tip)
Make 1
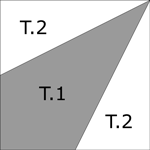
If you missed them or didn't print them yet, click here to go back to the Printing Chart for the paper piecing pattern and templates for this Leaf Tip.
Always cut with the printed side of the template facing up, you'll be using the solid lines. The sides that meet at 90 degree angles are placed on the straight of grain. Your block will have stable edges that don't stretch.
With your leaf fabric pretty side up, lay the cone shaped T.1 template, printed side up on the fabric. I used bits of Scotch Brand Magic Tape® to hold it in place and minimize slippage. It pulls right off without leaving a residue.
Just don't iron it—it'll melt.
Remember to remove it from your leftover fabric after cutting.
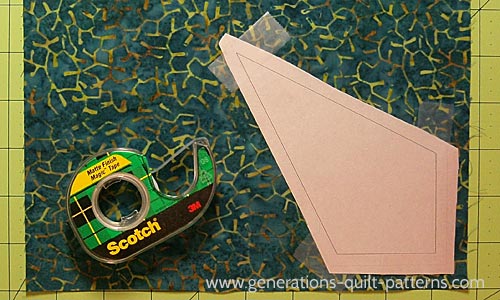 Since this photo was originally taken, I've now added identification numbers (this template is T.1) and grainline arrows to the templates.
Lay the 1/4" line of your ruler on the solid black line and cut,
repeating for each side. You'll cut through the tape until there's
nothing left holding it in place.
Repeat for the T.2 and T.2r (the 'r' stands for 'reverse') templates. You can cut each patch out individually with the template printed side up on the right side of your fabric selection.
Or you can cut two patches at a time—just be sure to fold your fabric so either right-sides or wrong-sides are together. Then cut. You'll have two patches the mirror-image of each other...exactly what we need! Again, remember to cut with the 1/4" line of your ruler directly on top of the solid black line so that the patches are the right size.
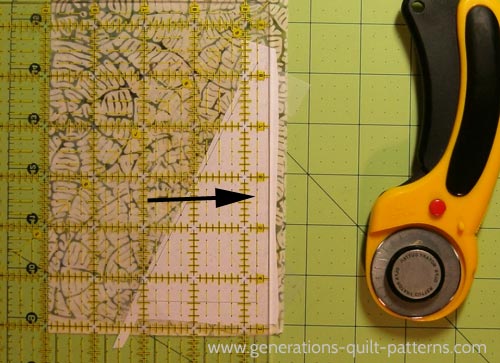 Cutting through two layers of fabric, RST, to get mirror image patches. Again, edges that create a corner are placed on the straigt of grain. The arrow points to the 1/4" mark on the ruler.
Otherwise, remember it's always fabric, pretty side up. Template printing side up.
Draw two placement lines a 1/4" past the long edges of T.1 right on your pattern.
With a dab of Elmer's Glue Stick, adhere the wrong side of patch T.1 to the unprinted side of the pattern.
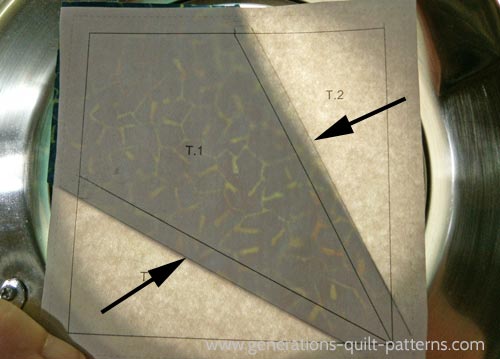 Drawing guidelines makes placement fast, easy and accurate.
With RST position a T.2 on the T.1. T.2 is over-sized so you do have some wiggle room.
Set your stitch length to 1.5mm and install an open toe applique presser foot (so it's easier to see where the needle hits the line).
Start and stop your stitching part the outside dashed edge of the block (black arrow below).
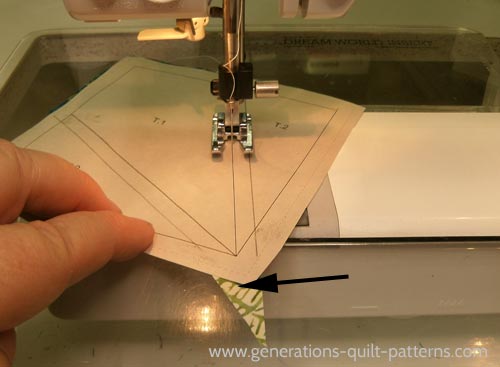
Press.
Repeat for T.2r. A surefire way to accurately position the T.2 patches is to have the 'valley' of their overlap (black arrow) approximately a 1/4" from the edge.
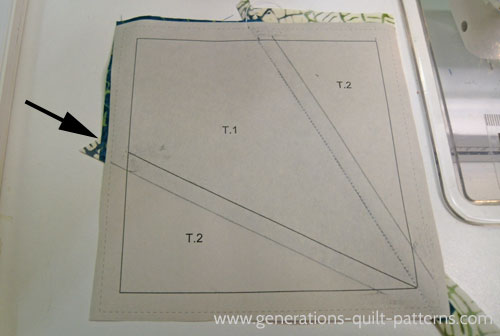
Press. Trim the unit to size.
Return to your every day presser foot and stitch length.
Lay out the remaining pieced #1/#2/#4 with this corner.
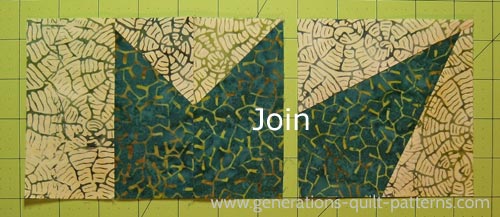
Stitch with RST, pressing afterwards with SAs to the corner unit.
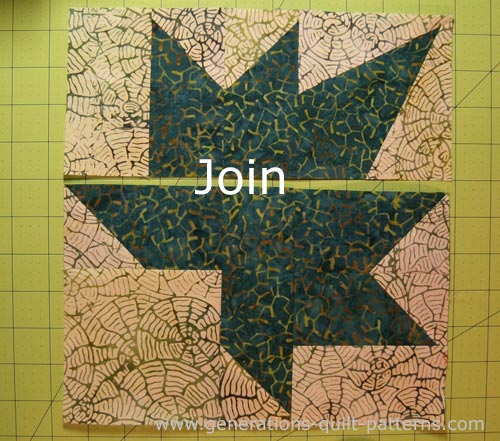
With RST, stitch the two halves together. If you need to, pin. Since I chose to press some of my SAs open, pins came in handy.
After pressing, our pieced Autumn Leaf quilt block looks like this from the front...
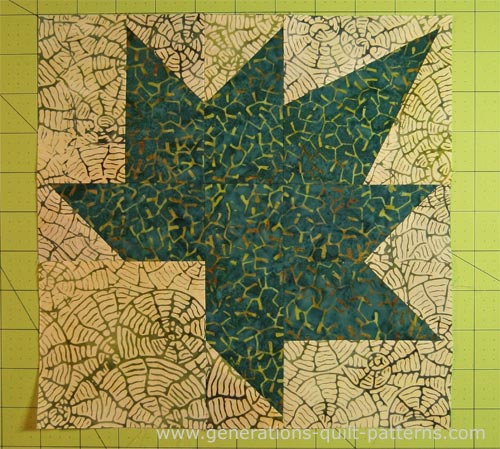
Leaves need stems...
...and our Autumn Leaf quilt block is no different.
For my block, I will stitch the stem by hand using a stem stitch and embroidery floss after I've decided how to set my block.
Here's a quick tutorial on the stem stitch by my friend, Carol Leather.
So why wait to do the stem?
This block looks great in any direction, and I expect to draw the stems differently depending on the blocks' orientation in my quilt.
What about if you'd prefer to piece your stems?
I've got you covered! :D
Piecing a Stem Unit
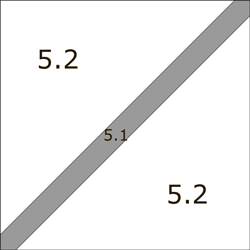 Make 1 per block
Below is a cutting chart.
SUBSTITUTE THESE PATCHES for the #5 in the cutting chart on the first page.
The connector corners method to used to make the unit. While it does take a bit of extra fabric, but there's no funky patches to deal with. No extra trimming.
Besides, you get some nice sized bonus half square triangle out of the corners.
| CUTTING CHART for a Stem for the Autumn Leaf Quilt Block | Finished Block Size | ||||||
|---|---|---|---|---|---|---|---|
| Patch # | Fabric | Qty | 5” | 10” | 15” | ||
| 5.1 | Leaf | 1 | 2-1/2” x 2-1/2” | 4-1/2” x 4-1/2” | 6-1/2” x 6-1/2” | ||
| 5.2 | Background | 2 | 2-1/4” x 2-1/4” | 4-1/4” x 4-1/4” | 6-1/4” x 6-1/4” | ||
| Maximum unfinished size of bonus HST | 1-1/2” | 3-1/2” | 5-1/2” | ||||
| Maximum finished size of bonus HST | 1” | 3” | 5” | ||||
To make our step unit, draw a diagonal line with a pencil on the back of these two additional squares.
With RST, align the edges of #5.2 with the corner of #5.1. Stitch from end to end along the line.
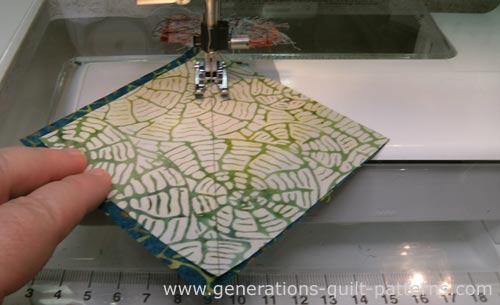 Sewing on the line for one side of your stem
Stitch again 1/2" away from your first stitches to create one bonus HST.
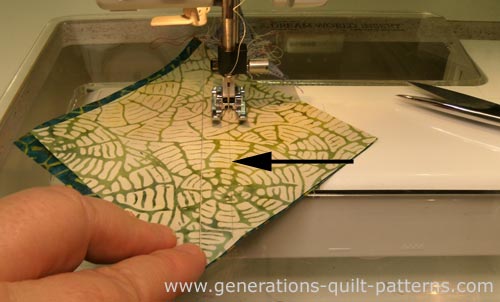 Stitching the bonus HST
Cut with scissors between the lines of stitching. Press the #5 unit.
Repeat these steps for the opposite corner.
Press.
This is your 'new' #5 with a stitched stem and the two bonus HST.
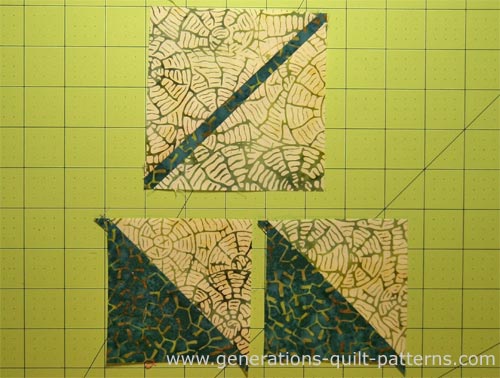 Completed stem unit top with two bonus HST bottom
Just substitute this pieced unit in for the solid #5 square in the instructions to make an Autumn Leaf quilt block with a pieced stem.
What about a different quilt block?
For a list of all the 220+ quilt block patterns on this site, start here.
If you know the name of the block, shorten your search by using these links:
Click here if you're looking for blocks with at least some paper piecing.
Click here if you're looking for the basic building blocks of quilting, i.e., Flying Geese, half square triangles, quarter square triangles, etc., along with several techniques to make each.
And finally, use these links to find blocks in these finished sizes:
