- Home
- Free Quilt Block Patterns
- Anvil Quilt Block
Anvil Quilt Block
From our Free Quilt Block Patterns Library
This post contains affiliate links, for which I receive compensation.
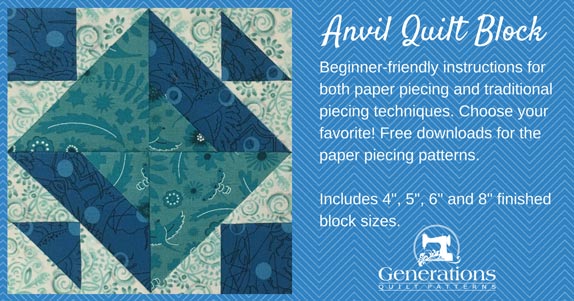
The Anvil quilt block is a combination block made from Brave World and a Birds in the Air variation.
Full of pointy goodness.
Don't let the points scare you.
Instructions for both paper- and traditional-piecing are shared so you can choose your own path to success!
In this tutorial you'll find:
- A cutting chart in four sizes with downloads for both charts and the block design
- 5 other blocks—same name, different design
- No time to quilt? Pin this for later.
It's time to cut up and sew!
General Instructions
These abbreviations are used in this tutorial:
- SA - seam allowance
- RST - right sides together
- HST - half square triangle
- BW - Brave World units
- BITA - Birds in the Air units
1/4" SAs are used through this tutorial.
Pressing instructions are highlighted in yellow throughout this tutorial to make them easy to find.
When instructed to press, first press the patches in the closed position just as they came off your sewing machine.
This sets the seam, smushing the fibers of the threads into the fibers of the fabric.
Then press the SA to the dark unless otherwise noted.
Download and print paper piecing patterns
You have the option to either paperpiece your Anvil (like the sample) or skip the paperpiecing entirely and use traditional methods.
If you choose traditional methods, skip printing the patterns and skip down to Step 1 for your cutting instructions.
Otherwise continue here...
You'll need the most current version of Adobe installed on your computer to download the pattern.
On the Adobe Print Menu page, under 'Page Size and Handling' set 'Custom Scale' to 100% before printing for accurate results. Click here to see what it looks like on the Print Menu page.
Choose your finished block size from both charts below and print one copy from each for a total of 2 units the BITA and Brave World patterns.
Print the Birds in the Air VAR Units | ||
|---|---|---|
| Finished Block Size | # of copies | Link to PDF Download |
| 4" | 1 | 2" |
| 5" | 1 | 2½" |
| 6" | 1 | 3" |
| 8" | 1 | 4" |
Print the Brave World Units | ||
|---|---|---|
| Finished Block Size | # of copies | Link to PDF Download |
| 4" | 1 | 2" |
| 5" | 1 | 2½" |
| 6" | 1 | 3" |
| 8" | 1 | 4" |
After printing, use the 1" square graphic on the printed page(s) the patterns printed at the correct size.

Not sure which paper to use?
Take a look at my review of several of the most popular brands available to us quilters on the market.
You want a super-easy paper to tear away—less stress on the stitches.
Step 1: Cutting for an Anvil quilt block
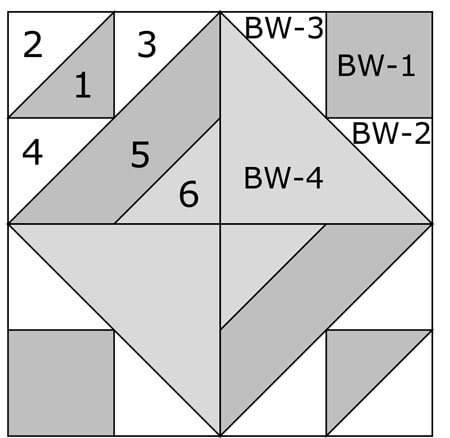 Anvil design
Sample Block Size: 6" finished / 6-1/2" unfinished
Grid: 4x4
Design Type: 4-patch
Choose a background, medium and dark fabric with good contrast.
My medium and dark are from the Sunprint Collection by Alison Glass from Andover Fabrics. I'm not sure about what I used for the background—I didn't remember to save the selvedge. My bad! :(
Please label all your patches. We use these letters/numbers throughout this tutorial.
Paperpiecing Cutting Chart
 | Cutting Chart for an~ Paper Piecing ~ | ||||||
|---|---|---|---|---|---|---|---|
| Patch | Fabric | Qty | Finished Block Size | Sub Cut | |||
| 4" | 5" | 6" | 8" | ||||
| 1 | Dark | 1 | 1⅞" x 1⅞" | 2⅛" x 2⅛" | 2⅜" x 2⅜" | 2⅞" x 2⅞" | |
| 2, 3, 4, BW-2, BW-3 | Light | 5 | 2⅜" x 2⅜" | 2⅝" x 2⅝" | 2⅞" x 2⅞" | 3⅜" x 3⅜" | |
| 5 | Dark | 1 | 3⅜" x 3⅜" | 3⅞" x 3⅞" | 4⅜" x 4⅜" | 5⅜" x 5⅜" | |
| 6 | Medium | 1 | 2⅜" x 2⅜" | 2⅝" x 2⅝" | 2⅞" x 2⅞" | 3⅜" x 3⅜" | |
| BW-1 | Dark | 2 | 1¾" x 1¾" | 2" x 2" | 2¼" x 2¼" | 2¾" x 2¾" | --- |
| BW-4 | Medium | 1 | 3⅜" x 3⅜" | 3⅞" x 3⅞" | 4⅜" x 4⅜" | 5⅜" x 5⅜" | |
| Unfinished Block Size | 4 1/2" | 5 1/2" | 6 1/2" | 8 1/2" | --- | ||
| Grid Size | 1" | 1 1/4" | 1 1/2" | 2" | --- | ||
Traditional Piecing Cutting Chart
 | Cutting Chart for an~Traditional Piecing ~ | ||||||
|---|---|---|---|---|---|---|---|
| Patch | Fabric | Qty | Finished Block Size | Sub Cut | |||
| 4" | 5" | 6" | 8" | ||||
| 1 | Dark | 1 | 1 1/2" x 1 1/2" | 1 3/4" x 1 3/4" | 2" x 2" | 2 1/2" x 2 1/2" | |
| 2, 3, 4, BW-2, BW-3 | Light | 5 | 1 7/8" x 1 7/8" | 2 1/8" x 2 1/8" | 2 3/8" x 2 3/8" | 2 7/8" x 2 7/8" | |
| 5 | Dark | 1 | 2 7/8" x 2 7/8" | 3 3/8" x 3 3/8" | 3 7/8" x 3 7/8" | 4 7/8" x 4 7/8" | |
| 6 | Medium | 1 | 1 7/8" x 1 7/8" | 2 1/8" x 2 1/8" | 2 3/8" x 2 3/8" | 2 7/8" x 2 7/8" | |
| BW-1 | Dark | 2 | 1 1/2" x 1 1/2" | 1 3/4" x 1 3/4" | 2" x 2" | 2 1/2" x 2 1/2" | --- |
| BW-4 | Medium | 1 | 2 7/8" x 2 7/8" | 3 3/8" x 3 3/8" | 3 7/8" x 3 7/8" | 4 7/8" x 4 7/8" | |
| Unfinished Block Size | 4 1/2" | 5 1/2" | 6 1/2" | 8 1/2" | --- | ||
| Grid Size | 1" | 1 1/4" | 1 1/2" | 2" | --- | ||
Step 2: Assemble the units for an Anvil block
The units in our 6" finished sample are all paperpieced—makes all those pointy-points virtually foolproof!
However, I realize that for some, paperpiecing just doesn't blow your skirt up.
No problem!
Click here for directions to piece these Anvil block unit with traditional methods.
I've got your back!
Remember! The way that works best for YOU is the best way.
General Sewing Machine Setup for Paperpiecing
- Reduce your stitch length to 16-20 stitches per inch (1.3-1.6mm). This perforates the paper. It also stabilizes the seam when you remove the pattern. [Learn more about stitch length here.]
- Reduce your machine's speed or just plain slow down when you stitch. Sew only as fast as you can stay on the stitching lines.
- Install an open toe applique foot (sometimes called an 'embroidery' or 'satin stitch' foot) if you have one (it's easier to see where you're stitching with one installed).
- Use a larger needle (90/14) if you have problems removing the pattern.
- As you stitch each seam, start and stop a generous 1/4" before and after the solid stitching lines. ALWAYS. Future lines of stitching secure the ends.
After adding each patch, press the unit as it was sewn to set the seam. Then press it open. The SA is automatically pressed towards the last patch added.
Steam is optional and usually curls the pattern.
If that bothers you, don't use steam. Sometimes I do. Sometimes I don't.
It really just depends on my mood.
Remember, as you follow this paper piecing tutorial, the printed and the fabric sides of this block are mirror-images of each other.
At last!
Let's sew!
From the patterns you printed, cut out two of each unit—just past the outside dashed lines. It's not worth the time to cut exactly on the dashes. The finished units are given a final trim after the sewing is complete.
Brave World
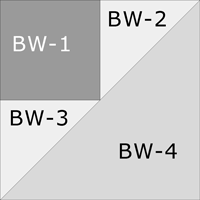
Make 2
For more detailed instructions/photos to construct this unit, click here.
Position BW-1. The dashed placement guides make quick work of this. The tiniest dab of Elmer's Washable Gluestick holds it in place for the sample block.
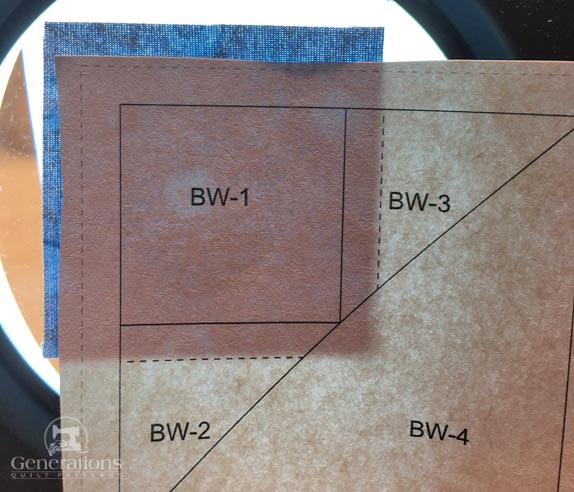 Here you can see how casually the pattern is trimmed.
With RST, align a short edge of BW-2 with #1 (blue arrow below).
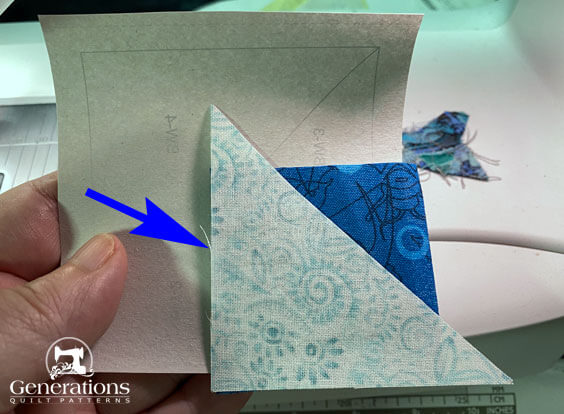
Stitch starting and stopping a generous 1/4" before and after the solid line between BW-1 and BW-2.
Press.
Repeat for BW-3.
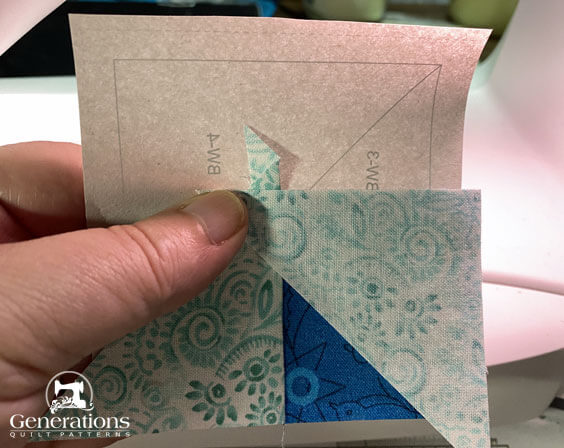
Press.
Trim the SA of BW-2/#3 to 1/4".
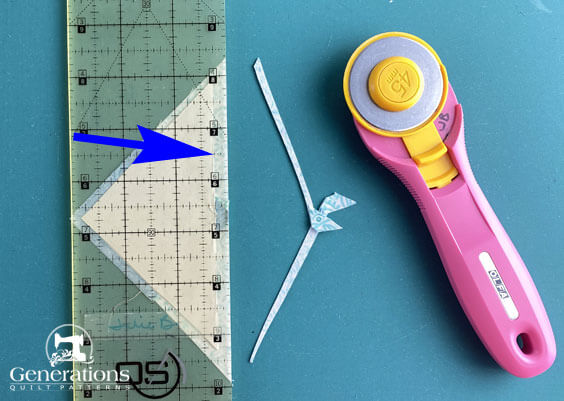 1/4" mark on the ruler(blue arrow) is directly above the fold made on the line between BW-2/3 and BW-4.
With RST, align the long edges of BW-2/#3 and BW-4.
Remember to stitch a good 1/4" before and after the solid line.
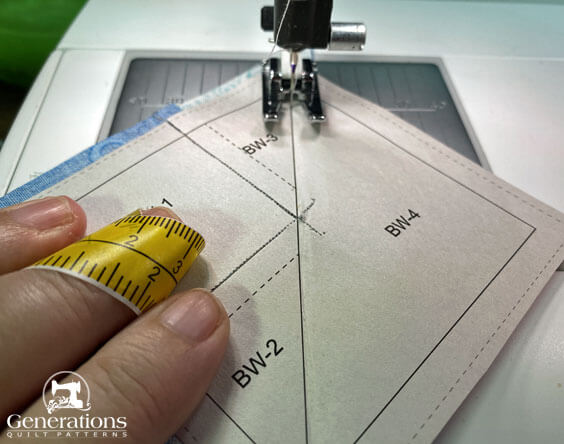
Stitch. Press. Make a total of two.
Set aside while we create the two BITA units.
A gardening mishap caused the boo-boo above.
Did you know they make bandages for just quilters and sewers? They do. Check 'em out here.
What'll they think of next?
Birds in the air VAR (BITA)
Make 2
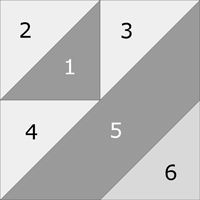
With a small dot of Elmer's Washable Glue stick, adhere the wrong side of #1 with the unprinted side of your pattern. Use the dashed placements lines to quickly, accurately position this patch.
If glue isn't your idea of a good time, hold the patch in place with your fingers or a pin.
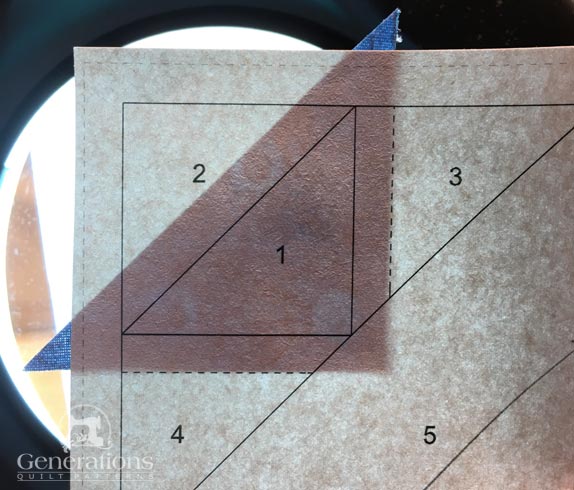
With RST, match the long bias edges of #1 and #2. The point of the #2 triangle should line up opposite the printed corner of the unit (white arrow below).
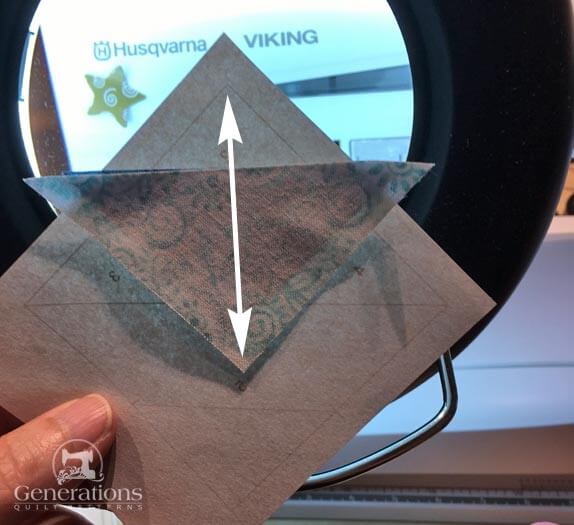
Stitch on the line between #1 and #2, starting and stopping past the outside dashed line of the unit.
Press.
Patches #3 and #4 are added in the same way but with their short, straight grain edge in the seam.
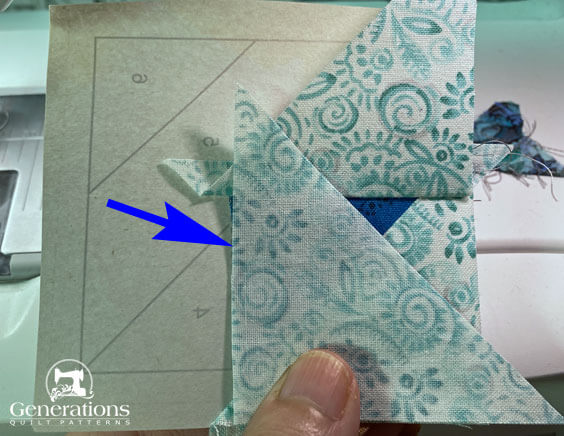 Adding the short side of #4 (blue arrow). You can see the #3 triangle is already stitched and pressed.
In the photo below you can see how all the stitches extend a bit more than 1/4" past the ends of those solid lines.
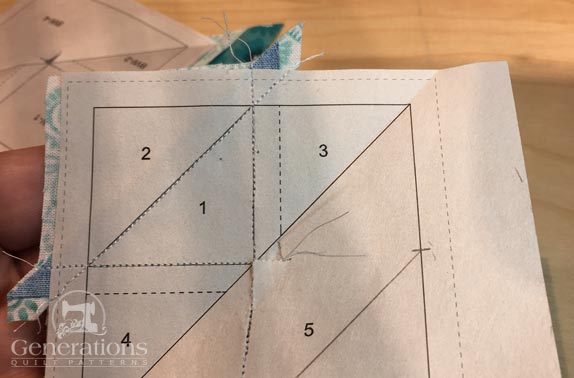
Oops!
Got a little aggressive with clipping threads and ripped the pattern a bit.
Tears happen in paperpiecing—especially when you pull on the paper with a bit too much gusto.
When they do, just grab a piece of Scotch Brand Magic Tape® and repair the tear. It's as simple as that!
The only thing you need to remember is don't iron directly on top of the tape. You don't want to yuck up your iron in the middle of a project.
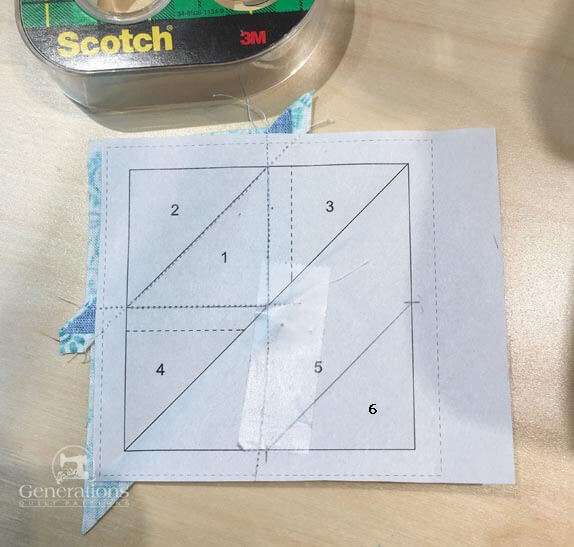 All better!
Press.
At the cutting mat, trim patches #3 and #4 to a 1/4" SA.
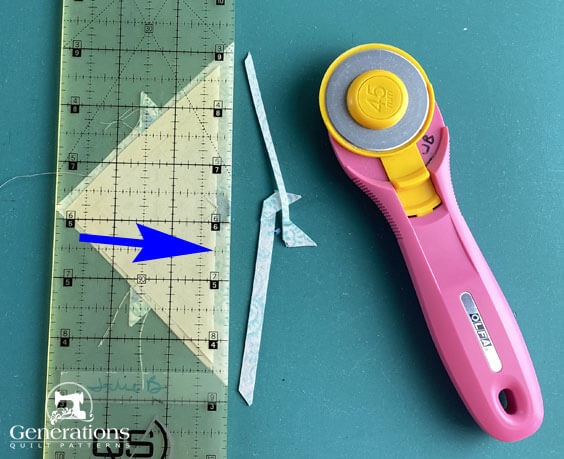 The blue arrow points to where we folded the pattern along the solid line between #3/4 and #5. The 1/4" marking on your ruler is directly above this fold.
With RST add patch #5 to #1/#2/#3/#4.
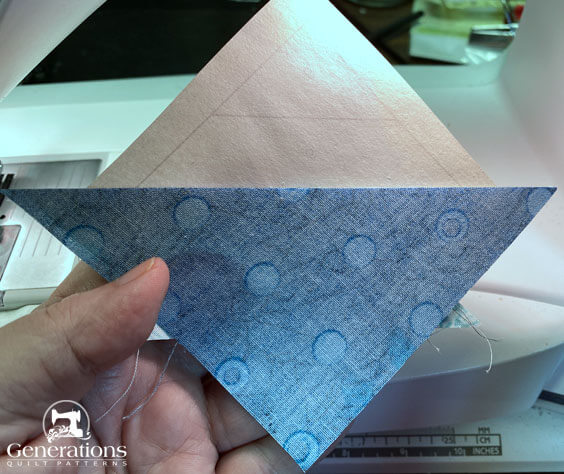
Stitch.
Press and trim #5 to a 1/4" SA (below).
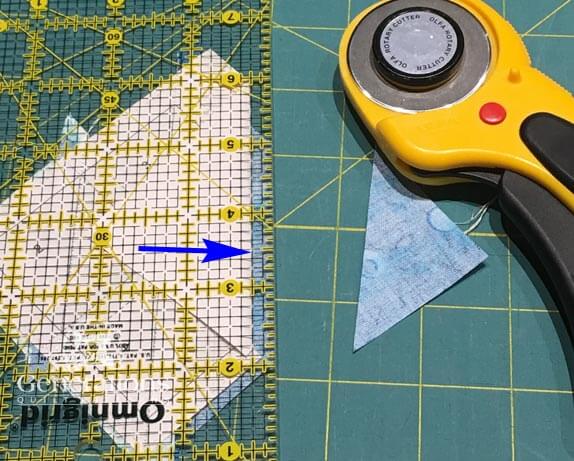 Again, the 1/4" mark is positioned directly on the fold.
With RST add the medium #6.
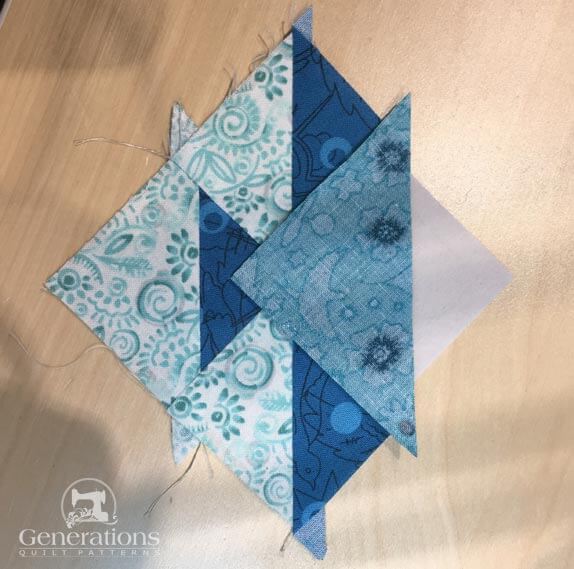 Edges lined up and ready to sew.
Press.
Complete two.
The final trim
Grab the completed BITA and BW units and trim them to size using your rotary cutter, ruler and mat.
I find it easiest to lay the 1/4" mark on the ruler on the solid outside line and trim. It's much easier than trying to line up the edge of my ruler with the outside dashed line.
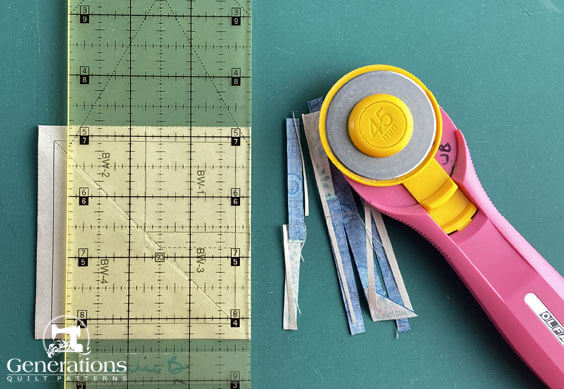 The final trim is the same for BW and BITA.
And finally, remove all the paper from the finished BITAs and BWs.
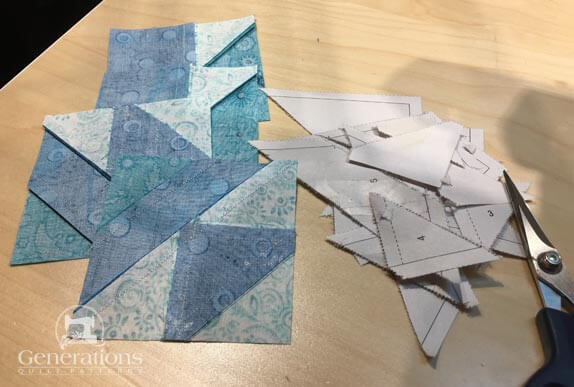 Our units are all ready for piecing into the Anvil design
Helpful Hint
For the longest time, I didn't remove the paper pattern until the block was done.
Now I only leave the paper on until the end when I'm stitching pictorial-type quilts with odd-shaped patches. Because of the unusual shapes, the edges are usually all on the bias. Leaving the paper on helps stabilize those edges.
For a block design like Anvil, since we precut our patches, the edge is always on the straight of grain. Very stable.
Choose whichever works best for your workflow and skill level.
Click here to skip to Step 3 to assemble the block.
Traditionally pieced Anvil units
These are the links to instructions for traditional piecing. Remember you will have used the green cutting chart for these patches.
Click each link below for the corresponding tutorial:
These links open in new windows to make it easier to find your way back to this point in the Anvil tutorial.
After making two of each unit, continue on here to complete your block.
Step 3: Assemble your Anvil quilt block
From this point forward, regardless of which technique you used to construct the units, the assembly of our Anvil block is the same.
Arrange your stitched BITA and BW units to create the Anvil design. The medium fabrics for #6 and BW-4 patches are in the center.
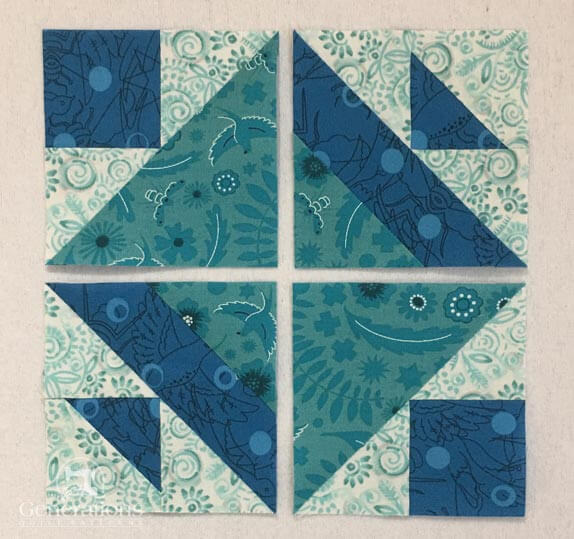 The medium turquoise patches are positioned in the center of our Anvil block
With RST, sew the units in each row together. The only thing to match is the point of the larger HST at the outside edge of the block.
To get a really good match in our sample Anvil block, I flipped the SA on the BW unit in the opposite direction. Go in with your iron and give the SA a good press. You'll be able to do this because it was the last seam in the unit.
You can see it here.
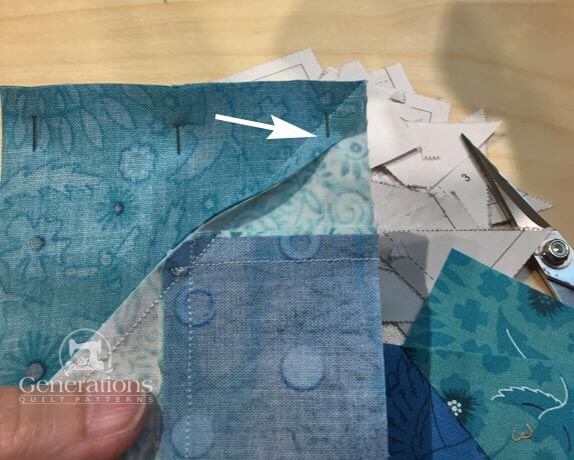 The white arrow points to where I flipped the SA to force the SAs of the large HST nest
Here's how it looks pinned from the side I'll be sewing from.
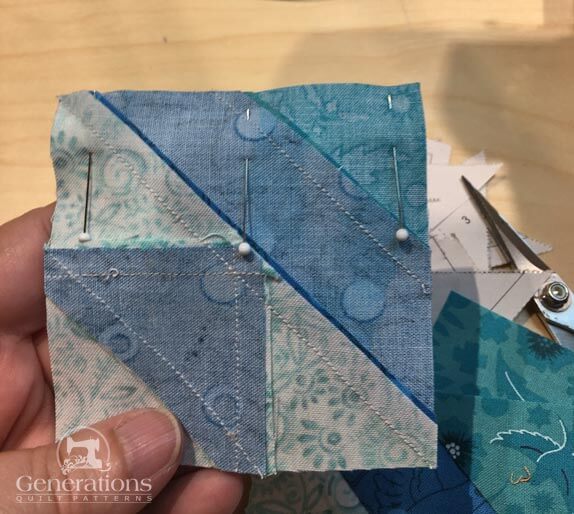 On this side you can see that I didn't touch the SA
Pins are really helpful to get a good match. Click here to brush up on your pinning techniques for perfect points.
You can find my favorite IBC Fine pins (.0500) here.
Press the SA toward the BWs(with the square in the corner) to reduce bulk.
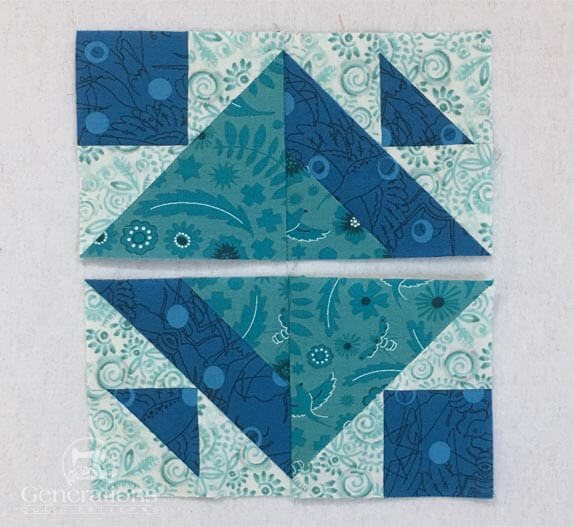
One last seam to stitch. A few pins to keep things lined up.
Voila!
Our Anvil quilt block is done!
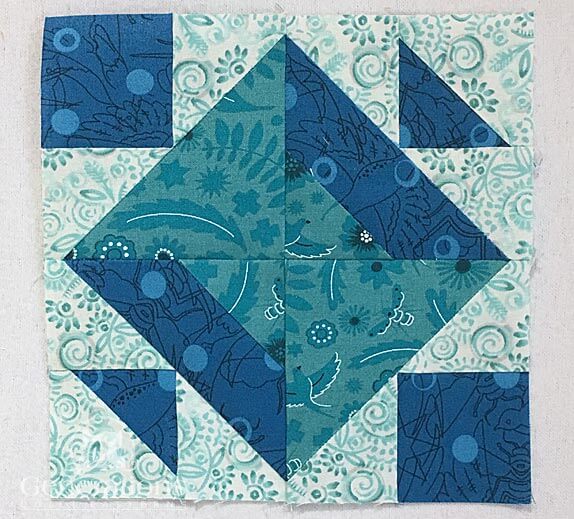 I love the little spool shape that forms in the center.
Here it is from the backside so that you can see how the seams nest together. Notice how I've twirled or fanned the center seams to reduce bulk.
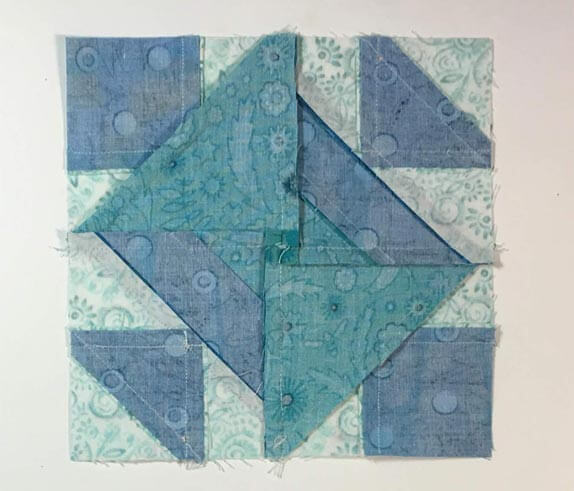
If you used traditional piecing techniques, the SAs are all pressed in the same manner—all away from #1 and then twirled around the center.
Same name, different block
There are several other blocks named "Anvil" or "The Anvil". All are drawn on a 4x4 grid like the block in this tutorial.
The blocks are attributed to the designers shown.
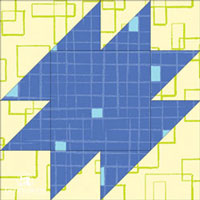 Hall
Hall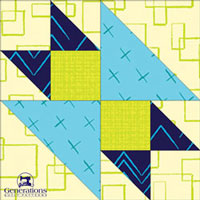 Hall
Hall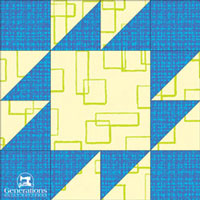 Unknown source
 Wilma Smith
for Nancy Cabot
 Marshall
There are no tutorials on the website at this time for these five blocks.
What about a different quilt block?
For a list of all the 220+ quilt block patterns on this site, start here.
If you know the name of the block, shorten your search by using these links:
Click here if you're looking for blocks with at least some paper piecing.
Click here if you're looking for the basic building blocks of quilting, i.e., Flying Geese, half square triangles, quarter square triangles, etc., along with several techniques to make each.
And finally, use these links to find blocks in these finished sizes:
