- Home
- Machine Quilting 101
- Stitch in the Ditch
Learn to Stitch in the Ditch
Quilting with a Walking Foot
Beginning Machine Quilting 101 continues...
This post contains affiliate links for which I receive compensation
To stitch in the ditch is to sew in the 'well of the seam', right where two quilt fabrics join. Ideally, this quilting will not show.
If seams allowances are pressed to one side, these stitches are made on the side of the seam with just one layer of fabric. (If the seams are pressed open, the stitches are made in the center where the fabrics meet.)
Because there's no marking, this is an easy and efficient technique to use for quilting a quilt. You simply follow the lines of your piecing.
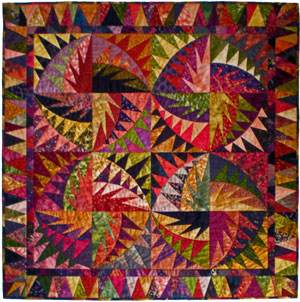
In 'The Fish Quilt' (above, right), all the quilting is in the ditch. Click the image to learn more about how this quilt was made.
How much or how little quilting you do is up to you.
You needn't quilt every single seam line of a quilt block. Just be sure to follow the quilting distance recommendations on the label from the batting you chose for your quilt.
You need enough quilting to stand up to everyday use and laundering.
Pros
- No marking saves time
- Quilting doesn't distract from the pieced design
- It's a safe choice and gets the quilt quilted
- A good way to stabilize a quilt that will include lots of quilting
Cons
- Ditch quilting adds little or no visual texture
- It adds no additional layer of design to a quilt
- Twisted seam allowances must be fixed before quilting so the quilting stitches don't show
- It's boring and tedious because your eyes are so focused on where the needle is.
Quilt Top Preparation
You need a neatly pressed, clean quilt top in good condition. For stitch in the ditch, pay particular attention to...
- 'Twisted sisters', that is, seams that have twisted and been stitched down during construction. Fix them now, especially if you'll be ditch quilting over them. Where the seam allowance twists is the highest point along the seam. Any stitches over that point will show, because they are closest to the viewer.
- Tucks or pleats pressed into the quilt top. If you ditch quilt at the edge of the tuck, you completely miss the ditch. As those seams are stressed and pulled open with use, your quilting will show. The best thing is to avoid the problem. Press carefully during the piecing process.
Stitch in the ditch is all about sewing in the crevasses between patches; eliminate these 'ditches' and every stitch shows.
Setup up Your Sewing Machine
It's time to find your instruction manual. Especially on the computerized machines, there are a number of settings to remember. In fact, I created a 'cheat sheet' on a note-card that I kept at my machine for years with the necessary setting changes from regular piecing.
Install your walking foot
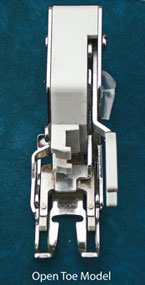
Yep. You need one...
...that is unless you've got an integrated dual feed (IDF), like on the Pfaff machines. (If you're not certain, check your manual.)
I heartily recommend using an open toe walking foot like the one shown to the right.
It
provides a totally unobstructed view of the needle so that you can see the 'ditch'. Feed dogs are in the
'up' position (just like when you piece) so that the machine is creating the stitch length. Your job is to guide the sandwich.
Thread your machine
If you'll stitch over a limited range of colors or values, choose a thread that matches in either color or value.
A 50 wt quality cotton thread like Aurifil or Masterpiece will work.
If you are not opposed to polyester thread in your cotton quilts, then Superior Threads' Bottom Line, a 60 wt polyester is a nice choice.
Again, stitches quilted in the ditch are not meant to show. That's why...
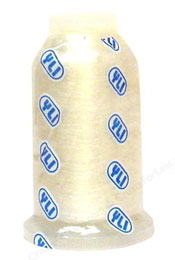
Monofilament thread is a great choice for ditch quilting, if you'll be quilting over a wide range of fabrics.
It comes in both clear and smoke.
Test both on a sample quilt sandwich to determine which works best for hiding your stitches. (For more information,
go to Clear Thread.) A 50wt 100% cotton is a good bobbin thread to use with it.
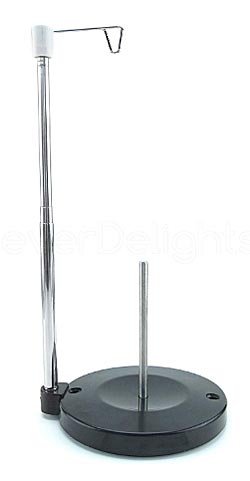
If you're using the economical cones of thread, make sure you're using a standalone thread stand. (I prefer the heavy metal one—less static electricity.) Crosswound threads need to feed off the end of the cone and the typical spindle on your sewing machine is neither big enough nor positioned correctly to handle the big cones.
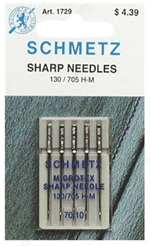
Install a new needle
I can't emphasize this enough.
Your needle is the cheapest piece of your sewing machine, and the easiest to fix, yet it is the culprit of so many problems. The slightest damage can throw off your stitches, and it's damage that you can't see with the naked eye.
Set your machine for 'needle stop down' if you have it. (Older machines might not have it.) This acts as an extra hand while you're maneuvering the sandwich under the needle.
Set stitch length
Set stitch length between 2.0 and 3.0.
If your
stitches show too much, reduce the stitch length. My personal preference
is 2.0.
If you've chosen clear thread, this shorter stitch will help mask some of its shininess.
Reduce presser foot pressure with a walking foot
Because your sandwich has that extra layer of batting, you may need to reduce your presser foot pressure.
If this adjustment is needed, your manual provides recommended settings. This information may also be found in the directions that come with your walking foot.
If you have an older machine, you may not be able to make this adjustment.
Thread tension
Test your balanced thread tension, especially if you've used one thread for the needle and another for the bobbin. (For more information, go to our Sewing Machine Tension page .
Make a simple practice quilt sandwich from the leftovers in your quilt—it doesn't have to be neat, it doesn't have to be pretty—just an accurate representation of the materials you've used.
Quite frankly, one the size of your palm is usually more than adequate if the only quilting you'll be doing on your project is stitch in the ditch.
Straight stitch throat plate
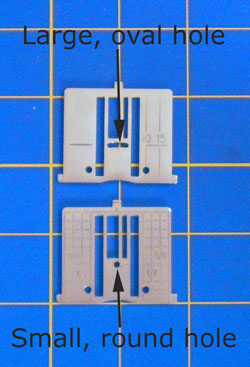
While this is an optional 'adjustment', you may not have one in your accessories kit just yet, I do believe that you have better stitch quality with one installed.
The smaller hole doesn't let the needle push any of the quilt sandwich through it, compromising your thread tension adjustments. The bobbin thread feeds straight up as it's grabbed by the hook. It just makes for a better quality, straighter stitch.
As long as you stitch with the needle in the center position, you will be able to stitch in the ditch with this throatplate installed.
You can see the difference in the two different versions to the right. Your machine most likely came with the one on the top.
Optional adjustments
Your sewing machine, especially if it is a new, computerized one, may require additional adjustments or settings to be set up properly for stitch in the ditch quilting with a walking foot. Consult your manual to be sure.
Now that you're set up and your quilt sandwich ready, let's learn about the basic techniques for stitch in the ditch quilting.
Table of Contents
for Beginning Machine Quilting 101
Introduction
Beginning Quilting 101: Quilting Instructions for the Beginner
