- Home
- Beginner Quilt Blocks
- No Waste Flying Geese Quilt Blocks
No Waste Flying Geese Quilt Blocks
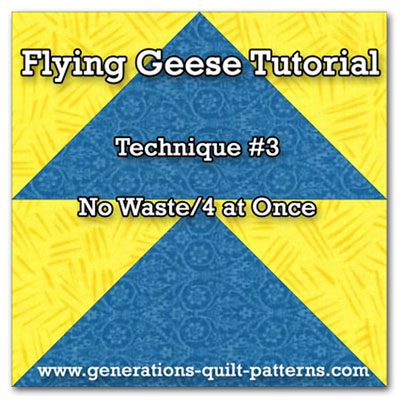
Technique #3: 5 Squares + 6 Seams + 3 Cuts = 4 Geese
This post contains affiliate links, for which I receive compensation.
The No Waste Flying Geese quilt blocks 4-at-a-time method is fast and reliable.
Sure. Marking and stitching are kept to a minimum.
But what makes this method so special?
It's easy!
Most patterns don't call for a just a single Flying Geese block.
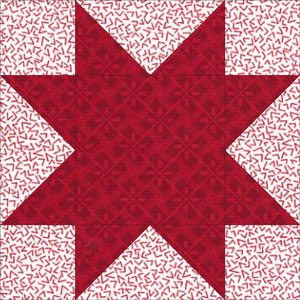
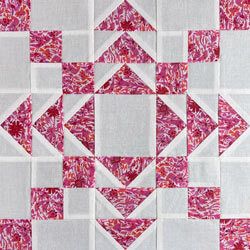
In fact many (like those shown below) require four or multiples of four.
And using this method, you create four identical blocks, all at the same time!
No special tools or specialty rulers required.
Just your basic, everyday ruler— a square or rectangle with a 45° diagonal line that splits one corner in half for cutting patches and trimming to size.
This 'no waste' technique is terrific, especially if you don't like paper piecing.
To make things even easier, I've created a cutting chart for you to download and print for a variety of sizes.
Pros:
- Fast, four at a time with fewer seams to sew
- No special tools to buy
- No paper to remove
- No sewing on a bias edge
- Little to no fabric waste
Cons:
- Not as scrap friendly, the four geese blocks are identical and take a bigger piece of fabric
- You MUST SEW ACCURATELY; if you mess up, you've messed up four Flying Geese
UPDATE: I've added another cutting chart for oversized patches. The piecing instructions are the same, you'll simply trim a bit more off to guarantee an accurate block.
Remember to download your free No Waste cutting charts further down on this page.
The newest quilt fabrics to tickle your fancy...
Click the images below to see the full collection. We share any commercial and/or free patterns that showcase them, too. (For inspiration, of course!)
The Technique
NOTE: In this tutorial I use FG as the abbreviation for Flying Geese or Goose.
 This technique makes 4 at once
This 'no-waste' method creates four traditional FG blocks at a time, whose width is twice its height.
In my stitched sample, the finished FG blocks measure 2" x 4" (or 2-1/2" x 4-1/2" unfinished).
The Formula
The No Waste Flying Geese Quilt Blocks Formula
For quilters with a perfect 1/4" seam
✔✔Before doing any cutting, identify the finished size of the Flying Geese you need to make.
Patch Requirements:
Sky Fabric: Cut 4 squares equal to the finished height of the Flying Geese plus 7/8"
Goose Fabric: Cut 1 square equal to the finished width of the Flying Geese plus 1-1/4".
Always press towards the 'sky' fabric.
Do you prefer to skip the math entirely?
Never fear! I've got you covered. :)
If your 1/4" seam allowance is perfect every time, click here to download that cutting chart. The patch sizes in that chart use the formula above. When you trim your blocks, there'll just be slivers, at most, to remove. Only the tiniest bit of waste.
If your 1/4" seam isn't reliably reliable (don't feel bad, mine isn't) click here to download this cutting chart. The patches are a bit bigger and you'll trim to perfection after stitching. A little bit more waste, but perfect blocks are worth it IMHO.
Cutting and Piecing No Waste Flying Geese Blocks
Step 1
Calculate the sizes of the sky and goose fabric for our 2" x 4" finished Flying Geese.
Skys Fabric: 2" finished plus 7/8" equals 2-7/8"
Goose Fabric: 4" finished plus 1-1/4" equals 5-1/4"
Then cut 4 'sky' squares 2-7/8"x2-7/8" and 1 'goose' square 5-1/4"x5-1/4".
(Personally, I like to cut my squares over-sized to start with, stitch, and then trim them to the unfinished size. I find that adding an extra, additional 3/8" to the sky squares and an extra 1/4" to the large Geese square provides plenty of 'fudge factor'. So I have cut the sky patches 2-7/8" + 3/8" or 3-1/4" and the Geese square 5-1/4" + 1/4" or 5-1/2" square in the sample in the tutorial.)
Trimming instructions are included at the end of this tutorial.
Cutting charts for both exact-size and generously-cut squares are available for you to download, too.
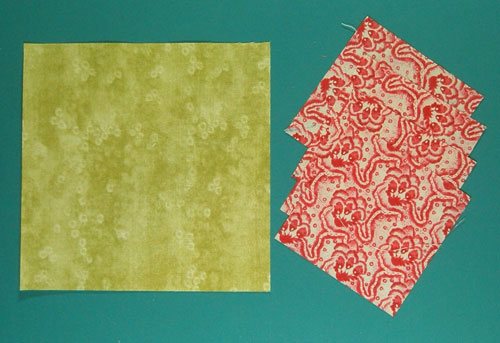 One larger Goose square and four smaller Sky squares
Step 2
With right sides together (RST) align one sky patch in each of two opposite diagonal corners—my sky's are the red print.
To help the fabrics stick together, give this set-up a little press.
Now draw a line from outside corner to outside corner through the sky's. (Though I've used a blue marker so it's easier to see the line here, usually I use my favorite Bohin mechanical chalk pencil because it never dulls and the line stays fine.) Your two smaller squares should overlap, just like in the picture below.
CLICK HERE for a quick trick to remove extra bulk BEFORE sewing.
Sew 1/4" away from each side of the drawn line.
If it's easier you can always draw in the sewing lines instead with a Quilters Rule Quick Quarter ruler.
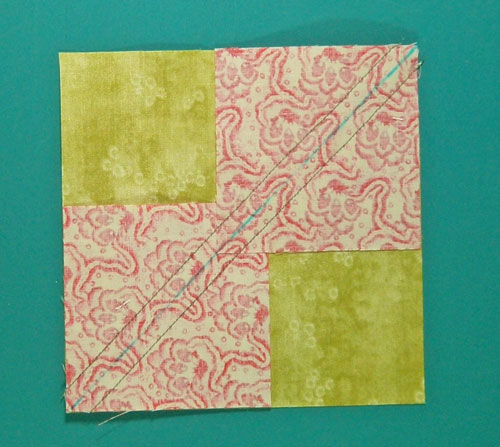 After marking and stitching
Step 3
Cut the large square in half between the stitching lines with either a scissor or rotary cutter to create two sections.
Press flat to set the seam.
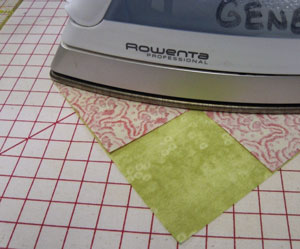
Open the sections, pressing with the seam allowances toward the sky fabric.
Step 4
Draw a diagonal line from corner to corner on the two remaining sky patches. (Or use your Quick Quarter ruler to draw the two stitching lines a 1/4" from the center diagonal.)
With RST, align a sky patch with the geese corner of the two sections. The drawn blue line intersects the corner.
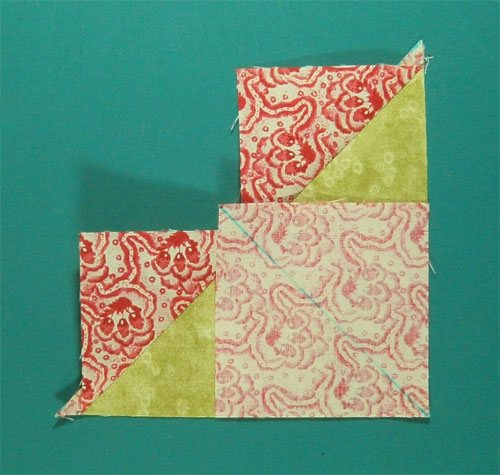 The overlap of the patches—though it looks strange—is absolutely correct
Step 5
Sew 1/4" away from the drawn line for both sections.
Cut each section in half between the stitching lines.
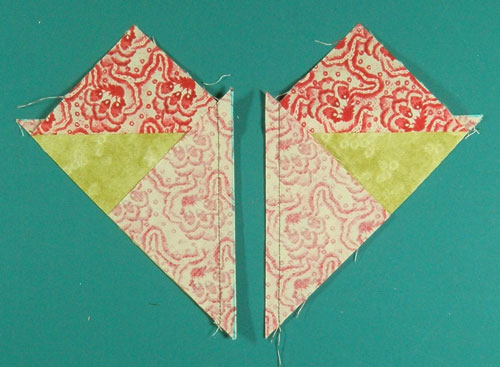 One section cut between the stitching lines
Step 6
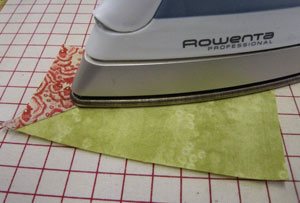
Press flat to set the seams. Open the sky patch and press with the seam allowances towards the sky fabric.
Repeat for both corners.
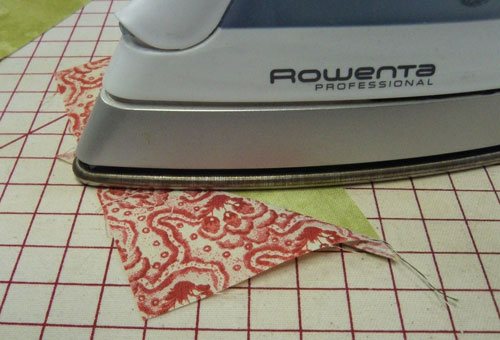 Since these are trimmed to size at the end, I don't stop to clip threads
Step 7
Repeat for all four No Waste Flying Geese quilt blocks.
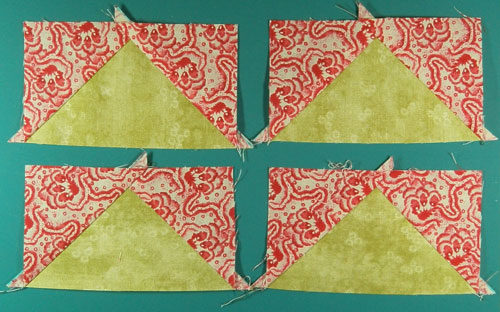 These blocks are ready to be trimmed
Trim the Finished Block
If you've started with over-sized patches, as I have in this example, you need to trim each block to size.
If you started with patches cut exactly to size, measure to confirm their accuracy.
Step 1
Find the vertical center of the unfinished Flying Geese block. (If you've downloaded the cutting chart, this number is in the column called 'Center' or 'Center/Midpoint'.)
For our 2-1/2" x 4-1/2" unfinished sample, the center is computed as:
Unfinished width of Flying Geese divided by 2
or
4-1/2" divided by 2 equals 2-1/4"
At your cutting mat, align the 2-1/4" vertical marking on your ruler with the top center point of your goose.
Align the 45 degree marking on your ruler with the seam line between the geese and sky fabric as shown below.
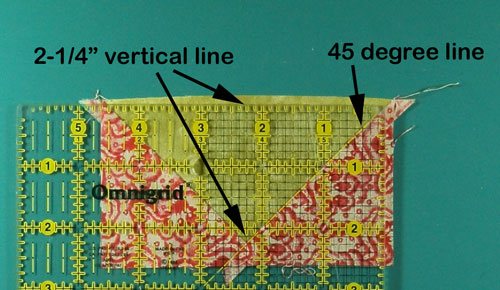 Measure and trim the first pair of sides
Step 2
Trim off the two exposed sides with your rotary cutter.
Rotate the block 1/2 turn (Goose point is away from you), aligning the previously trimmed edges with the 2-1/2" horizontal line and the 4-1/2" vertical line of the ruler.
Take a quick check to see the that the 2-1/4" vertical line—the 'center' from the previous step—runs through the point of the goose.
This point should also be a 1/4" away from the top edge of the ruler.
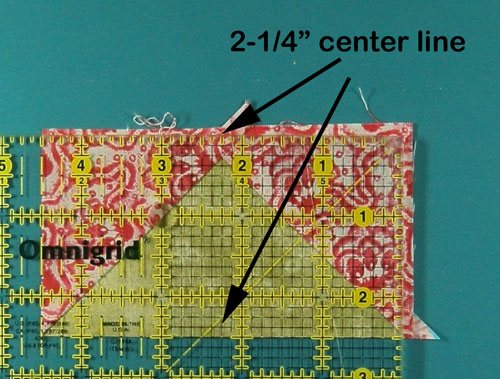
Step 3
Trim the two remaining exposed edges.
The point of the Goose is 1/4" away from the cut edge. The seams of the Goose at the bottom cut the corners exactly in half.
Voila! Four perfect No Waste Flying Geese Quilt Blocks!
Not sure if this method is for you? Remember...
There's always more than one way to get things done in quilting.
Trimming FG is no different.
If using an everyday rotary ruler is confusing, check out this tutorial on using the Wing Clipper to do the same thing, without having to hunt so much for the numbers.
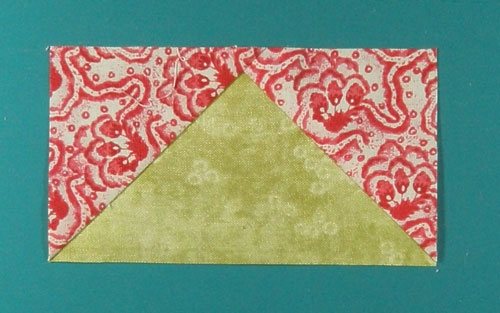 Trimmed and ready to be pieced into your next quilt!
Trim (or check for accuracy) the 3 remaining FG blocks.
The perfect No Waste Flying Geese quilt blocks ready to be pieced into a quilt of your choice!
Download and Print Your Charts
There are two different downloads available to you.
Click here if your seam allowance is reliably perfect 1/4", or...
Click here if you'd prefer to stitch oversize patches and trim them down after sewing.
The 'Center' dimension used for trimming is the same for both charts and is the vertical center of the unfinished Flying Geese block.
For even MORE blocks to make... 🧩🎨

...visit our Free Quilt Block Pattern Library, with over 230+ blocks to choose from in multiple sizes.
Free downloads are included in all sizes for any blocks require paper piecing patterns or templates.
- Home
- Beginner Quilt Blocks
- No Waste Flying Geese Quilt Blocks
