- Home
- Free Quilt Block Patterns
- Bear's Paw Quilt Block
Classic Bear's Paw Quilt Block: Leave Your Mark with Perfect Points ⭐🎯
Paw-sitively Precise Piecing 🐻
This post contains affiliate links, for which I receive compensation.
The Bear's Paw quilt block is a classic!
It might look like it has claws, but don't let those points intimidate you.

We're breaking down this classic beauty into bite-sized pieces that even a quilting cub can handle. With an innovative 8-at-a-time HST technique, you'll be piecing with the confidence of a mama bear protecting her cubs.
Efficient with your time and extremely accurate, I'm sure you'll love this method—especially because it requires no specialty tools or rulers.
🧭Put your paw on exactly what you need! 🐾
These quick links will help you navigate through our tutorial faster than a bear finding honey. 🍯 No more getting lost in the woods of instructions! 🌲✨
- A cutting chart in 3 sizes with a download of the chart and block design
- A coloring/fabric planning page to download and print
Cut. Sew. Press. Create some bear-y amazing magic!
📋 General Instructions
All seam allowances (SA) in our Bear's Paw are 1/4". Press them toward the darker fabric unless otherwise noted.
When you are instructed to press, first press the pieced unit flat to set the seam. Then open the patch, pressing from the front.
I recommend starching your quilt fabric before cutting to increase your stitching accuracy.
You'll see these abbreviations in this tutorial:
- RST - Right sides together
- HST - Half Square Triangle(s)
The newest quilt fabrics to tickle your fancy...
Click the images below to see the full collection. We share any commercial and/or free patterns that showcase them, too. (For inspiration, of course!)
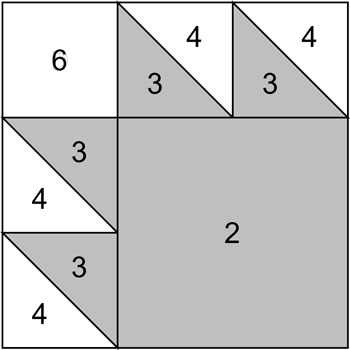
✂️ Cut the patches for your Bear's Paw
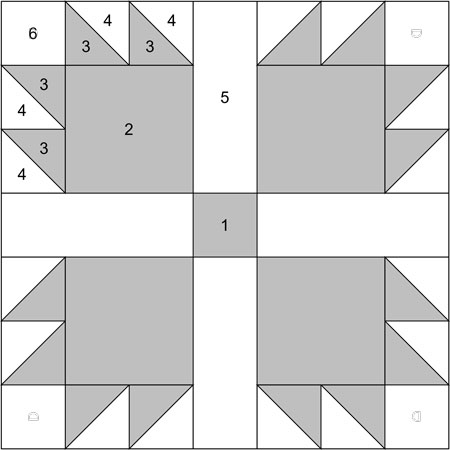
Sample Size: 7" finished / 7½" unfinished
Grid: 7x7
Attributed to: Ruth Finley
Brackman ID: 1879
Design Type: Uneven 9-patch, small center
AKA: Illinois Turkey Track (Scioto Imhoff Danner, Best Friend (Ruth Finlay, Batsche (Marie Knorr Graeff), Bear's Foot (Ladies Art Company), Best Friend (The Country Gentleman), Cat's Paw (Nancy Page), Duck's Foot in the Mud (Ruth Finley), Hand of Friendship (Ruth Finlay), Small Hand (Marie Knorr Graeff), Tea Leaf Design (The Farmer's Wife)
A single Bear's Paw quilt block requires 16 HSTs, so we'll use the very efficient 8-at-once method. This saves time, both marking and cutting, and provides perfect results!
Patches #3 and #4 (used for this technique) are cut oversized. The HST units are trimmed to size after stitching.
I suggest you try one pair of patches first and then make any adjustment you need to the cutting sizes.
Don't let your pieces play hide and seek - label each one with its corresponding number for easy tracking.
 | Cutting Chart for a~ Traditional Piecing ~ | ||||||
|---|---|---|---|---|---|---|---|
| Patch | Fabric | Qty | Finished Block Size | ||||
| 7'' | 10½'' | 14'' | |||||
| 1 | A | 1 | 1½'' x 1½'' | 2'' x 2'' | 2½'' x 2½'' | ||
| 2 | A | 4 | 2½'' x 2½'' | 3½'' x 3½'' | 4½'' x 4½'' | ||
| 3** | A | 2 | 4¼'' x 4¼'' | 5¼'' x 5¼'' | 6¼'' x 6¼'' | ||
| 4** | Bac | 2 | 4¼'' x 4¼'' | 5¼'' x 5¼'' | 6¼'' x 6¼'' | ||
| 5 | Bac | 4 | 1½'' x 3½'' | 2'' x 5'' | 2½'' x 6½'' | ||
| 6 | Bac | 1 | 1½'' x 1½'' | 2'' x 2'' | 2½'' x 2½'' | ||
| Unfinished Block Size | 7½'' | 11'' | 14½'' | ||||
| Grid Size | 1'' | 1½'' | 2'' | ||||
**These are the oversized patches that will be trimmed to perfection AFTER stitching.
🪡 Create the units for your Bear's Paw block
Half Square Triangles (HST)
Make 16
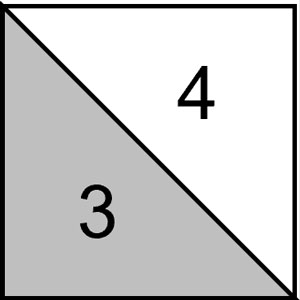
Start by constructing the HST units.
Mark the back of each light #4 patch with a diagonal line between both pairs of corners. Layer a #4 with a #3 square, right sides together.
With your favorite quarter inch foot installed on your sewing machine, stitch a quarter inch away from both sides of each line.

Repeat for the other set, and you've stitched a total of 16 HSTs. Pretty nifty, eh?!!
After sewing, the unmarked side looks like this.

Now it's time to cut this into the units.
The block in the photos finishes at 7".
Find the Center measurement for the 7" sample block—it's 2-1/8".
HST Dimensions | ||
|---|---|---|
| Finished Block Size | Center Measurement | Trim HST to… |
| 7" | 2⅛" | 1½" x 1½" |
| 10½" | 2⅝" | 2" x 2" |
| 14" | 3⅛" | 2½" x 2½" |
Place the sewn unit on your cutting mat, marked side up.
Align the 2-1/8" of your ruler (black arrow) with one of the edges and cut.That cut should go through (or at least pretty close to) the center of the drawn 'X'.
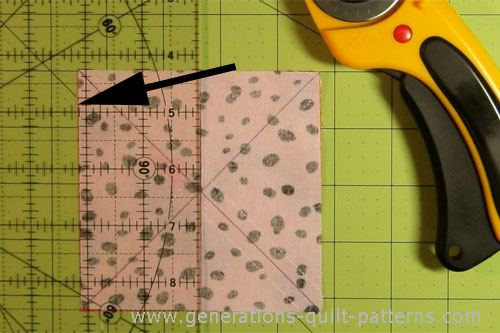
Rotate the mat a 1/4 turn and align the 2-1/8" ruler mark with the edge and cut again. You've now cut your patches into four 2-1/8" squares.
Now cut along each of the drawn diagonal lines and you'll have...
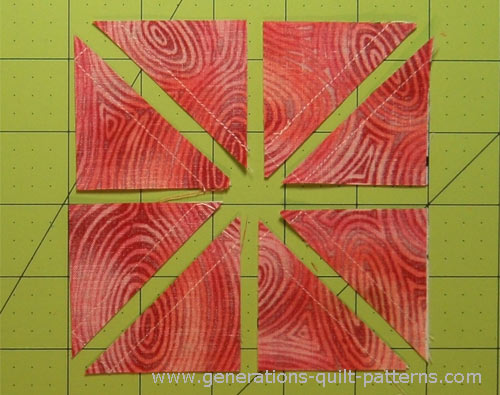
Press. For the 1" grid size (which is the size shown in these photos) I prefer to
finger press seam open before pressing them from the front. Starch makes this very effective.
Trim to the size listed in the chart above (for this example it's 1-1/2" sq)
One set of #3 and #4 patches yields 8. Notice the small amount of waste.
Quite an acceptable tradeoff from perfectly sized HSTs, don't you think?!
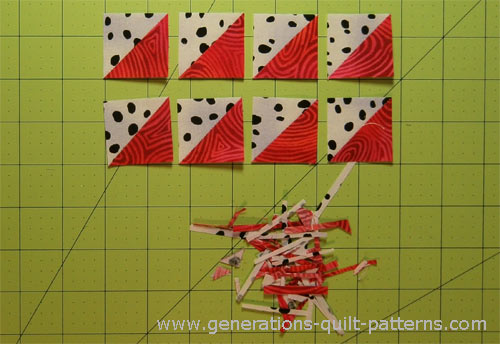
Repeat for the other set.
For more detail instructions on this HST-technique, click here. (This link opens in a new window so it's easier for you to return right here.)
Corners
Make 4
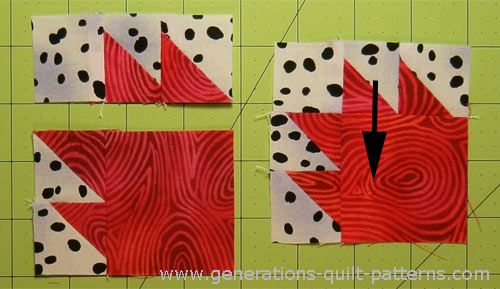
To create the corner sections for our Bear's Paw, stitch four of each of the 2 different units shown below. The arrows indicate the direction to press the seam allowances.
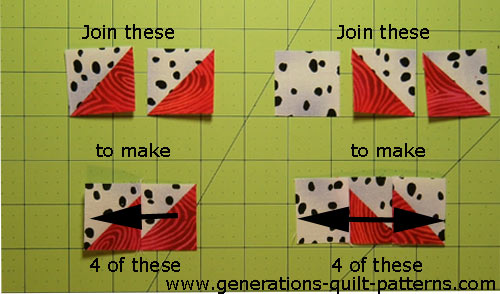
It's easy to get things all discombobulated when you sew these units together. I like to sew one and then keep it at my machine as the others are made.
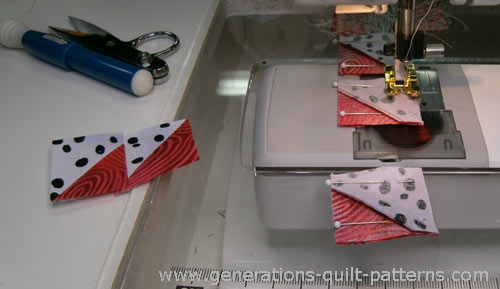
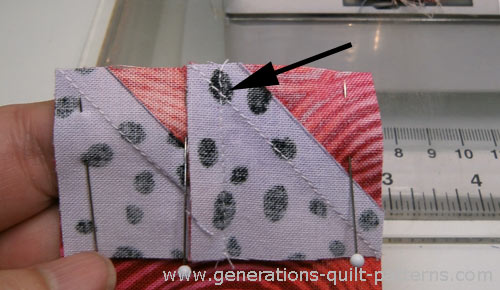
With RST, join a pair of HST to a #1 and press in the direction of the arrow for a total of 4.
Pressing the SA as suggested makes it easy to see where your stitch where your seam touches the point of the triangle.
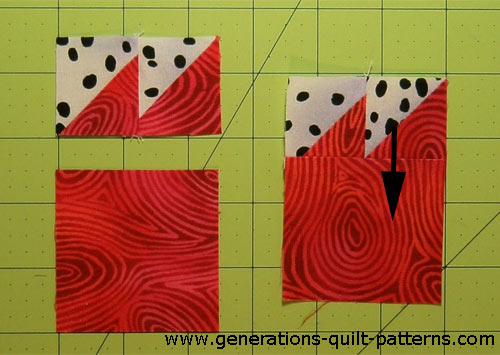
To finish your corners, add the remaining subunit as shown below. Press your SA toward #1. Make 4 identical units. Now this is looking like a Bear's Paw!
🧩 Assemble the Bear's Paw quilt block
Arrange the sewn corners and #5 and #6 patches into the Bear's Paw design.
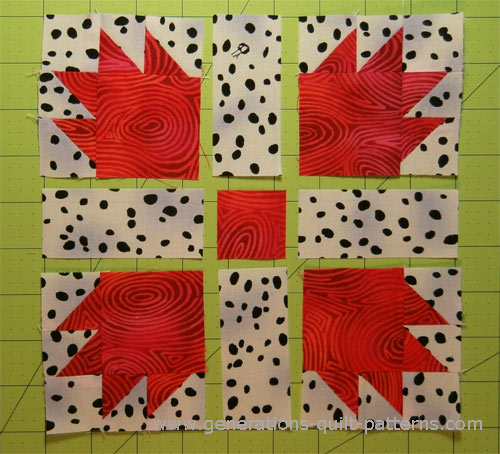
Sew them together into rows. Press the SA in the direction of the arrows.
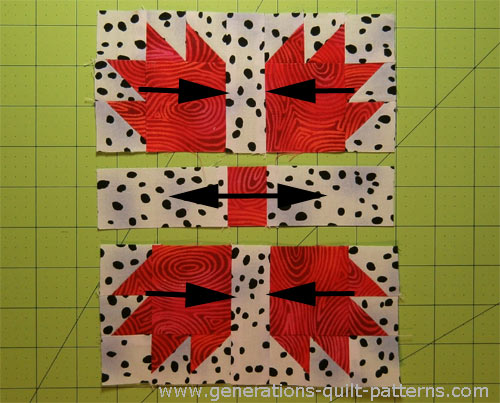
Join the rows together, pinning if you like. (I find I rip less when I pin.)

One final press and your Bear's Paw quilt block is complete.
For the perfect finish, check out our Best Technique for pressing. It's fast, simple and the results are fabulous!
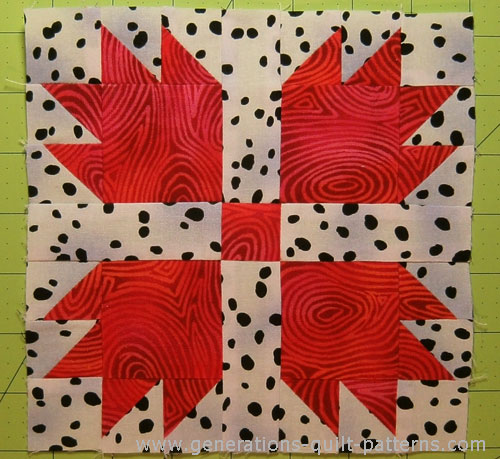
Paws and Reflect🐾
Your Bear's Paw block is proof that precision and personality go paw in paw. 🐻✨
Those 8-at-a-time HSTs? They're your new secret weapon!
Whether this is your first or fifty-first block, you're now part of the Bear's Paw legacy.
Keep those points sharp and your creativity flowing—we can't wait to see what you create next! 🐾💫
📌 Don't let this tutorial hibernate!
Pin it now for paw-fect piecing later! 🐻✨
For even MORE blocks to make… 🧩🎨

...visit our Free Quilt Block Pattern Library, with over 260+ blocks to choose from in multiple sizes.
Free downloads are included in all sizes for any blocks require paper piecing patterns or templates.
- Home
- Free Quilt Block Patterns
- Bear's Paw Quilt Block
